Ethernet Communications Modules, 3rd Edition, Rev. D
2–3
Chapter 2: Setup and Installation
1
2
3
4
5
6
7
8
9
10
11
12
13
14
A
B
C
D
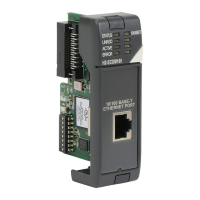
Module ID
A Module ID is required for PLC-to-PLC communications, and it can be set either of two
ways. You can assign the Module ID:
• Using the DIP switches on the module.
• Using the configuration tools in NetEdit3
• HTML Configuration (after IP address is assigned to module using
NetEdit3; described in Chapter 5; H0/H2/H4- ECOM100 only)
Use the DIP switch if you want the ability to install or change modules without using a PC to
set the Module ID. Set the module’s DIP switch, insert the module in the base, and connect the
network cable. Your Module ID is set on powerup, and your ECOM is ready to communicate
on the network. We step through setting the DIP switch on pages 2-5 and 2-6.
Name
If you prefer to be able to set or change all Module IDs on your network from a single PC, use
the tools in NetEdit3, discussed in chapter 3.
A Name makes it easy to recognize the PLC by its function. An example of a Name is
“PumpStationOne.” The Name can be up to 32 alphanumeric characters in length. A Name
can be assigned using NetEdit3.
NOTE: Some HMI software products will not accept Names with numbers as the first character, spaces or
certain other non-alphanumeric ASCII characters. Also, your HMI product may not accept Names longer
than 16 characters. Consult your HMI product documentation about its naming conventions
7 6 5 4 3 2 1 0
8 7 6 5 4 3 2 1
ON
Pump Station One
PUMP STATION ONE
 Loading...