Step 7: Establish PC to PLC Communications (cont’d)
Using a USB or Serial Port for Programming
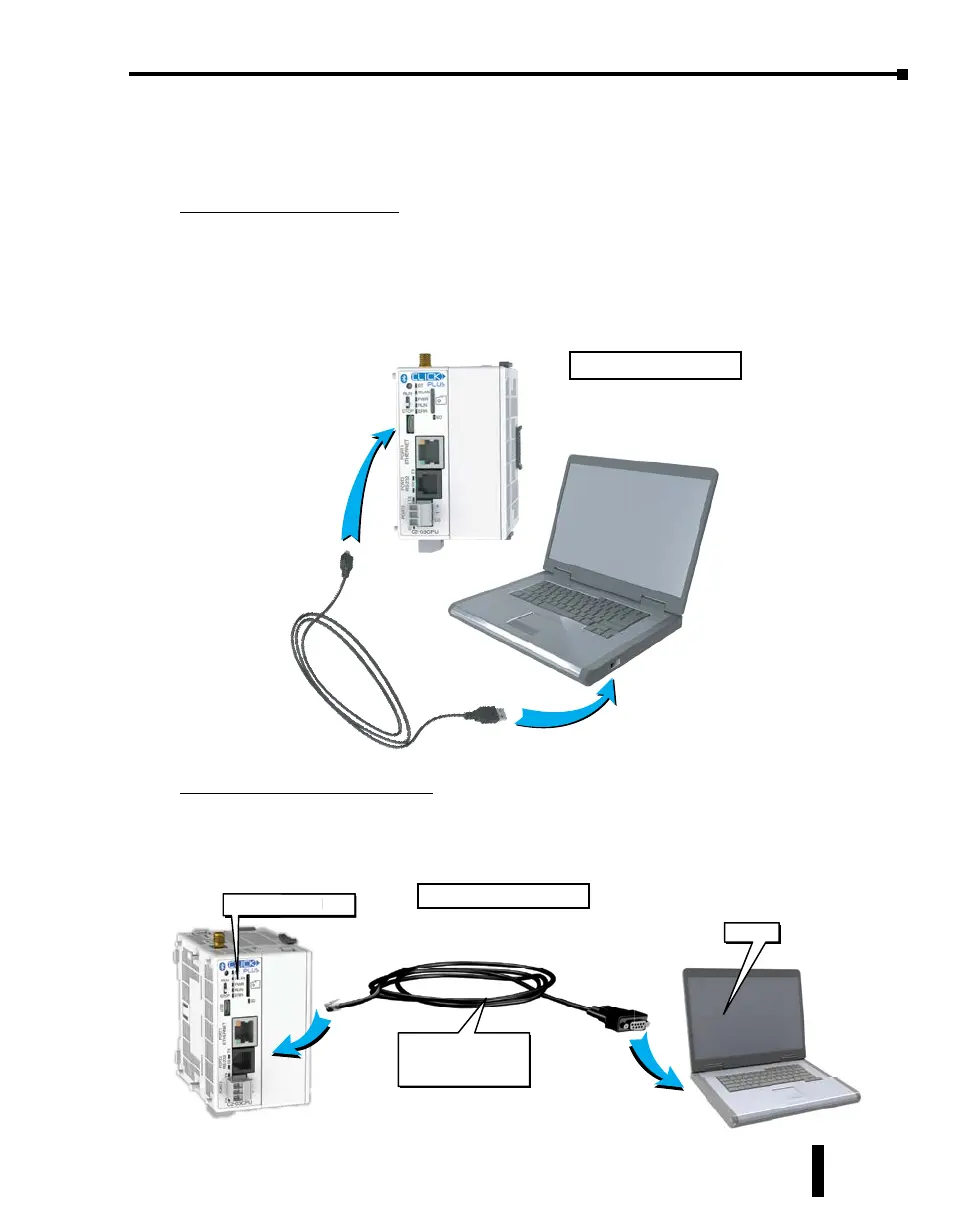
Connecting to a USB Port
If a USB port is available on the PC, then use an AutomationDirect USB A to USB micro B
Programming Cable (P/N - USB-CBL-AMICB6) to connect between the USB port on the PC
and the micro-B USB connector on the CLICK PLUS PLC., or use an AutomationDirect PC
to Panel Programming Cable Assembly (P/N - EA-MG-PGM-CBL) to connect between the
USB port on the PC and the RJ12 serial port on a CLICK PLC.
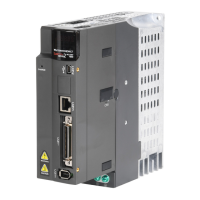
Connecting to an RS-232 Port
If a 9-pin RS-232 serial communications port is available on the PC, then use an
AutomationDirect PC Serial Programming Cable (P/N - D2-DSCBL) to connect between the
9-pin port on the PC and the RJ12 connector on the PLC’s RS-232 Port.
USB Cable
ADC Part #
USB-CBL-AMICB6
PC with
USB A Port
CLICK Plus
PLC
Using a PC USB Port.
CLICK PLUS PLC
LU
PL
PC
PC Serial
Programming Cable
D2-DSCBL
Using a PC Serial Port.
CLICK PLUS PLC Hardware User Manual, 1st Edition, Rev. K – C2-USER-M
1-19
Chapter 1: Getting Started