42
600 SeriesOperating instructions
Transporting instructions and tie down points
On the rear frame, the tie down points are located. on the
sides, and on the front frame close to the boom. Optionally
available are the rear bumper and / or behind the rear
wheels installed tie down brackets (Art. A418746), in which
the straps and slings can be attached.
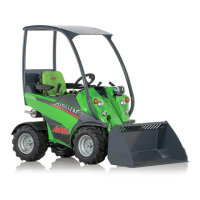
Mount the articulation frame lock, on the machine during
transports. Lower the boom down and take off the battery
disconnect switch. Remember to remove the frame lock
after transport!
Optional equipment for frequent trailer transport
If transporting the loader frequently on a trailer, optional
tie down brackets are available for easier load securing.
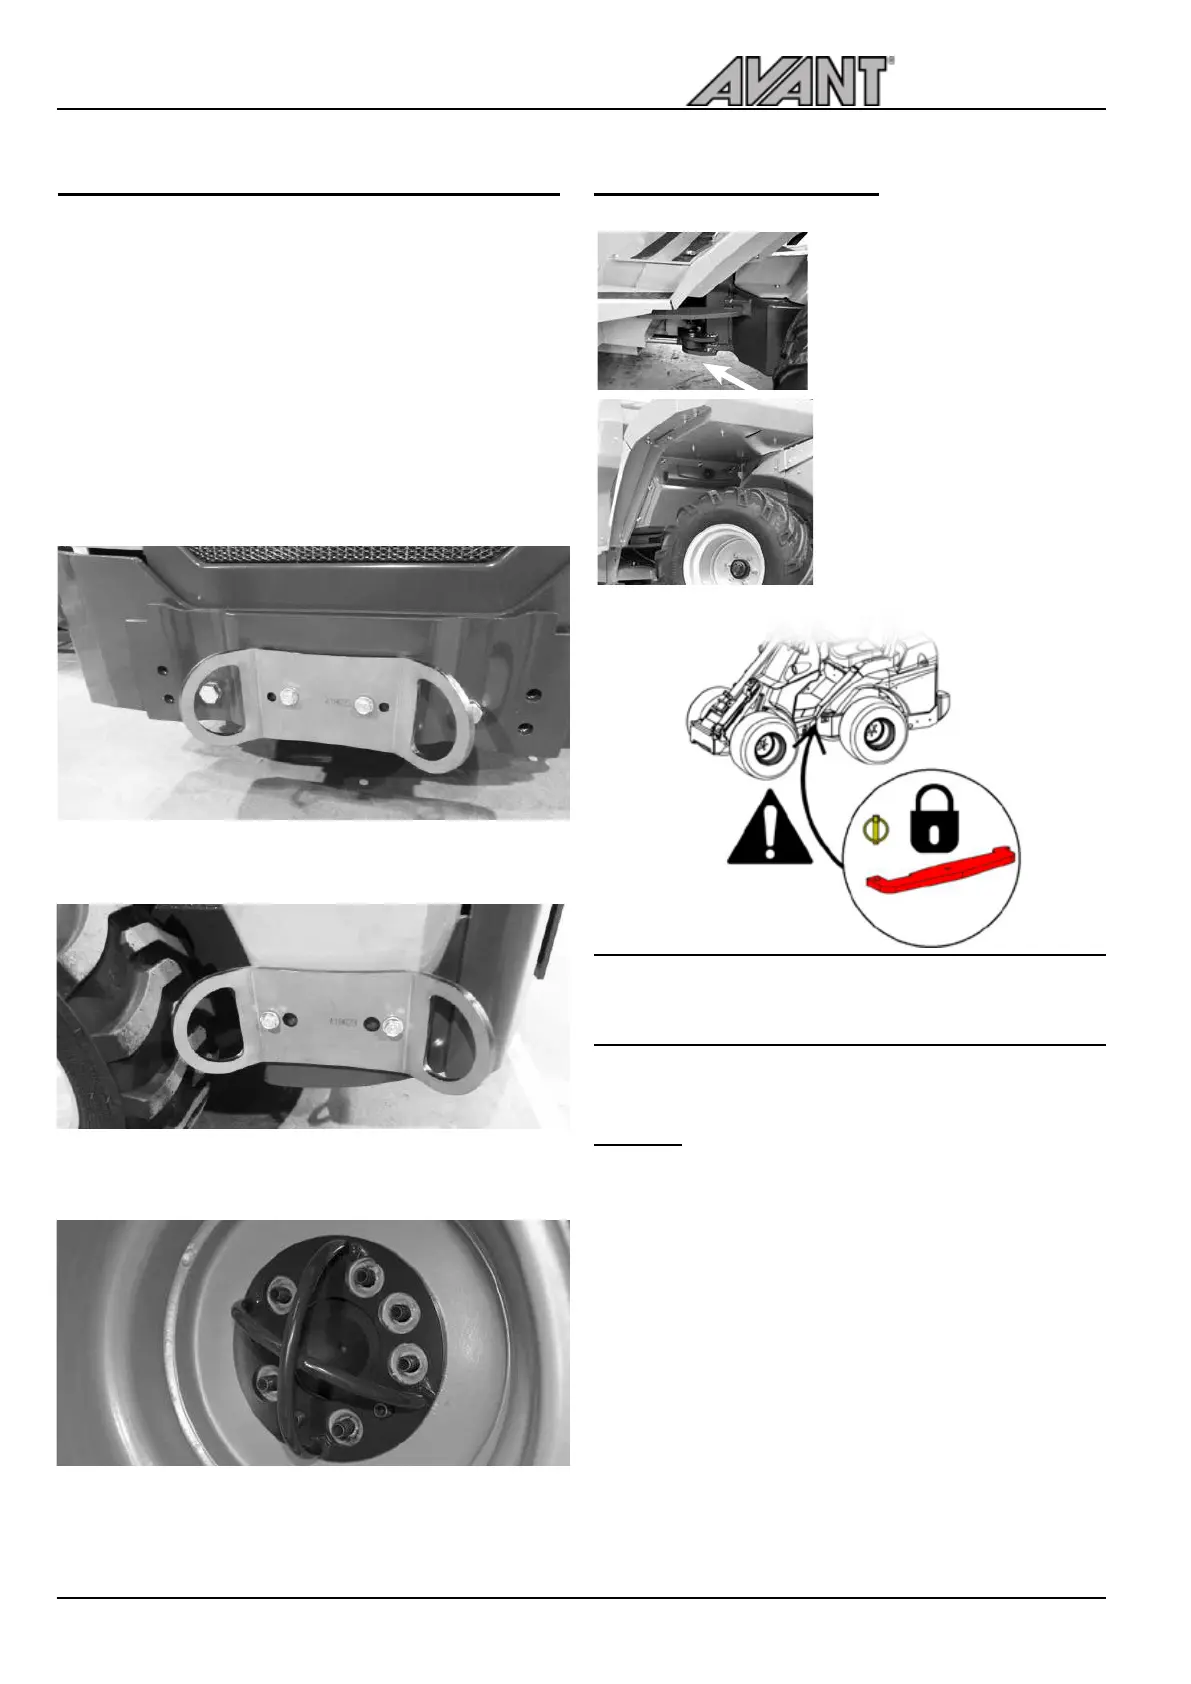
Tie down bracket A418623 installed at the rear bumper or
counterweight
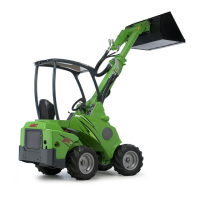
Tie down bracket A418623 installed at the side of rear
frame. For side installation, two brackets are needed.
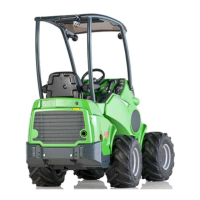
Tie down bracket on wheel hub A423091
Installing of frame lock
Always lock the frame lock before transporting or lifting the
loader. Also remember to remove the frame lock and test
the steering of the loader after transport.
Towing
The loader cannot be towed. It is equipped with a
hydrostatic transmission and a hydraulic parking brake,
which can be released only when the engine is running
and there is enough pressure in the hydraulic system. In
case there is a technical failure and the engine cannot be
started or doesn’t start, the loader must be pulled aside
with another machine or lifted e.g. with a forklift truck and
transported to service.
The frame lock is located over
the articulation joint, under the
seat base, and it is fastened
with a bolt.
The frame can be locked with
the red frame lock. This way
the loader frame stays straight
during e.g. transportation.
Install the frame lock in the
holes on the front and rear
frame and secure it with the
cotter pin.