31
CH100
A
B
A
B
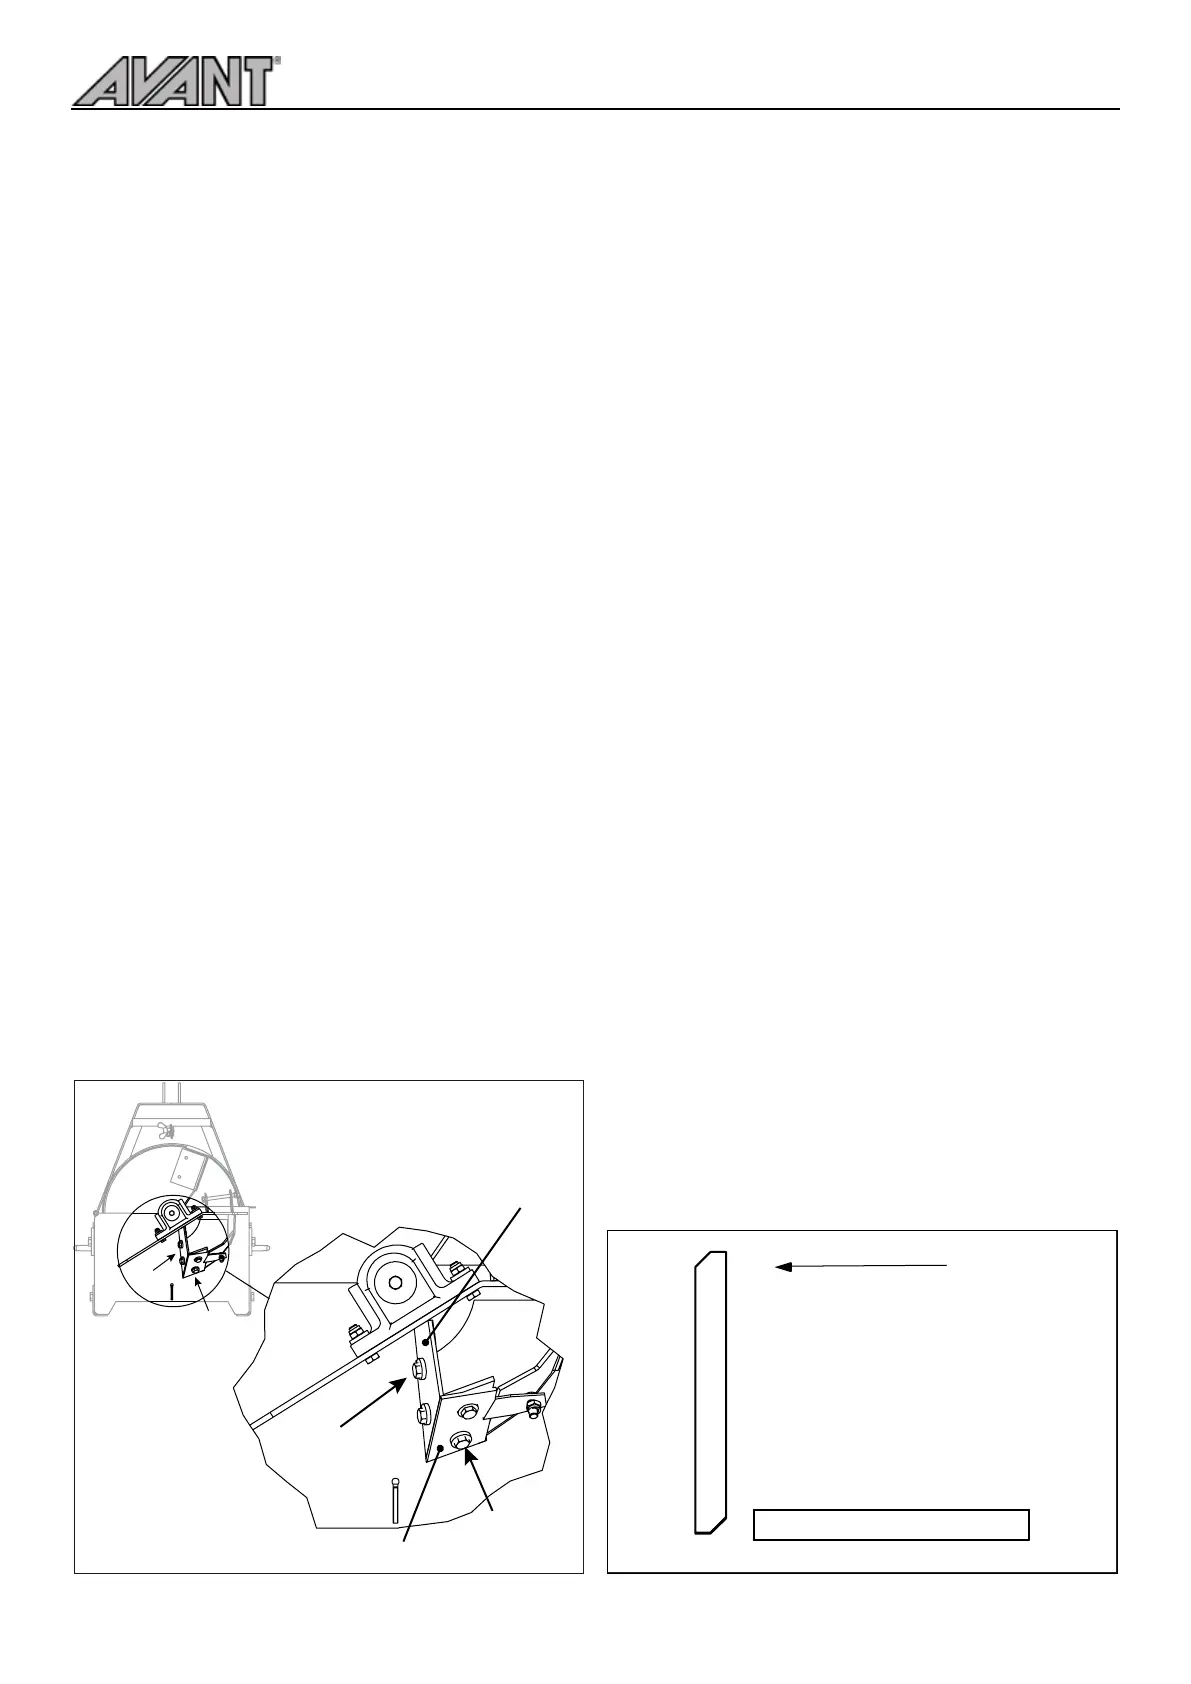
REMOVING THE ANVILS
The chipper features both a vertical and horizontal
anvil. To remove the anvils, open the fastening bolts
(A) and (B) (M12). The horizontal anvil fastening bolt
(B) is located below the feed opening. Fig 16.
SHARPENING THE ANVILS
If you notice wear or rounding of the inner edge of the
anvil, sharpen the anvils so that the original angles are
retained. Fig 17.
INSTALLING THE KNIVES AND ANVILS
• Check the condition of the fastening bolts and
nuts.
• Install the knives and anvils and tighten the
fastening bolts to the torques specied in table.
• Adjust the knife-to-anvil clearance.
ADJUSTING AND CHECKING THE KNIFE-TO-ANVIL
CLEARANCE
The need for adjusting the anvils is determined by the
amount the knives are sharpened. Always check and,
if necessary, adjust the clearance between knives and
anvils
• after a heavy sharpening;
• if the knives were removed - for example, due to
sharpening;
• if new knives are replaced,
• if chip length is adjusted.
Check the clearance with a feeler gauge.
1. Loosen the M12 locking screws (A) and (B) of the
anvils. Fig 18.
2. Turn the cutting disk in such a way that the front
edge of the knife is exactly opposite the vertical
anvil. Slide a feeler gauge between the knives.
3. Tighten the screws of the anvil (A).
4. Adjust the play of the horizontal anvil towards the
front edge of the knife to 1.2-1.5 mm.
5. Tigthen the locking screw (B).
6. Recheck the knife play.
Vertical anvil
Horizontal anvil
Fig 16. Anvil fastening bolts
Vertical anvil prole
Horizontal anvil prole
Fig 17. Anvil proles
Cutting direction of the knife