Job Aid Replacing the Avaya S8700 Media Server—Release 2.0 and Later
Replacing the S8700 Media Server
10 Replacing the Media Server with Release 2.0—S8700
555-245-767, Issue 1.1 December 2003
Replacing the S8700 Media Server
When replacing a failed S8700 Media Server, you may be able to reuse the hard drive from the failed
media server. For specific information on removing and replacing, see Reusing the hard drive
on page 11.
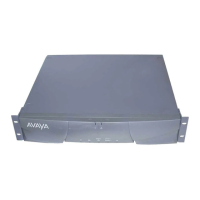
Removing the S8700 Media Server being
replaced
1 Using a cross-point (Phillips) screwdriver, unscrew one screw from each bracket that attaches the
media server to the rack.
2 Unscrew the remaining screws.
3 Carefully remove the media server from the rack.
7 Resolve alarms on both media
servers
Under Alarms, click Current Alarms. Clear any alarms that
appear.
From a DOS command line, type
arp -d 192.11.13.6 and press
Enter to clear the ARP cache.
Connect to the standby media server and click Current Alarms.
Clear any alarms that appear.
From a DOS command line, type
arp -d 192.11.13.6 and press
Enter to clear the ARP cache.
Using a SAT screen on the active media server, type display
alarms and press Enter.
For instructions on resolving alarms, see Maintenance Alarms
Reference, 555-245-102.
Caution: If you cannot clear alarms. Call your service support
group.
8 Administer backup schedule on
the replacement media server
Under Data Backup/Restore, click Schedule Backup to
readminister the media server’s backup schedule.
9 Set the Product ID on the
replacement media server
Type
productid -p product_id, where product_id is the product
ID you received from the customer or the ART tool. It should be
the same product ID as the old media server.
10 Release alarm suppression on the
replacement media server
Using telnet on the Linux command prompt screen, type
almsuppress -n and press Enter to release alarm suppression.
Note: Only do this if you want to release it before the time you set
earlier runs out (maximum of 2 hours)
11 Log off all administration
applications
When you have completed all the administration, log off the media
server.
Checklist 6. Final tasks for replacing an S8700 Media Server reusing the original hard drive
9 Task Description

 Loading...


