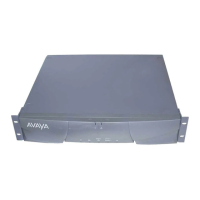
Job Aid Replacing the Avaya S8700 Media Server—Release 2.0 and Later
Initial onsite tasks
4 Replacing the Media Server with Release 2.0—S8700
555-245-767, Issue 1.1 December 2003
Checklist 3. Initial tasks for replacing an S8700 Media Server reusing original hard drive
9 Task Description
1 Verify that the good media server
is the active media server.
Check the Active/Standby LED on the good media server and
make sure it is steady GREEN (not flashing).
If not, log into the media server with the good hard drive and
interchange.
2 See if failed media server is in
busied-out standby mode
Check the Active/Standby LED on the failed media server and
see if it is flashing GREEN (standby) or RED (busied out).
3 Log onto Maintenance Web
Interface of the active media
server
Connect to the services port on the back of the active media
server. Open a browser on your laptop. Use 192.11.13.6 to log
onto the Maintenance Web Interface as craft or dadmin.
4 Record alarms Under Alarms, click Current Alarms. Record alarms on the
active media server.
5 Connect to the standby media
server
Disconnect the laptop from the active media server.
Connect the laptop to the services port (2) on the standby media
server.
6 Clear ARP cache on laptop From a DOS command line, type arp -d 192.11.13.6 and press
Enter.
7 Busy out the standby media server
(if functional)
Under Server, click Busy-out Server > Busy Out.
Click Status Summary to verify that the standby media server is
busied out.
8 Suppress alarm origination on the
standby media server
Use telnet to access the Linux command line. Use the
almsuppress -t 120 command to suppress alarms for the duration
of the replacement process. (Maximum time is 2 hours.)

 Loading...


