16
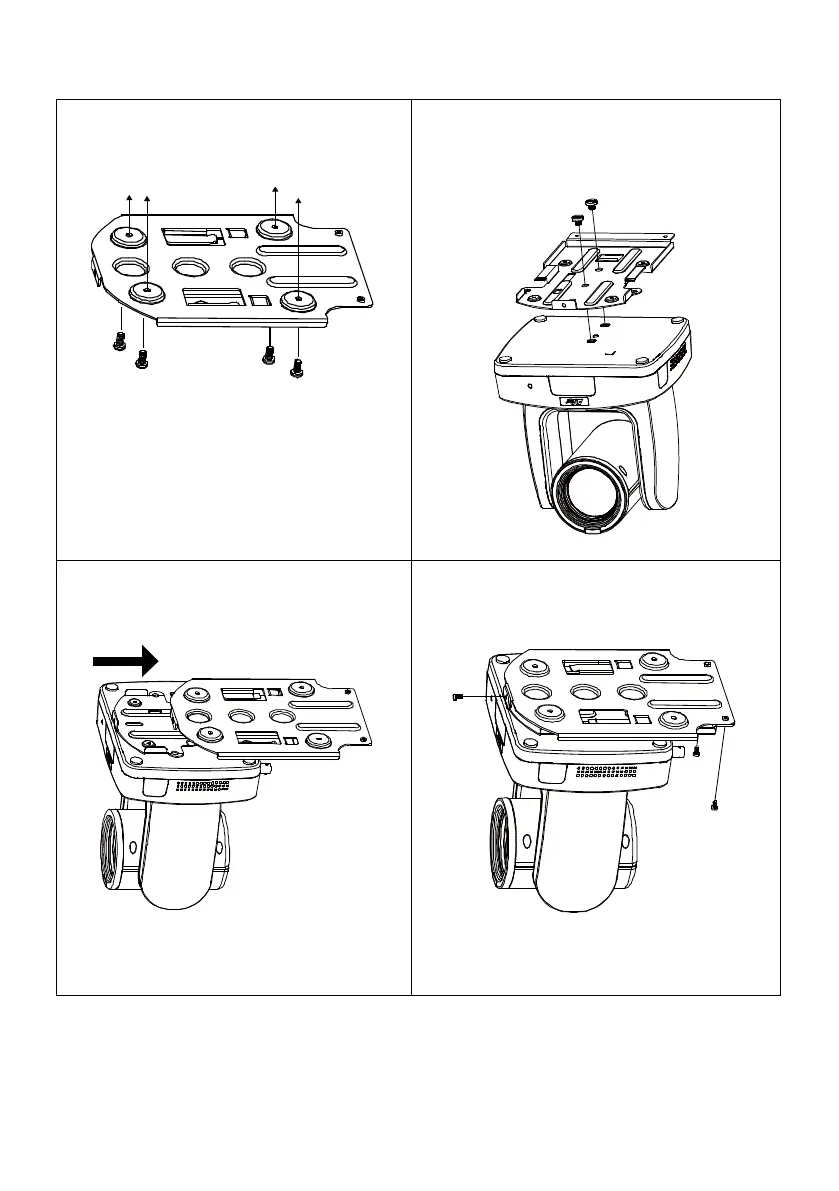
Ceiling Mount Installation
1. Secure the mount bracket on the ceiling.
Screw: 4 screws, M4 x 10mm (Not
Included in the package)
2. Install the mount bracket on the camera.
Screw: 2 screws, 1/4"-20 L=6.5mm (Included
in the package)
3. Slide the mount bracket with the camera
into the mount bracket which secured on
the ceiling.
[Note] Connect necessary cables after sliding
the camera into the mount bracket.
4. Secure the camera with screws.
Screw: 3 screws, M3 x 6mm (Included in the
package)