15
Model E1010 Indicator User’s Manual
Batch Weighing
This section applies if your indicator has the batching application active. The
batching application allows you to set three cutoffs or trips based on three
progressively larger weights. There are two possible modes of batching;
Auto or Manual. Each are explained below.
AUTO
As weight is added to the scale and the first cutoff point is reached, OP1
annunciator lights and Output #1 is activated. When weight reaches the
second cutoff, OP2 annunciator lights and Output #2 activates. When weight
reaches the third cutoff, OP3 annunciator lights and Output #3 activates.
MANUAL
In manual mode, after you begin the batching process, you must press the
F1 key to activate each subsequent output after each output weight is
reached.
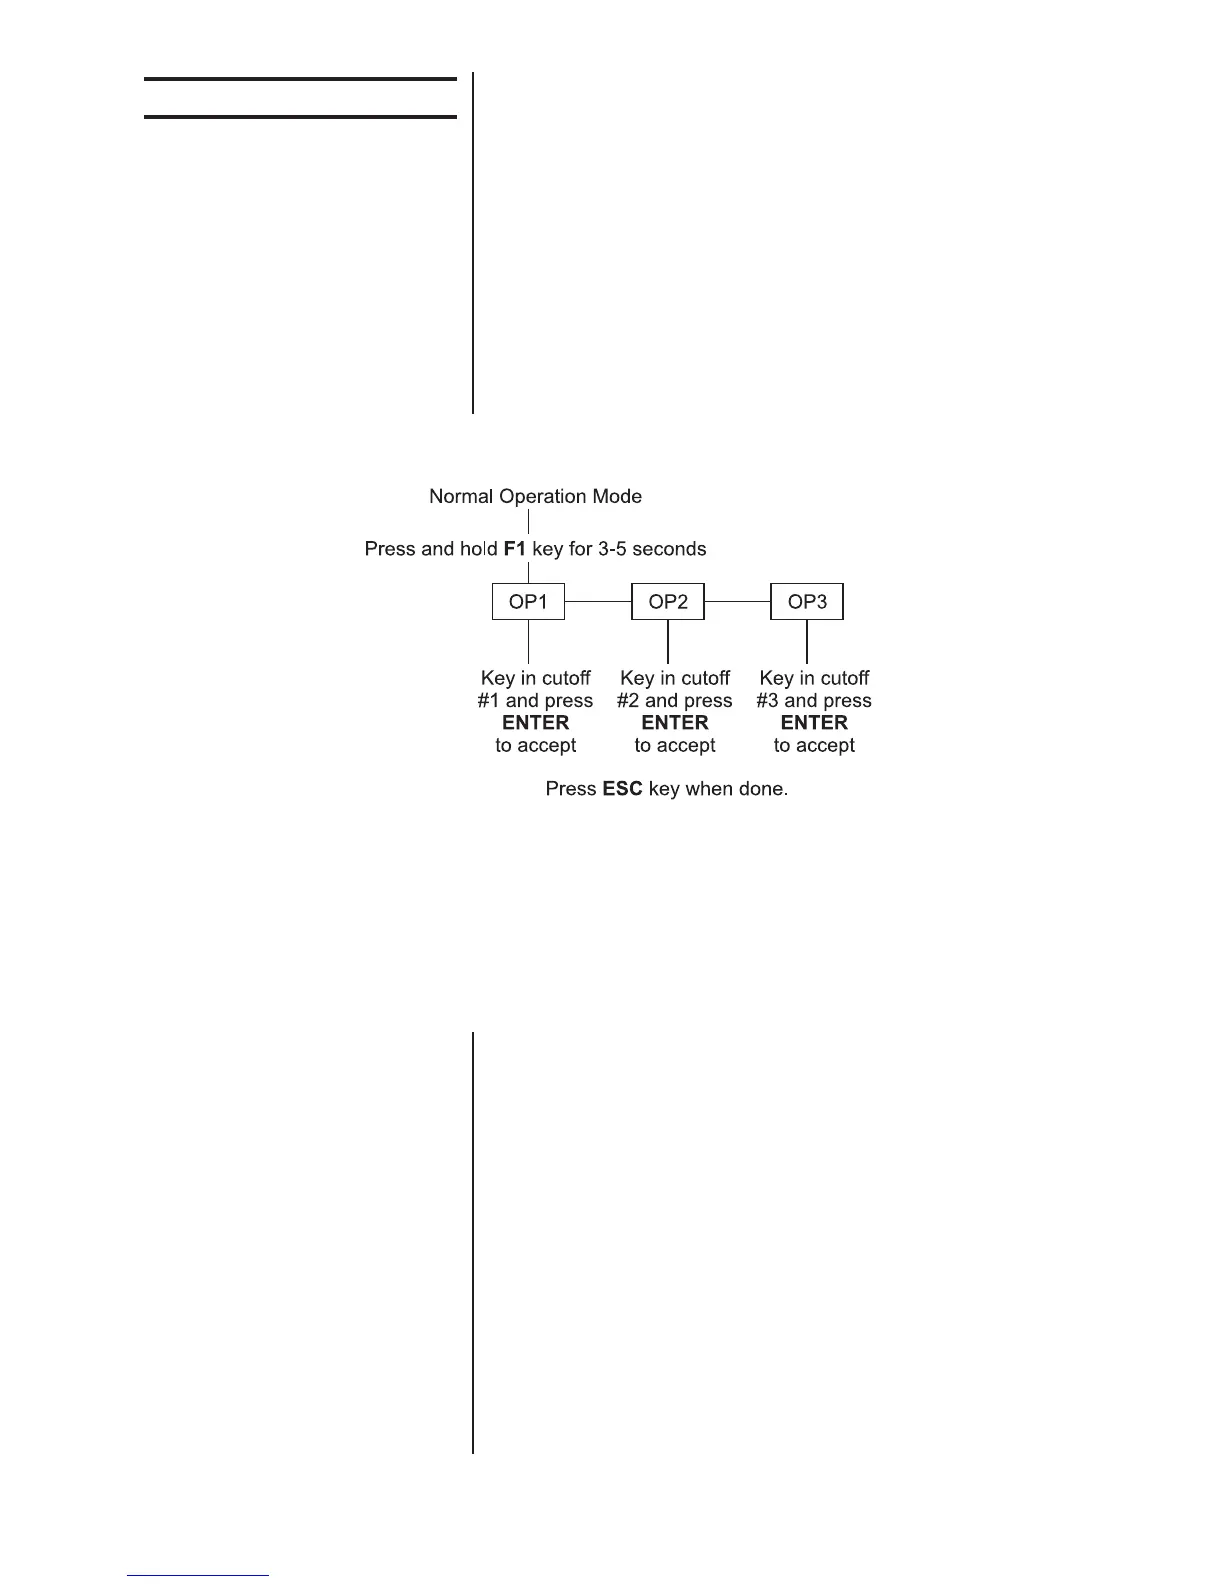
Figure 5
Output flowchart
Follow these steps and the flowchart in Figure 5 to setup a recipe with three
ingredients:
1. With the indicator powered up, press and hold the F1 key until. . .
OP1 is displayed.
2. Press the PRINT key to set the value for the output. . .
Key in a value and press the F1 key to accept the value. OP1 will
be displayed.
You can scroll through all three outputs by using the TARE and
UNITS keys.
3. Press the UNITS key. . .
OP2 is displayed.
4. Repeat steps 2 and 3 for each output. Press ESC key to return to normal
operation with the ingredients active. Indicator will automatically return to
normal weighing mode after OP3 value is entered.
This indicator has a 10 channel
PLU (Product Look Up)
memory. To access a memory
channel, press a number from
0 to 9, then press the F1 key.
Configuring Outputs

 Loading...


