19
Model E1010 Indicator User’s Manual
8. Press the PRINT key to perform a button test. Each key you press will
be reflected on the display by a number to confirm the button is function-
ing correctly. See Table 1. The ESC key is excluded from this test. It is
used to stop the testing and return to the menu item.
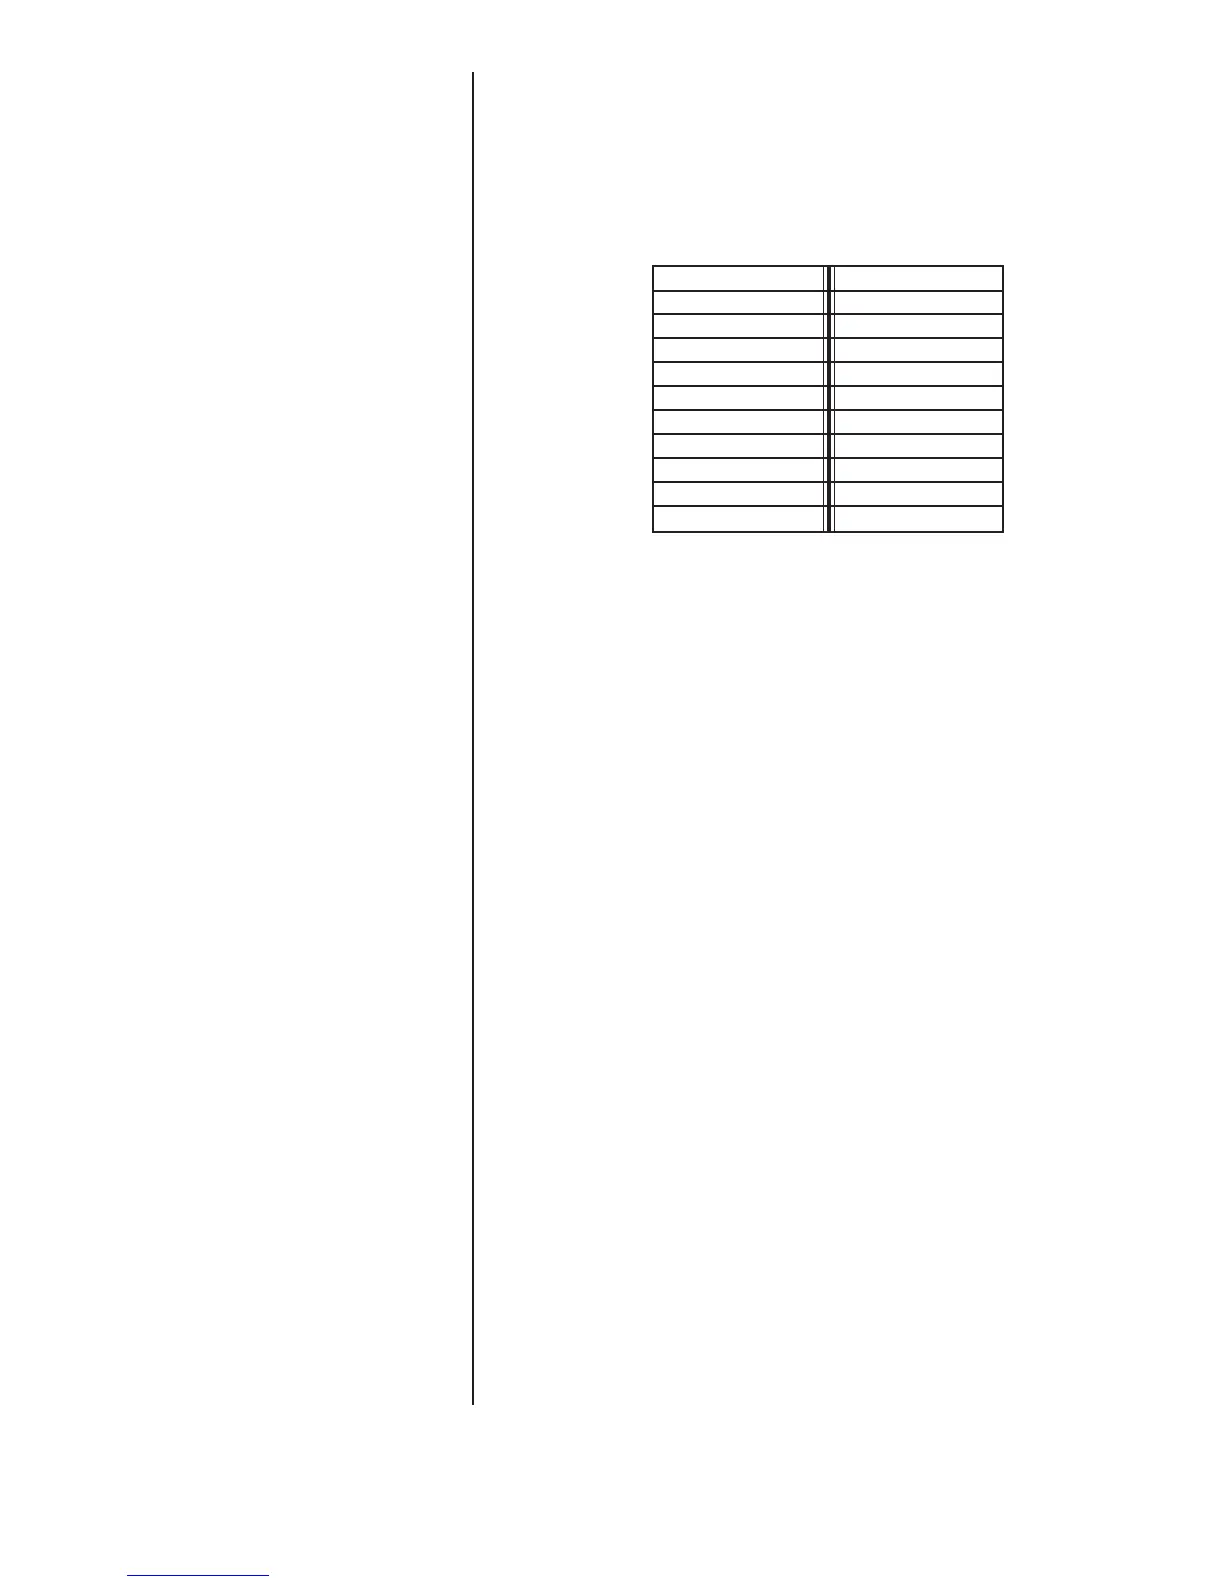
Table 1
Key / Number Equivalents
Tare = 1
Select = 2
Zero = 3
Print = 4
Units = 5
F1 = 6
Power = 7
7 = 8
8 = 9
9 = 10
4 = 12
5 = 13
6 = 14
1 = 17
2 = 18
3 = 19
0 = 23
. = 24
C/CE = 20
Mode = 15
Enter = 21
9. Press ESC key to stop the button test.
BUTTON is displayed.
10. Press the UNITS key. . .
SERIAL is displayed. This is the serial test item. To test the
serial port, jumper the TX and RX lines. Continue to step 11.
11. Press the PRINT key to access the serial test.
The display will show FAIL unless the TX and RX lines are
jumpered or there is a problem with the serial port. PASS is
displayed if the serial port is working properly.
12. Press SELECT key to exit the serial test.
SERIAL is displayed.
13. Press the SELECT key. . .
TEST is displayed.
14. Press the UNITS key. . .
AUDIT is displayed.
15. Press the PRINT key. . .
CFG is displayed. This stands for the configuration audit
counter.
16. Press the PRINT key to see the number of times the configuration has
been altered on this indicator.
17. Press the SELECT key. . .
CFG is displayed.
18. Press the UNITS key. . .
CAL is displayed. This stands for the calibration audit counter.
Audit counters cannot be reset.

 Loading...


