Chapter 7: Recording with Fast Track C400 34
chapter 7
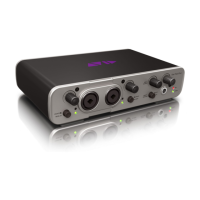
Recording with Fast Track C400
This chapter covers basic workflows for record-
ing audio and virtual instrument tracks with
your Fast Track C400.
It is assumed that your interface has been prop-
erly installed and connected as described in
Chapter 3, “Fast Track C400 Installation”, and
Chapter 4, “Hardware Connections.”
If you have configured the Multi button as de-
scribed in “Configuring the Multi Button (Build-
ing a Macro)” on page 32, you will also be able
to use this functionality when following the
workflows in this chapter.
Recording Audio Tracks
To record an audio track:
1 Make sure the Input Gain knobs are turned all
the way down (counter clockwise), on the top
panel.
2 Use the Input Selector buttons to select the
front or rear inputs based on the type of signal
your are recording:
• If you are recording an electric guitar or
bass, make sure the front input is selected
(the Input Selector switch should be set to
the “In” position) for the input channel
you want to use (either Input 1 or Input 2).
• If you are going to record a stereo keyboard,
use the Input selector buttons to select the
rear inputs (the Input Selector switch
should be set to the “Out” position) for
both Input 1 and Input 2.
• When recording a microphone, press the
Input Select button to choose the rear in-
put for the channel(s) to which the micro-
phones are connected (the Input Selector
switch should be set to the “Out” position).
3 Connect your signal source:
• For electric guitar or bass, plug your guitar
cable into the input channel you had cho-
sen in step 2.
This chapter covers the general concepts for
recording audio and virtual instrument and
cannot cover and cannot provide specific in-
formation for different music applications.
Please refer to your software documentation
for information about application specific
operations, such as creating or record en-
abling (record arming) a track.
 Loading...