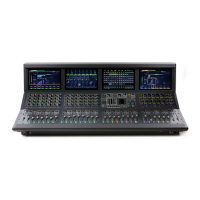
Configuring System Audio 79
Managing Connections
After initial setup, devices on the network can be named and renamed, reassigned, and removed.
Naming System Components
You can name the S6L control surface, the E6L engine, and any connected and assigned Stage I/O devices. The device name is
stored with the respective device, and stays with that device until it is changed. Names can be changed at any time. Though not re-
quired, naming components is highly recommended.
To name S6L system components:
1 In the Options > Devices tab of the external screen, select the component graphic so it is outlined in blue.
2 In the Information list, select the DEVICE tab.
3 Touch-and-hold (double-click) the field next to Name, then enter a unique name using the keyboard, then press Enter when fin-
ished.
Managing Stage I/O Unit Connections
When power-cycling your system and/or reconnecting Stage I/O devices to the same E6L engine, the original Stage 1–6 assign-
ments are automatically recalled, regardless of the order in which Stage devices are connected. Depending on the hardware com-
binations being used, however, you may want or need to reconfigure system Stage I/O. You can reconfigure Stage I/O on the
Op-
tions > Devices
tab any time after the initial system set up and configuration. You can reassign connected Stage I/O racks, remove
Stage I/O racks from the current configuration, and add new Stage I/O racks to the current configuration.
Reassigning a Stage I/O Rack
You can reassign a Stage device to a different Stage slot. For example, for a particular stage setup you may want to rearrange the
order of Stage 64 I/O racks as they appear in the VENUE Patchbay. Or you might want to add one or more Stage 32 or 16 I/O units.
To reassign a Stage I/O unit:
1 Put the system into Config mode.
2 Go to Options > Devices.
3 Select a Stage device in the Connected Devices column, then select the Disconnect button.
The unassigned Stage device appears in the
Available Devices column.
4 Re-assign Stage I/O racks as necessary.
Configuring Stage Slots for Stage 16s, Stage 32s, or Stage 64s
When adding Stage 16s or Stage 32s for the first time, or when reconfiguring a system to use Stage 64s instead of Stage 16s or Stage
32s, you must first configure Stage slots before you can assign Stage I/O units in the
Options > Devices tab. Each Stage slot cor-
responds to a
Stage hardware tab 1–6 in the VENUE Patchbay.
To configure Stage slots and assign Stage 16 I/O racks:
1 Make sure your system is in Config mode.
2 On the external screen, go to the Options > Devices page and locate the Connected Devices column.
In the following sections, references to “Stage I/O devices” includes Stage 64, Stage 32, and Stage 16 (but not Local 16).
You can configure Stage slots and assign devices in VENUE Standalone Software (requires version 5.5 or higher).
 Loading...