12
Note: When the configurations are saved successfully, you’ll see a message indicating the IP address
and port number assigned to this network camera.
3.3 Camera
3.3.1 Camera
Adjust the camera parameters if necessary.
Item Description
Title Enter the title for the camera with up to 15 alphabetic characters.
Snapshot Path Specify the location to save the snapshot pictures.
Environment Select the current environment for the camera to automatically adjust itself to produce the images suitable for the
selected environment.
Frame Rate The frame rate allowed to each viewer can be adjusted to adapt to the bandwidth on the network.
Set the desired image frame rate to the maximum (FULL) or to a specified frame rate (1/2; 1/3; 1/4; 1/5; 1/10;
1/15).
The actual frame rate depends on the actual network connection, and may be lower than the specified one.
Power Line Frequency Select only when your camera video keeps flashing.
Stream Format Select the stream format to Single H.264 / Single MPEG-4 / Single Motion JPEG / Multi-Mode.
Note: Motion detection is not supported when the stream format is set to Motion JPEG.
MPEG4 / MJPEG Resolution Select the video resolution when the stream format is set to “MPEG4” or “MJPEG”.
The options are: VGA (640 x 480), QVGA (320 x 240), and QCIF (176 x 144).
OSD Select “ON” to show the camera title on the live view, or “OFF” to hide the camera title.
Slow Shutter Level This function is used to extend the exposure time for clearer images when the light is not sufficient.
Select 1 ~ 5 to extend the exposure time based on your current light condition. The larger the value, the longer
the exposure time, and the less the fps.
0 means function off.
3.3.2 Preset
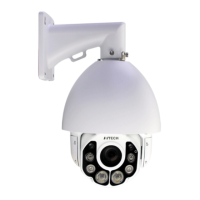
Note: Before using this function, make sure the DPTZ function is enabled.
You can set new preset points (up to 16) or check existing points here.
How to set a new preset point
Step1: Click DPTZ icon.
Step2: Move to the point with proper ratio that suits your need.
To zoom in / out, you may:
- Click
(zoom in) / (zoom out).
- Move the cursor to the preview screen, and roll the mouse wheel up (zoom-in) and down (zoom-out).
- Click any point on the preview screen to get a 5X image.
- Draw a square from the top left to bottom right or bottom right to top left to switch among 1x, 3x and 5x images.
Step3: In “Current Position”, give a name to this point, and click “Add”.