AXIS Q19 Series Installation Guide Page 5
ENGLISH
AXIS Q19 Thermal Camera Series
Installation Guide
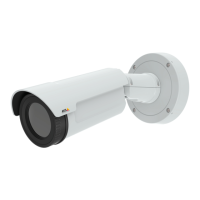
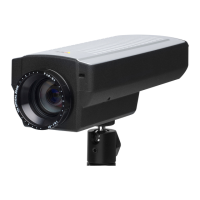
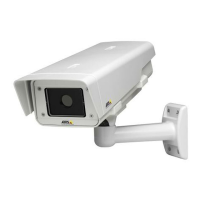
This installation guide provides instructions for installing an AXIS Q1910/-E/Q1921/-E/Q1922/-E
Thermal Network Camera on your network. For all other aspects of using the product, please see the
User Manual, available on the CD included in this package, or from www.axis.com
Installation steps
1. Check the package contents against the list below.
2. Hardware overview. See page 6.
3. Install the hardware.
• Install AXIS Q1910/Q1921/Q1922. See page 11.
• Install AXIS Q1910-E/Q1921-E/Q1922-E. See page 11.
• Connect the cables. See page 13.
4. Assign an IP address. See page 14.
5. Set the password. See page 17.
Package contents
Item Models/variants/notes
Network camera AXIS Q1910/-E (8.3 fps)
AXIS Q1921/-E (8.3/30 fps)
AXIS Q1922/-E (8.3/30 fps)
Note: Frame rate above 9 fps may be subject to export control regulations
Network cable AXIS Q1910-E/Q1921-E/Q1922-E Outdoor network cable 5 m (16 ft.)
Terminal block
connectors
4-pin connector for connecting external devices to the I/O terminal connector; 3-pin
connector for power connection; 2-pin connector for RS-485/422 connection (2x)
Camera stand AXIS Q1910/Q1921/Q1922 Metal stand
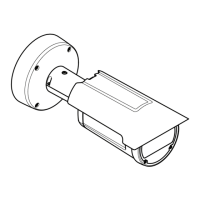
Wall bracket AXIS Q1910-E/Q1921-E/Q1922-E Wall bracket with internal cable channel
Tools AXIS Q1910-E/Q1921-E/Q1922-E Torx T20 Screwdriver; Allen key
CD AXIS Network Video Product CD, including product documentation, installation tools
and other software
Printed materials AXIS Q19 Thermal Camera Series Installation Guide (this document)
Drill template
Axis Warranty Document
Extra serial number labels (2x)
AVHS Authentication key
Optional accessories See www.axis.com for information on available accessories.
 Loading...