Axon Fleet 3 Wireless Microphone Installation and User Manual
Axon Enterprise, Inc. Page 25 of 28
4. Connect the Charging base ethernet pigtail to the Hub using the provided ethernet cable.
a. Secure the pigtail and ethernet cable together using the provided ethernet pigtail
splints. Refer to the Fleet 3 installation guide on proper installation procedure for
splint application
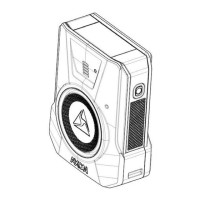
5. . Power on the Fleet 3 system with the Wireless microphone docked. The microphone will
enter “PAIRING” status, before transitioning shortly thereafter to “READY” status.
6. Undock the microphone and double-press the event button on the front of the device.
Ensure the Fleet 3 front camera begins recording. This confirms the installation is successful
and the communication protocols are functional.
Troubleshooting and Other Information
Troubleshooting
Any error states encountered with the Wireless microphone and/or Charging base can
typically be cleared by rebooting the devices.
• To reboot the Wireless microphone – hold down the power button for several
seconds until the device powers down, wait 12-15 seconds, and hold down the
power button again for a few seconds to boot the device.
Technical Support
Visit www.axon.com and view the Support options or call 1-800-978-2737.
Warranty Policy
Axon Enterprise warranty provisions are applicable on all Axon Fleet system products. See
Axon Enterprise’s website, www.axon.com, for detailed warranty information.
Warnings
For a full list of the warning associated with this product, see www.axon.com.