Installation and Basic Operation • 5
Chapter 2
3. Ensure that the MultiClamp Hardware option is selected. Set Serial Port: to the
number of the port to which the serial cable is connected (COM1 - 4). If you are
not sure about the port number, continue to the next step.
4. Figure 1.2Press the Scan button; the program will look for the correct Device
Number. (This value is set using the rotary switch on the back of the MultiClamp
700A; default setting is 1.)
5. If the program is unable to find a
valid Device Number, try the
following:
• Select a different Serial Port
and try scanning again.
• Check that the MultiClamp
700A is switched on and that
the serial cable is connected
properly.
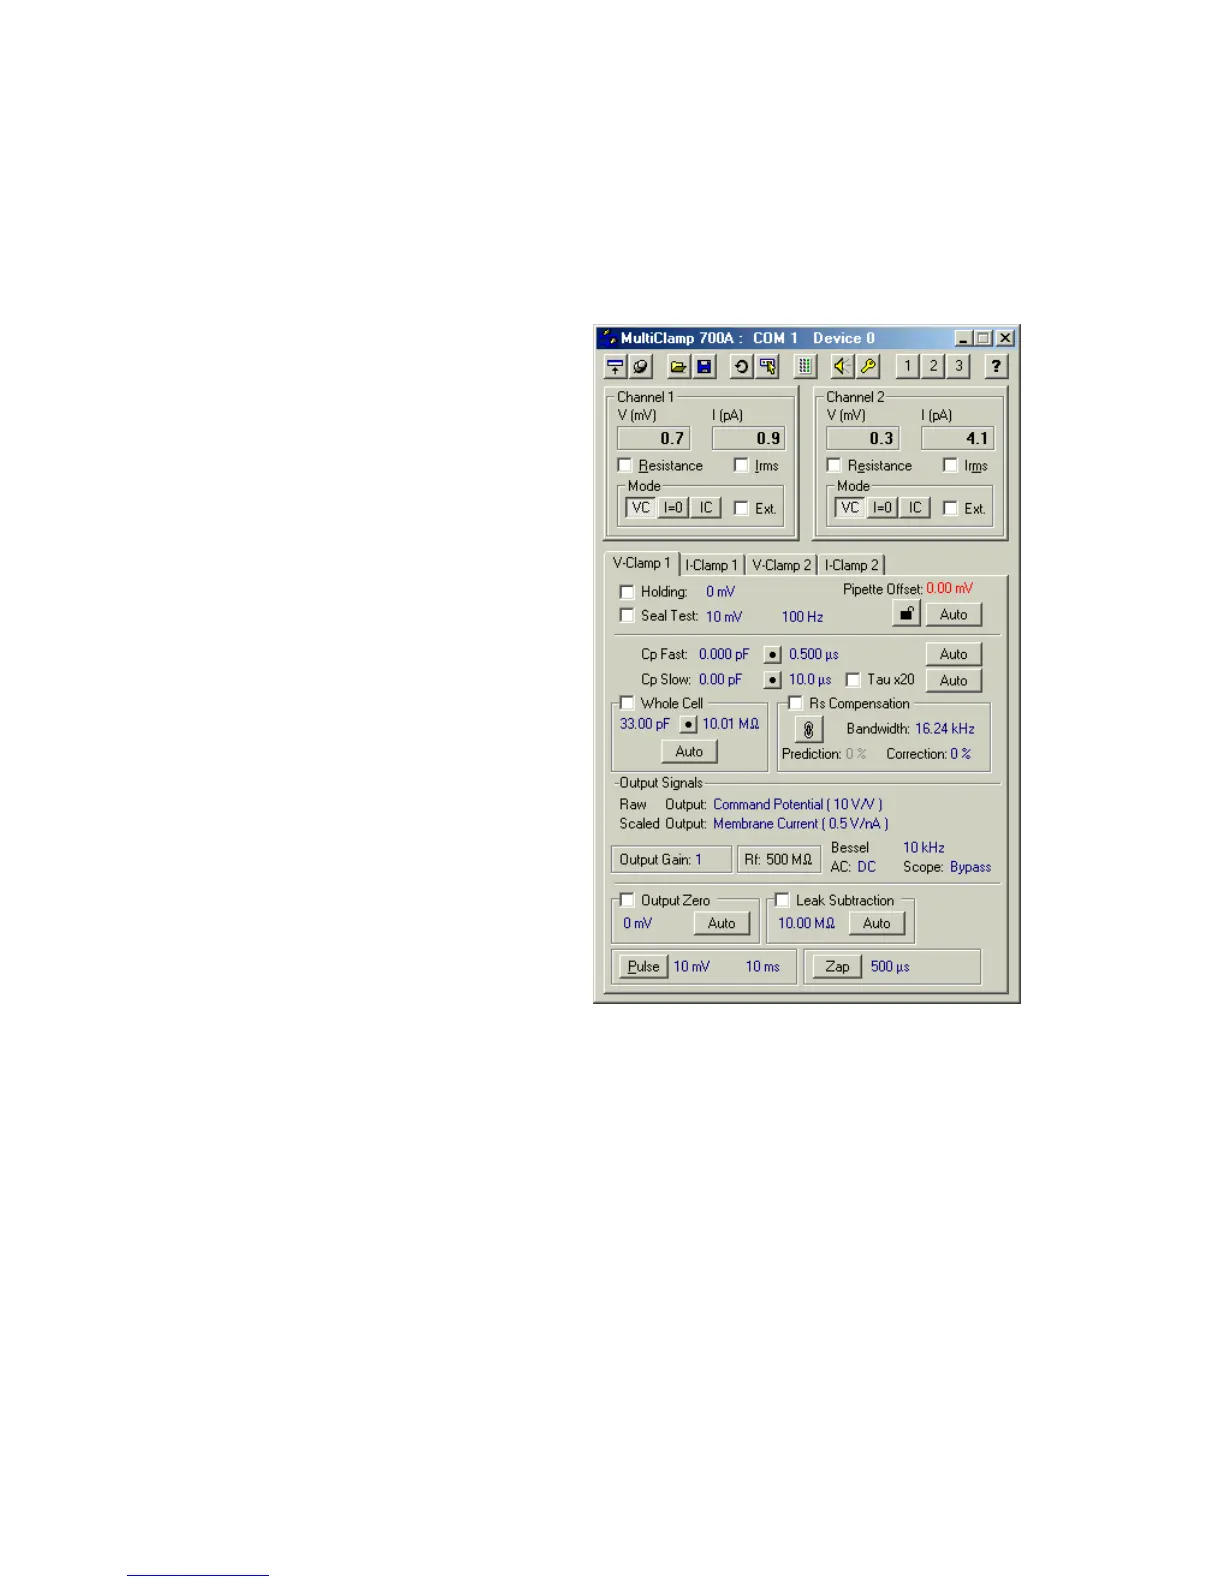
6. Press the OK button; the main
MultiClamp Commander window
should appear. If installed
correctly, the COM port and
Device number appear in the
Commander window heading, but
NOT the word “Demo”.
Note: If you are using the optional
SoftPanel instrument, refer to the
specific installation instructions
mailed with that device.