SEWING THE STITCHES
142
e
Match beginning needle drop points on the
opposite edge of the open area to keep the
stitching symmetrical.
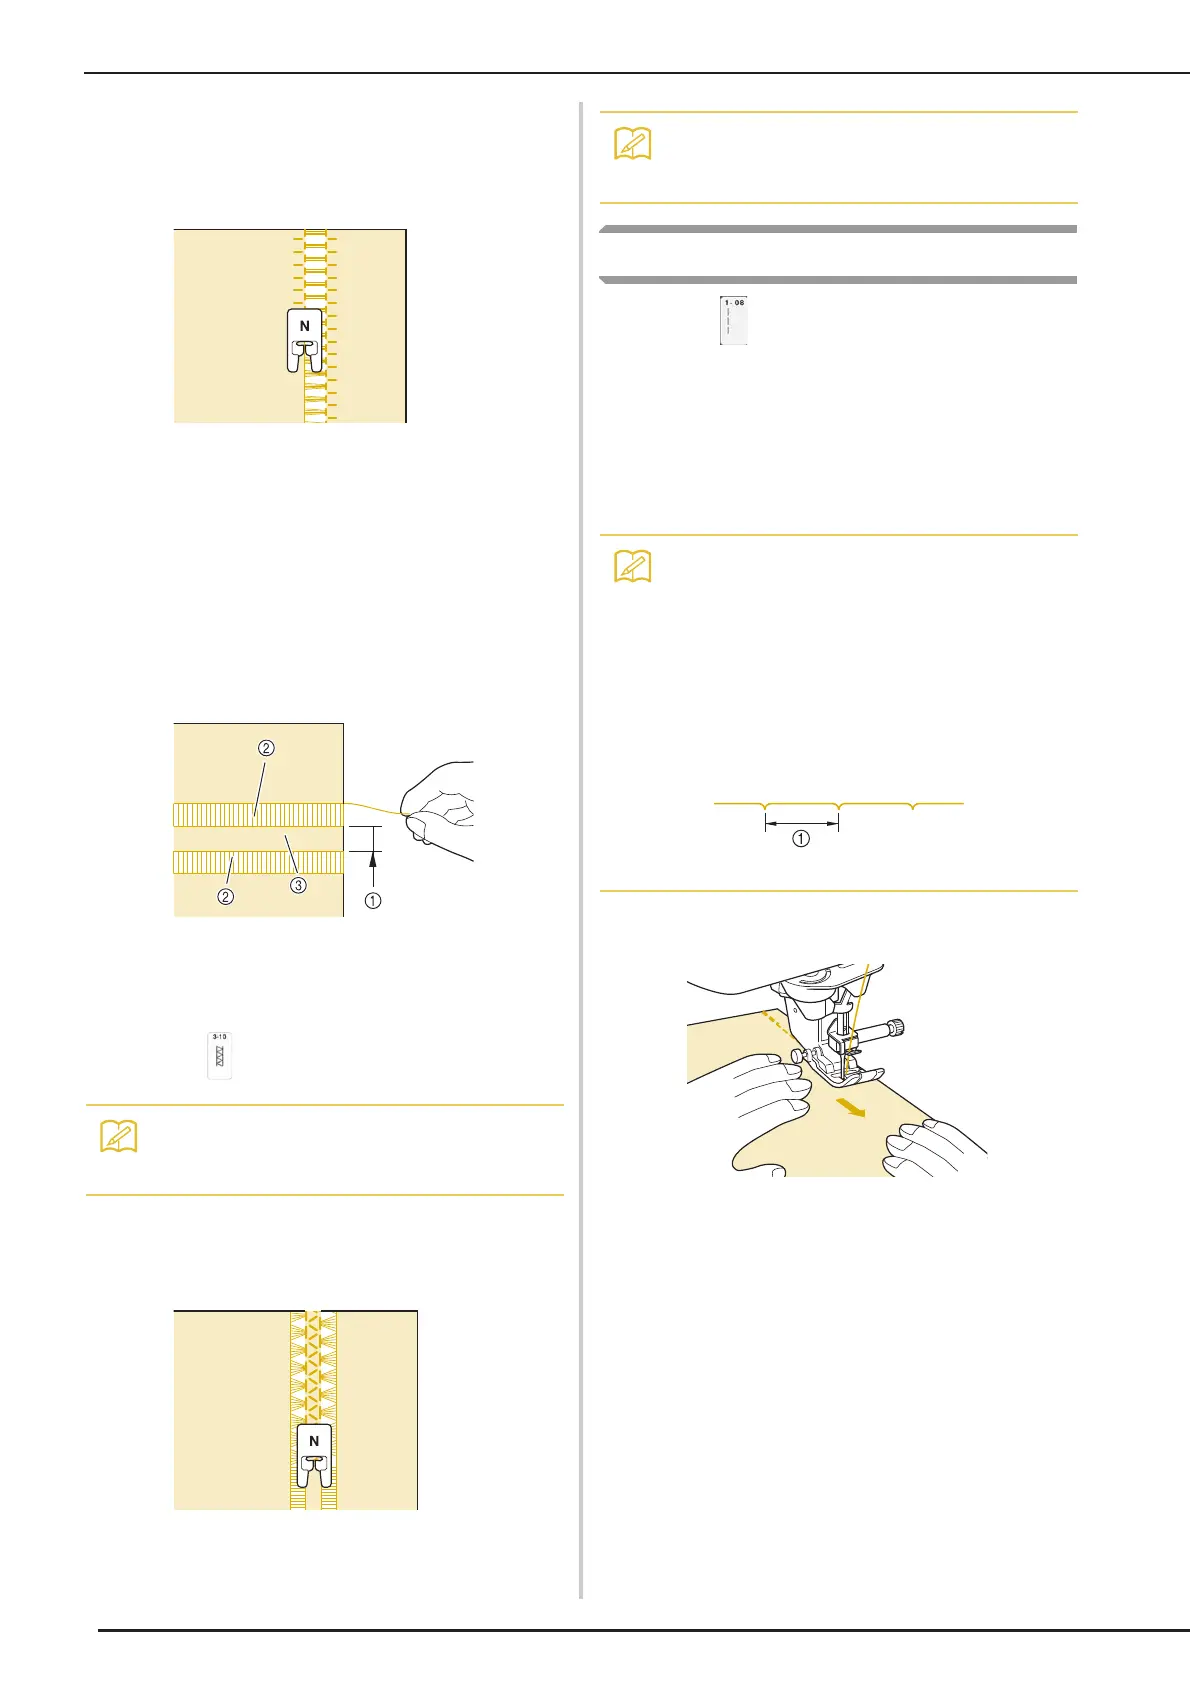
■ Hemstitching (3) (Drawn Work (2))
a
Pull out several threads from both sides of
the 4 mm (approx. 3/16 inch) area which
are not yet open.
* Pull out four threads, leave five threads, and then
pull out four threads. The width of five threads is
approximately 4 mm (approx. 3/16 inch) or less.
a Approx. 4 mm (approx. 3/16 inch) or less
b Four threads (pull out)
c Five threads (leave)
b
Select .
c
Sew the decorative stitch in the center of
the five threads created above.
Basting
a
Select and attach presser foot “J”.
b
Keep pressing the “Reverse Stitch” button
or the “Reinforcement Stitch” button to
sew 4 stitches of reinforcement stitches,
then press “Start/Stop” button to continue
sewing.
c
Sew while keeping the fabric straight.
d
End the basting with reinforcement stitches.
■ Free-Motion Basting
When the feed dogs are lowered, basting can be
sewn while freely moving the fabric.
• For details on each stitch, refer to “STITCH
SETTING CHART” on page 210.
• A wing needle can be used for Hemstitching
(3).
• When you use the basting stitch for
gathering, do not use a reinforcement stitch
at the beginning; you should lift the presser
foot, rotate the handwheel toward you
(counterclockwise), pull up the bobbin
thread and pull a length of top and bobbin
thread out from the rear of the machine.
• Stitching will be sewn with a length of 5 mm
(approx. 3/16 inch).
a 5 mm (approx. 3/16 inch)
 Loading...