Step 5a. Step 5b. Step 5c. Step 5e.
11.5.3 Fast Replacement of a Remote Scanner
The Fast Replacement of a remote scanner can occur only when a damaged remote device is replaced with a new remote
device of the same model and only the serial numbers do not match.
In this case, the new scanner can be aligned with the memory device topology by restoring the configuration from the
memory device to the scanner. To restore the configuration from the memory device, the process is as follows.
1.
Remove the damaged remote scanner and replace it with the identical model new scanner.
2. Select the Restore option.
PRESS -> TEST
PRESS V -> EXIT
!
The remote scanner's display shows the CHECK MASTER message. The master scanner's display shows the RUN
TEST MODE message.
3.
Press the center button on the master to enter the test mode.
4. Perform a Safety Zone validation test on the various safety zones on the replaced Remote Scanner.
5. At completion of the validation test, press the down arrow on the master and select accept or reject the validation.
• If accepted, the scanners return to an active state after a few seconds.
• If rejected, a new configuration will have to be created/loaded from the configuration software.
11.6 Replace Your Scanner without a Memory Device
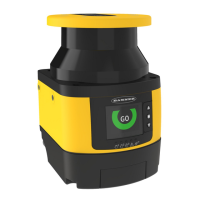
If it is necessary to replace your SX5-B or SX5-B6, replace the SX5-B(6) with the same model and install it in the same
position and alignment as the original SX5-B(6).
1.
Remove all power from the SX5-B(6) and the guarded machine.
2. Remove the original SX5-B(6).
3. Mount the replacement SX5-B(6) using the existing mounting bracket or holes.
4. Verify the alignment of the new SX5-B(6) (e.g., tilt and rotation) matches that of the original SX5-B(6).
5. Connect the 8-pin M12/Euro-style pigtail to the machine interface cable.
6. Connect a 4-pin M12/Euro-style Ethernet cable to the Ethernet port and transfer the appropriate configuration from a
saved file or create a new configuration.
7. Apply power to only the SX5-B(6) (not the machine) and perform the Commissioning Checkout procedure.
11.7 Repairs
Contact Banner Engineering for troubleshooting of this device. Do not attempt any repairs to this Banner device; it
contains no field-replaceable parts or components.
If the device, device part, or device component is determined to be
defective by a Banner Applications Engineer, they will advise you of Banner's RMA (Return Merchandise Authorization)
procedure.
Important: If instructed to return the device, pack it with care. Damage that occurs in return shipping is not
covered by warranty.
11.8 Contact Us
Banner Engineering Corp. headquarters is located at:
SX Safety Laser Scanner
www.bannerengineering.com - Tel: + 1 888 373 6767 125

 Loading...