3AOFENE
www.baofengradio.us http://www.baofengradio.us
www.foscam.us
Programming
Channel Information Window: Column Definitions
Channel -> Channel number.
Band -> Displays what Frequency Band is active.
RX Frequency -> Receive Frequency.
TX Frequency -> Transmit Frequency. Defaults to the Receive Frequency.
CTCSS/DCS Dec -> Receiver CTCSS or DCS. Defaults to OFF.
CTCSS/DCS Enc -> Transmitter CTCSS or DCS. Defaults to OFF.
TX Power -> Transmit power. Defaults to HIGH.
W/N -> Wideband or Narrowband operation. Defaults to W for Wideband.
PTT-ID -> Enables and sets position of PTT-ID. Defaults to OFF.
BusyLock -> Busy Channel Lock-out. Defaults to OFF.
Scan_Add -> Add to scanner list. When enabled the channel is included in
scanning mode. Defaults to ON.
SigCode -> Signal Code, group ID for the channel. Defaults to 1.
CH-Name -> Channel name.
To add a new channel, go to the row for the channel number you want to edit and
follow these steps:
Procedure: Adding a Channel
1 .Click in the RX Frequency field and enter the receiving frequency.
2.Click on the TX Frequency field and the rest of the row should fill automatically
with default values (except for CH—Name, which will remain blank)
a.If adding a duplex channel, the transmit frequency can be directly entered here.
3. Add or edit any of the information for the channel as needed.
a.An optional 6-character channel name can be entered in the CH-Name field.
To finalize any programming, go to Program -> Write to Radio and then
click Write. If successful, the radio will start to flash green indicating that it is receiving
data. When all data has been sent from the computer, the radio will restart
itself.
35
3AOFENE
www.baofengradio.us http://www.baofengradio.us
www.foscam.us
Programming
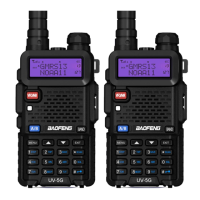
Radio to Radio Cloning
The Baofeng BF-F9V2+ is capable of cloning between radios. This means if there
is one radio configured in a certain manner, the settings can be cloned onto another
radio to ensure it is exactly the same. This is done by connecting a Reference (Master)
radio to a Copy (Slave) radio by hooking a cable between the two and copying the
information over.
Procedure: Cloning Radios
1.Attach the cloning cable to both the Reference and Copy radios by inserting the
adapters into each radio*s respective accessory cable ports.
2. Turn on the Copy radio (the radio that is being cloned to).
3. Turn on the Reference radio (the radio that is being cloned from) while holding
down the [MONI] button.
4. The Reference radio should show COPYING in the display, and if the connection
is successful, the LED will start flashing red to indicate data transfer. The Copy
radio,s LED should be flashing green at the same time to indicate that it is receiving
data.
5. When the LEDs on both radios turn off, the radios will restart, and the cloning
operation will be completed.
36