12. Convergence
Necessary tools
No tools.
How to converge
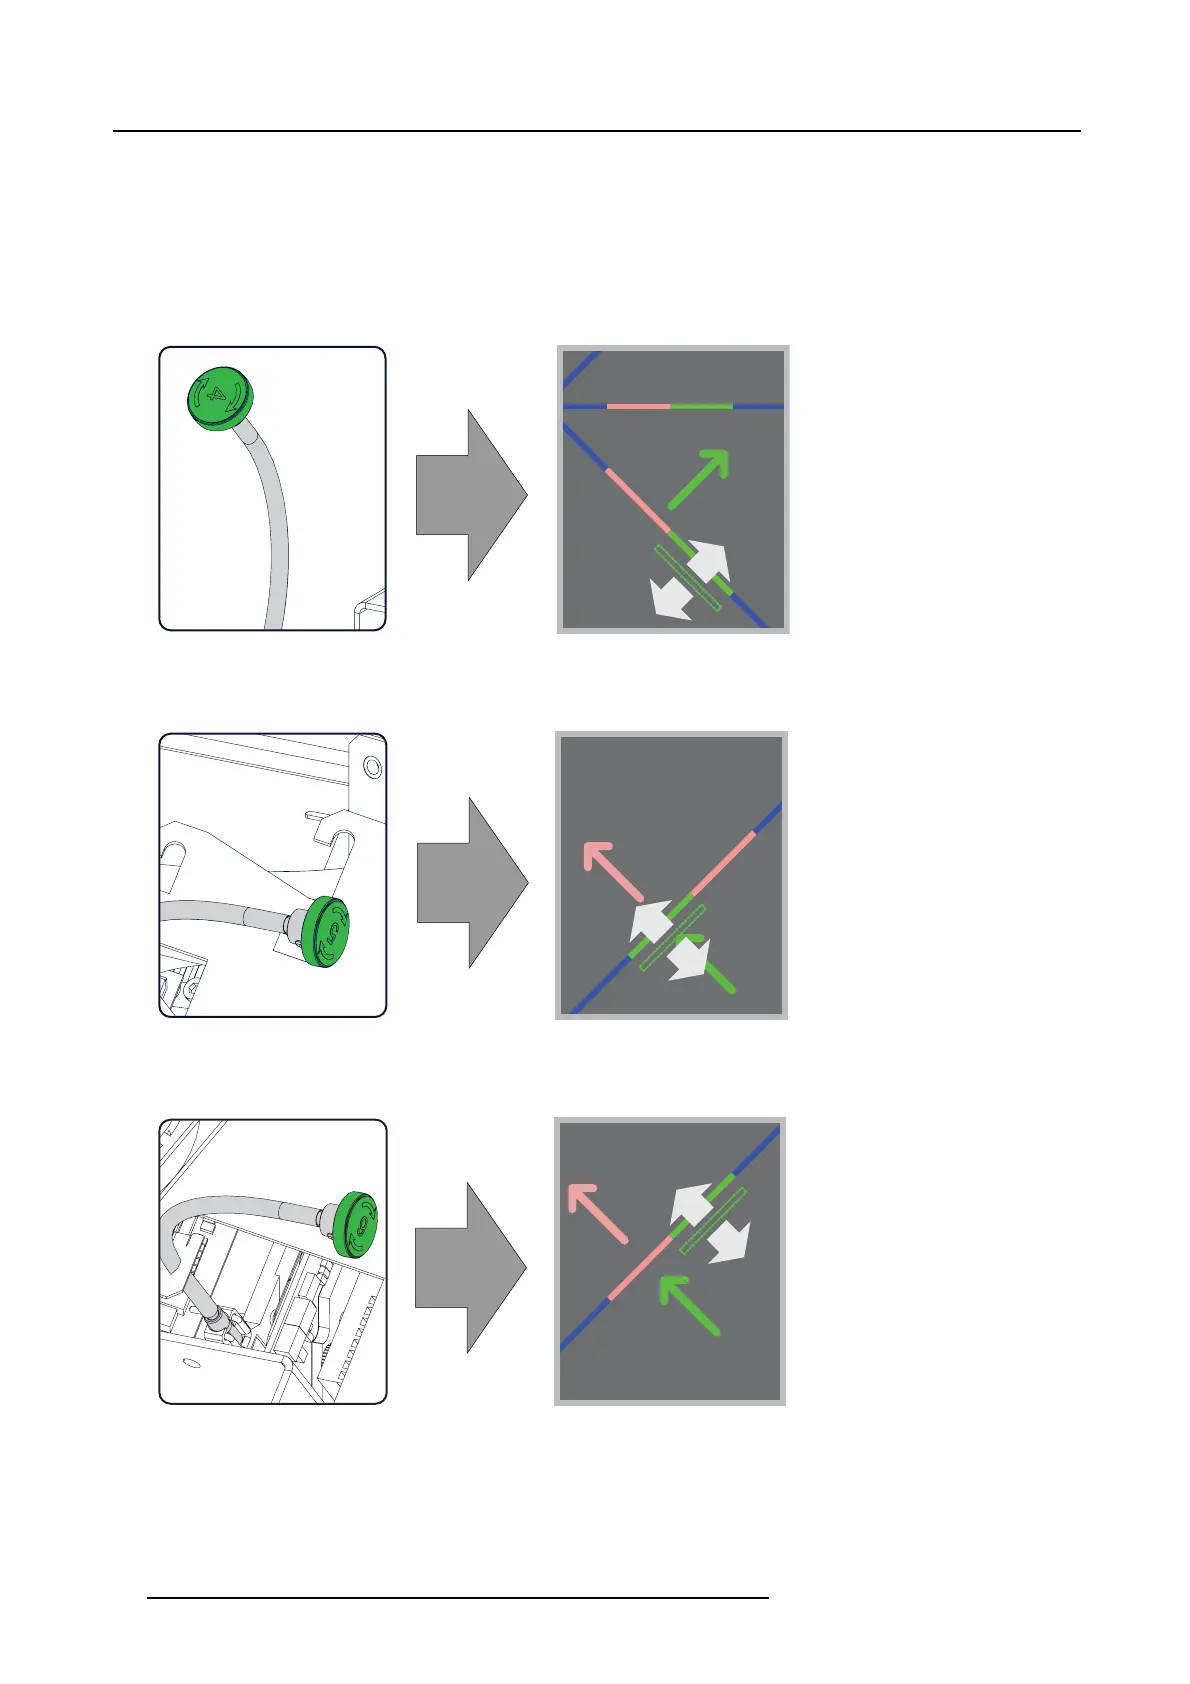
1. Slightly turn the gr een colored co ntrol knob number 4 until the green pattern in the center of the projected image converges with
the blue pattern. Note that a turn of a few degrees corresponds with one full pixel.
Note: When start turning the knob, a little res istance can be felt. This resistance is part of the internal locking mechanism of
the adjustment.
4
Image 12-9
Clockwise turning wi ll move the line downwards.
2. Slightly turn the green c olored control knob number 5 until the green pattern in the lower left of the projected im age converges
with the b lue pattern.
2
5
Image 12-10
Clockwise turning w ill move the line upwards.
3. Slightly turn the green colored control knob number 6 until the green pattern in the upper right of the projected image c onverges
with the b lue pattern.
3
6
Image 12-11
Clockwise turning w ill move the line upwards.
4. Repeat step 2 and step 3 until coincidence is obtained of the green pattern in the lower left and upper right of the projected image.
5. Repeat from step 1 until full c oincidence is obtained of the green pattern in the center, lower left and upper right of the projected
image.
6. Close the sealed compartment and reinstall a ll covers of the projector.
92
R5905050 DP2K C-SERIES 10/07/2012

 Loading...


