Service ManualLast Updated - 9/28/2016
495B SE (S)
50
COLLECTOR TROUBLE SHOOTING CONTINUED...
5. Walkthecleanornewthrustwasherdownthespoolfromsealgroovetoowgroove.Installthelowerdust
shield o-ring onto the spool.
6. Using new clean oil, lightly oil the back-up o-rings, seals, and the stretching mandrel.
7. Installonlytherstback-upo-ringontothespool(DONOTinstallalloftheback-upo-ringsatonce!).
8. Usingyourngertips,(notngernails)gentlyworktherstsealdownontothestretchingmandrelandallowat
least 5 minutes before removing.
9. Afterveminutesonthestretchingmandrel,removethestretchedseal.GentlyinserttheI.D.ofthesealintothe
1stsealgrooveandgentlywalkitintothenextsealgroove.Thengentlyworkthesealintothe1stowgroove
andrepeatfromowgroovetosealgrooveandsoonuntilyougetitinplaceovertherstback-upo-ringthat
you installed. Do not stop during this process because the stretched seal will want to go back to its original
shapemakingitmoredifculttoinstallwithoutdamage.
NOTE: If any seal appears to be damaged during installation, cut it off and start with a new one.
10. Once the seal is positioned over the back-up o-ring, gently place the loosened resizing clamp assembly over the
seal and SLOWLY tighten the clamp as you continually check that the seal is lined up with the groove. Tighten
untiltheclampisrmlyinplace.Theclampcanberemovedbythetimeyougetthenextback-upo-ringand
seal in place.
This seal assembly process is to be repeated until all of the back-up o-rings and seals are installed and resized.
DO NOT use hooks, picks, screwdrivers, etc. to stretch or locate the seals.
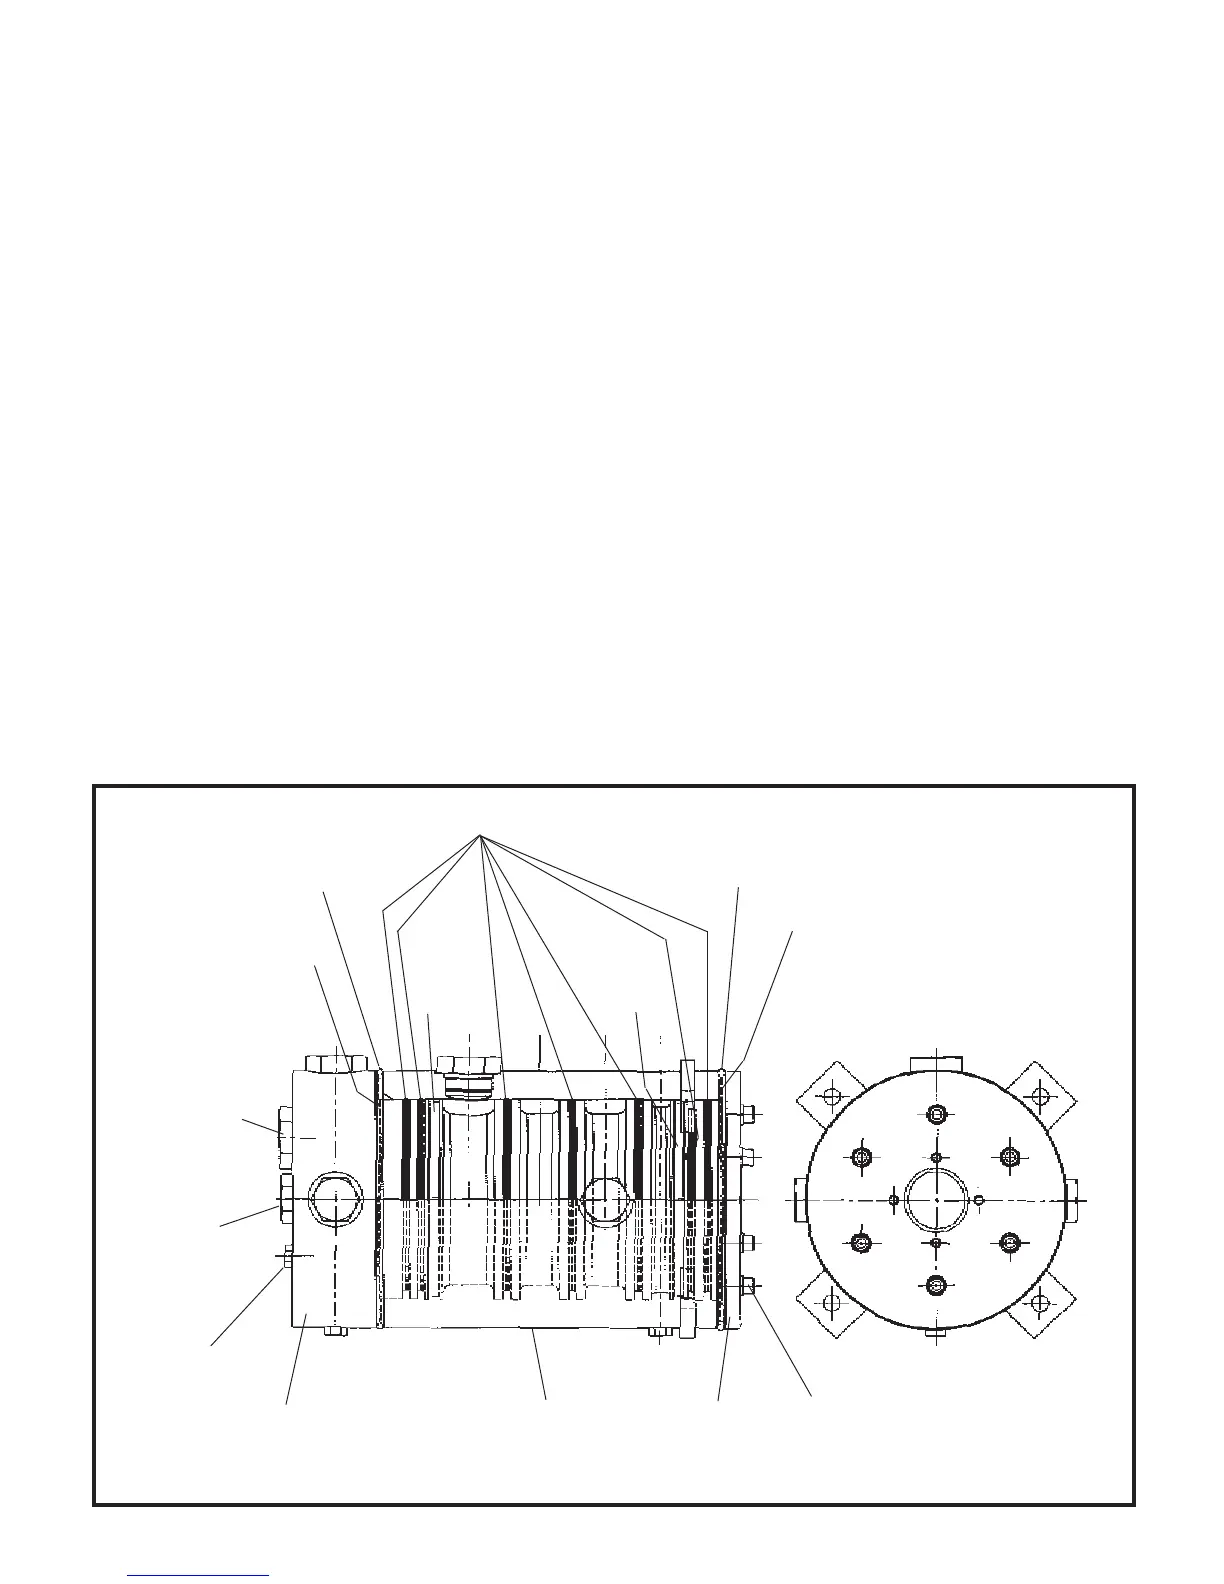
Figure 3
Housing
Cap Screws and
Lock Washers
Seals over Back-up
O-rings
Dust Shield O-ring
Spool
Retaining
Plate
Nylon Thrust Washer
PORT 1
PORT 2
(on left)
PORT 3
(on right)
PORT 4
1
2
3
4
1
2
3
4
3
4
1
Wear
Ring
Wear
Ring
Lower Nylon Thrust
Washer
Lower Dust Shield O-ring