Page 9For technical questions, please call 1-888-866-5797.70813
SAFETYOPERATIONMAINTENANCE SETUP
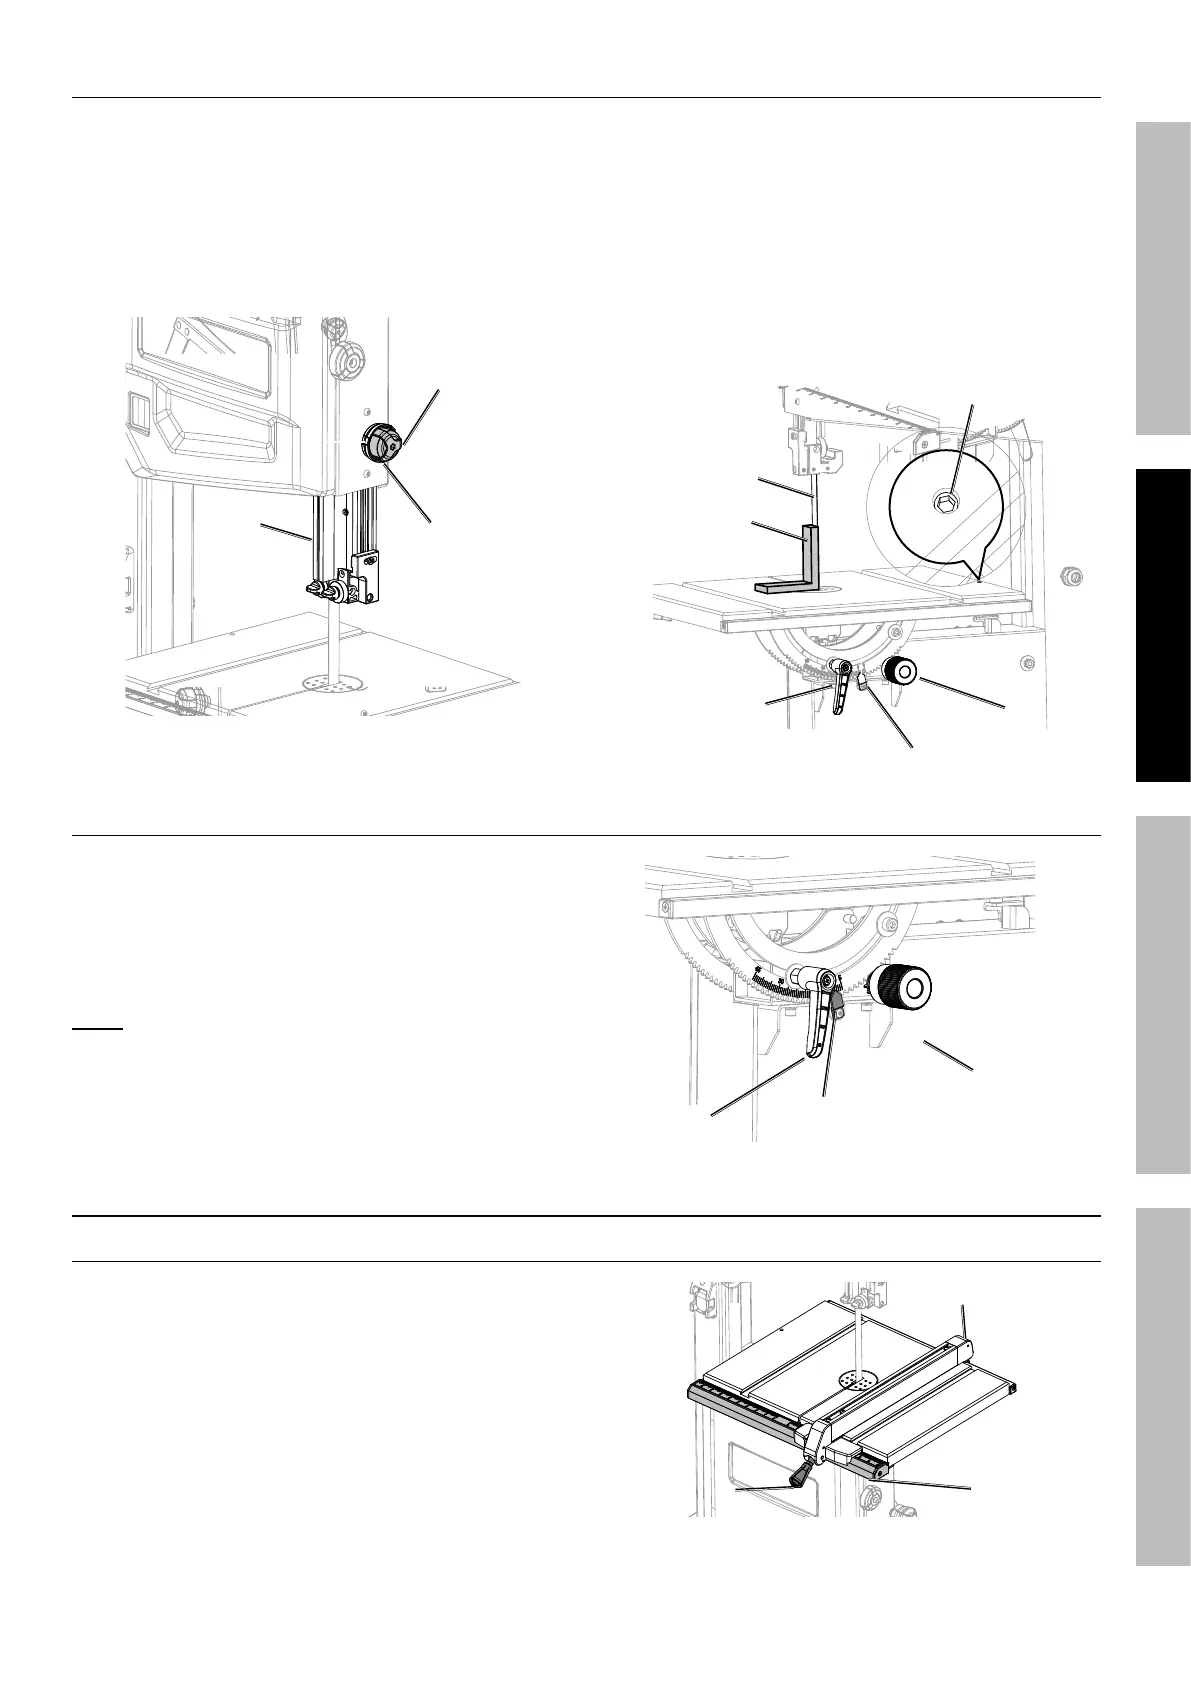
Squaring Work Table to Saw Blade
1. Turn Blade Guide Lock Knob
(inner) counterclockwise.
2. Turn Blade Guide Adjustment Knob
(outer) clockwise, while lifting Blade
Guide as far as it will go.
3. Turn Blade Guide Lock Handle clockwise.
Lock
Knob
Blade
Guide
Adjustment
Knob
4. Place a square (not included) on the Work Table
and flush against blade. Do not deflect blade.
5. Loosen Work Table Lock Handle and rotate Angle
Adjustment Handle to align 90° to square.
6. Tighten Work Table Lock Handle.
7. Turn Adjusting Bolt until Bolt touches Saw Housing.
8. Make sure Blade is square to Work Table.
9. Loosen Scale Indicator and align
with zero. Retighten Indicator.
Adjusting Bolt
Square (not
included)
Blade
Adjustment
Handle
Scale Indicator
Lock Handle
Work Table Tilt Adjustment
1. Turn Work Table Lock Handle counterclockwise.
2. Rotate Angle Adjustment Handle until Scale
Indicator reaches desired angle with Angle Scale.
3. Turn Work Table Lock Handle clockwise to tighten.
Note: Lock Handle is adjustable. Pull out on handle
and rotate to new position, then release handle.
Lock
Handle
Scale
Indicator
Adjustment
Handle
Additional Assembly
Rip Fence
1. Place Rip Fence onto Work Table and Guide Rail so
that Rip Fence Lock Lever is at front of Guide Rail.
2. Push down on Rip Fence Lock Lever.
Lock Lever Guide Rail
Rip Fence