36
13.0 Changing Components
© Baxi Heating UK Ltd 2017
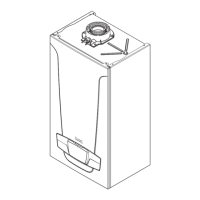
13.6 Flue Sensor (Fig. 54)
1. For ease of access remove the Expansion Vessel as
described in Section 13.22.
2. Ease the retaining tab on the sensor away and disconnect
the electrical plug.
3. Turn the sensor 90° anticlockwise to remove - it is a
bayonet connection.
4. Reassemble in reverse order.
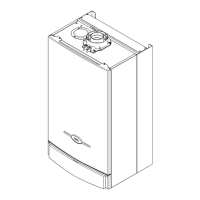
13.7 Heating Flow & Return Sensors (Fig. 55)
1. There is one sensor on the flow (red wires) and one
sensor on the return (blue wires). Note: For access to the
return sensor first remove the fan and air/gas collector (see
13.2).
2. After noting the position prise the sensor clip off the pipe
and disconnect the plug.
3. Connect the plug to the new sensor and ease the clip onto
the pipe as close to the heat exchanger as possible.
13.8 Safety Thermostat (Fig. 55)
1. Pull the plug off the safety thermostat.
2. Remove the screws securing the thermostat to the
mounting plate on the flow pipe.
3. Reassemble in reverse order, ensuring that the plug is
pushed fully on.
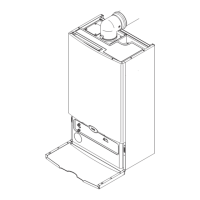
13.9 DHW NTC Sensor (Fig. 56)
1. Turn off the mains cold water supply tap and draw off the
residual domestic hot water.
2. Ease the retaining tab on the sensor away and disconnect
the electrical plug.
3. Remove the retaining clip and withdraw the sensor from
the hydraulic outlet assembly. Examine the ‘O’ ring, replacing
if necessary.
4. Reassemble in reverse order. The plug will only fit one way.
Flue Sensor
Electrical
Plug
Fig. 54
Heating Flow Sensor
Fig. 55
DHW NTC Sensor
Fig. 56
Retaining Clip
Control Box removed
for clarity
Safety Thermostat