EasyManua.ls Logo

Baxi LUNA DUO-TEC+ - ELECTRICAL CONNECTIONS AND WIRING DETAILS; Ensuring Electrical Safety Standards; Terminal Block M1 Wiring Specifications; Terminal Block M2 Accessory Wiring

Baxi LUNA DUO-TEC+
Print Icon
To Next Page IconTo Next Page
To Previous Page IconTo Previous Page
Loading...
7219620.01 (1-04/15) 32
INSTALLER Section (en)
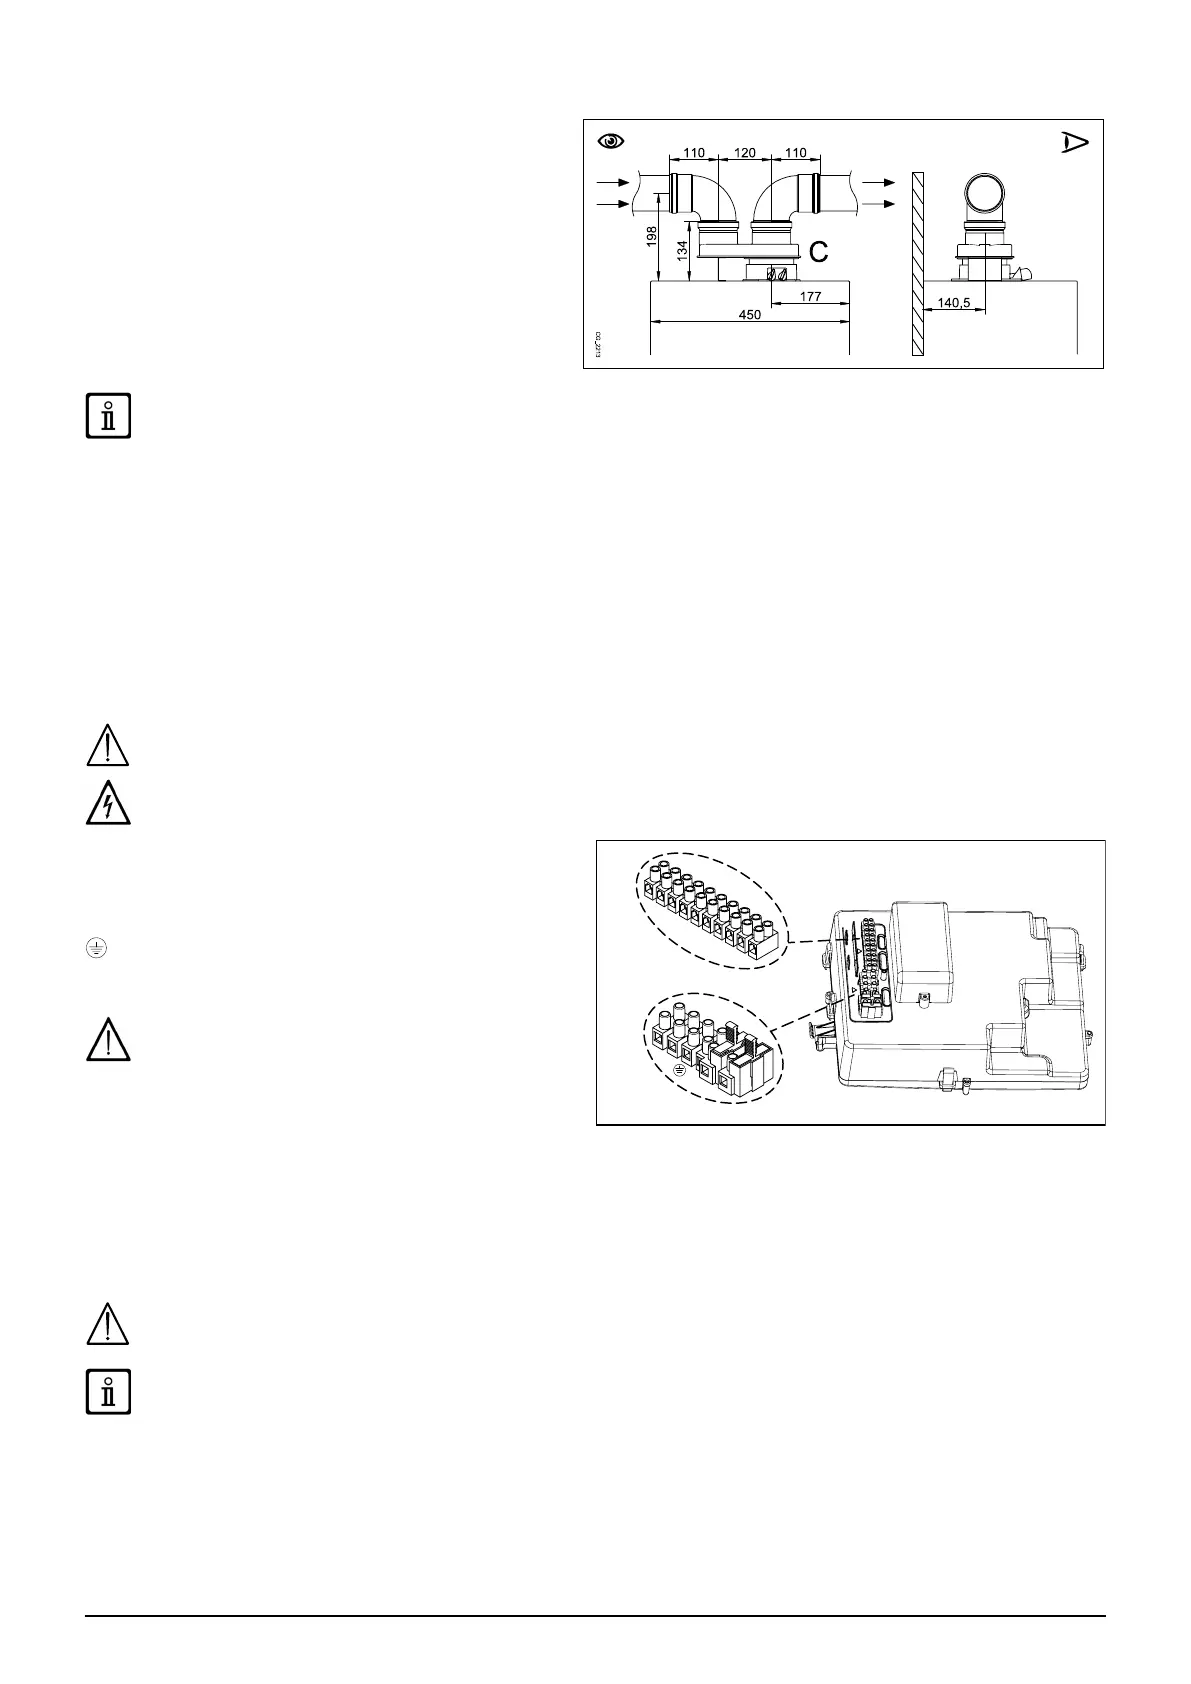
SINGLE SPLITTING KIT (ALTERNATIVE ACCESSORY)
For special installations of the fumes inlet/outlet ducts, the
single splitting kit (C      

        
it possible to discharge exhaust fumes both outside the
         





SOME OUTLET DUCT INSTALLATION EXAMPLES AND THEIR RELATIVE MAXIMUM LENGTHS ARE SHOWN IN ANNEX
"SECTION" D AT THE END OF THIS MANUAL.
11. ELECTRICAL CONNECTIONS



Use a double-pole switch with a contact separation of at least 3 mm.

2


and access terminal blocks M1, M2, M3, used for the electrical connections, after removing the protective cover. The 3.15 A fast-

SEE WIRING DIAGRAM IN ANNEX "SECTION" B AT THE END OF THIS MANUAL
Make sure that the overall rated power input of the accessories connected to the appliance is less than 2A. If it is higher, install
a relay between the accessories and the electronic board.
The connections in terminal blocks M1- M3 are high voltage (230 V). Before making connections, make sure the appliance is
disconnected from the power supply. Respect the input polarity on terminal block M1: L (LINE) - N (NEUTRAL).
TERMINAL BLOCK M1
(L)Live
(N)Neutral (light blue).
Earth
(1) (2)Room Thermostat.
Put back the jumper on terminals 1-2 of boiler terminal
block M1 if the room thermostat is not used or if the
Remote Control, supplied as an accessory, is not
installed.
TERMINAL BLOCK M2
Terminals 1 - 2:      

Terminals 4 - 5 (common):
Terminals 3-6-7-8: not used.
Terminals 9-10: storage boiler sensor connection.
If the appliance is connected to an underoor system, install a limit thermostat to prevent the latter from overheating.
Use the relative cable grommets at the bottom of the boiler to thread the cables through to the terminal blocks.





Table of Contents

Related product manuals