21 LM DRUM User Manual
50. MASTER
This control is used to set the volume for the master outputs and headphone
output.
MASTER
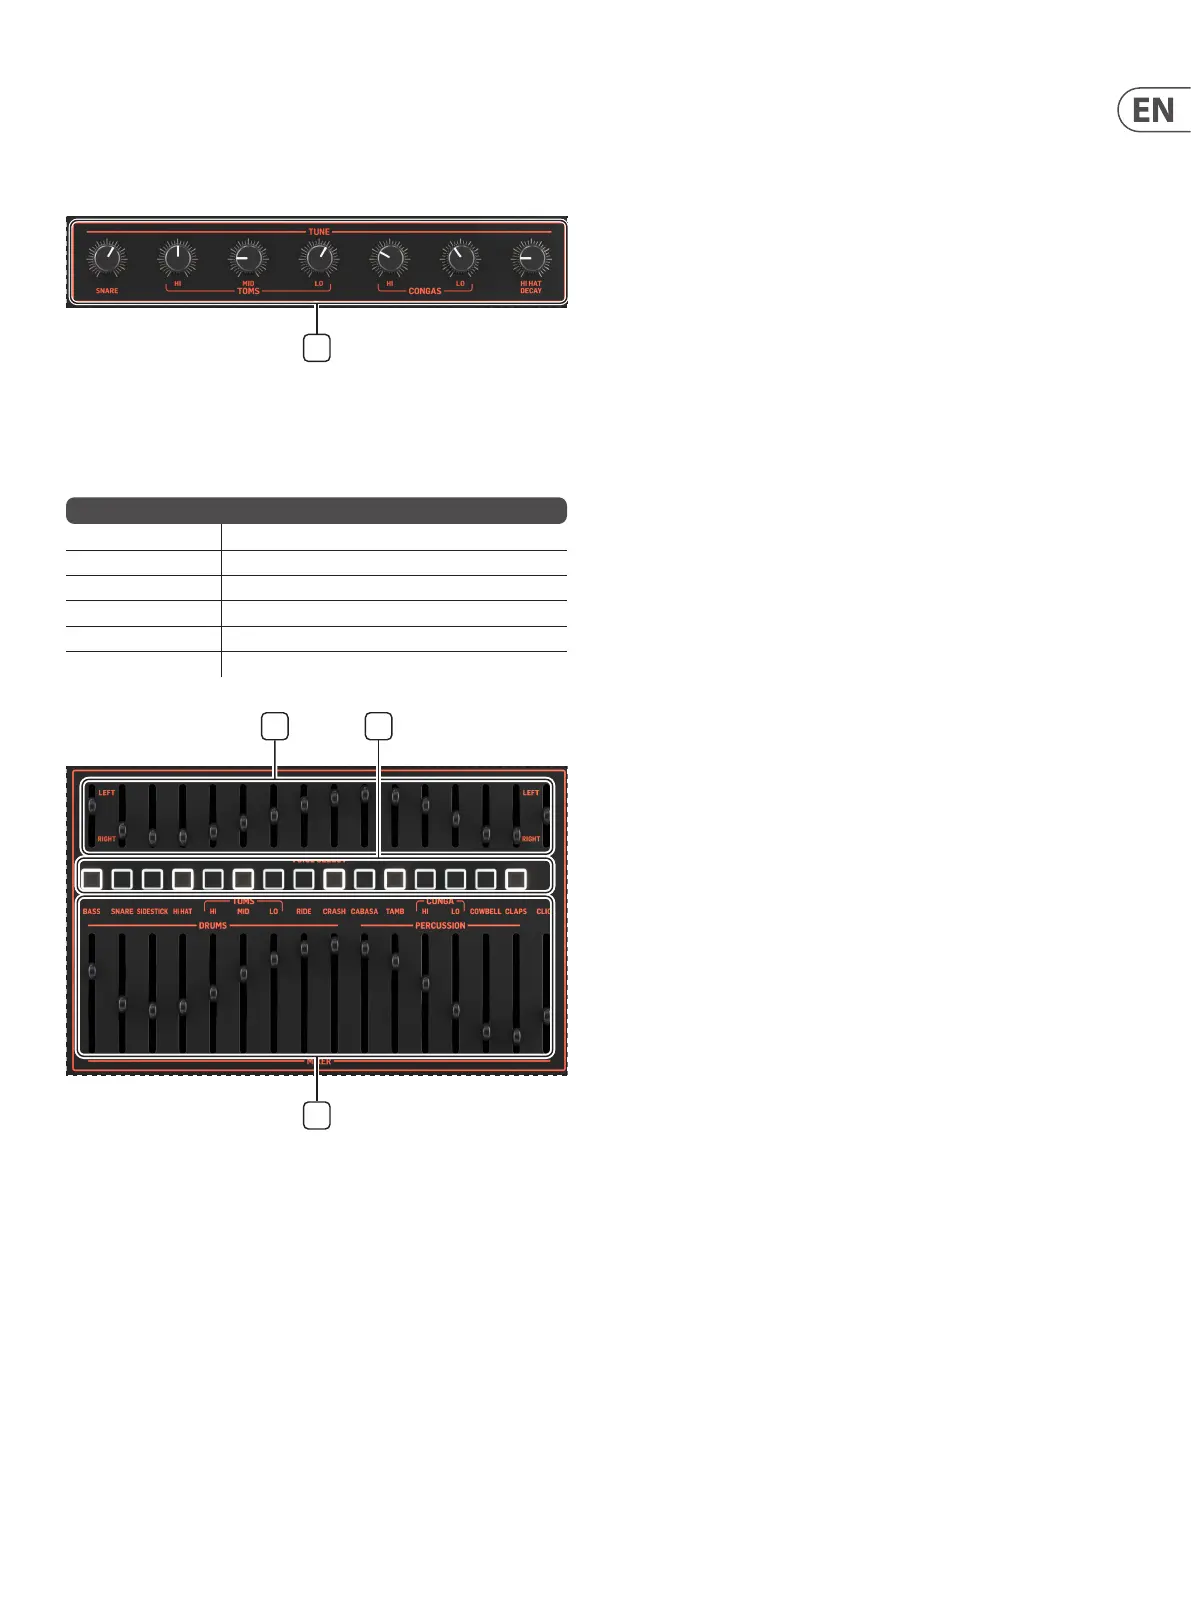
51. TUNE CONTROLS
These controls are used to tune the snares, toms and congas and set the hi-hat
decay. Apart from hi-hat decay this can also be achieved using the following MIDI
continuous controllers:
52. PAN CONTROLS
These controls are used to set the pan positions of the drums and metronome on
the master outputs. When the controls are at the lowest position the drums will
be panned hard right, at the top hard left.
53. VOICE SELECT
These buttons are used to select the required voice(s) for programming, muting,
soloing, wave designer and lter. They also light up following the drums when
the LM DRUM is being programmed or played with the pad buttons or an external
MIDI controller.
54. MIXER
These controls are used to set the level of the drums and metronome on the
master outputs. They do not aect the level of individual voice outputs. To
remove a drum from the main output reduce its level to zero.
REAR PANEL
55. MAIN OUTPUTS
Use these 6.35mm (¼") TS unbalanced jack sockets to access the main outputs
of the LM DRUM, with level set by the mixer (54) and panning by controls 52. If
a mono output is required use only the left output. Note that sounds panned to
the right will appear quieter than their mixed settings when the mono output
is used.
56. HEADPHONE OUTPUT
Use this 6.35mm (¼") TRS stereo jack sockets to monitor the LM DRUM’s output
using a suitable set of headphones.
57. REC INPUT
Use this 6.35mm (¼") TS unbalanced jack socket to sample sounds into the
LM DRUM’s sample memory. Normally this would be a line level input, but with
a higher gain setting a dynamic microphone can be used. Phantom power is
not available.
58. VOICE OUTS
Use these 3.5mm TS jack sockets to output individual voices. The level on these
sockets is unaected by the mixer (54).
59. TRIGGER OUTS
Use these 3.5mm TS jack sockets to access +5 v analog triggers, which can
be assigned to specied voices using the Trigger Assign menu or via the
SynthTribe app.
60. 60 – SYNC IN
Use this 3.5mm TS jack socket to synchronize the LM DRUM to an external analog
sync source.
61. SYNC OUT
Use this 3.5mm TS jack socket to synchronize external analog devices to the
LM DRUM’s internal clock.
62. MIDI IN
Use this 5-pin DIN socket to control the LM DRUM over MIDI.
63. MIDI OUT
Use this 5-pin DIN socket to control external MIDI devices from the LM DRUM’s
MIDI output.
64. MIDI THRU
Use this 5-pin DIN socket to mirror the MIDI In for use by external devices.
65. USB
Use this USB 2.0 Type B socket to control the LM DRUM over MIDI, to use the
LM DRUM’s MIDI output to control external devices, and to access functions and
update rmware using the SynthTribe app.
66. POWER SOCKET
Use this socket to connect the LM DRUM to its 12 V 2000 mA PSU. Only use the
supplied PSU to avoid damaging the LM DRUM.
67. POWER SWITCH
51
CC Number Action
75 Snare Tuning
76 Hi Tom Tuning
77 Mid Tom Tuning
78 Lo Tom Tuning
79 Hi Conga Tuning
80 Lo Conga Tuning
54