Autostacker™ Parking Lift 58 P/N 5900002 — Rev. D — August 2019
Installing the Return Line
As previously mentioned, the Return Line takes extra Hydraulic Fluid from the Hydraulic Cylinders and
returns it to the Power Unit’s Reservoir; refer to Connect the Return Lines for more information.
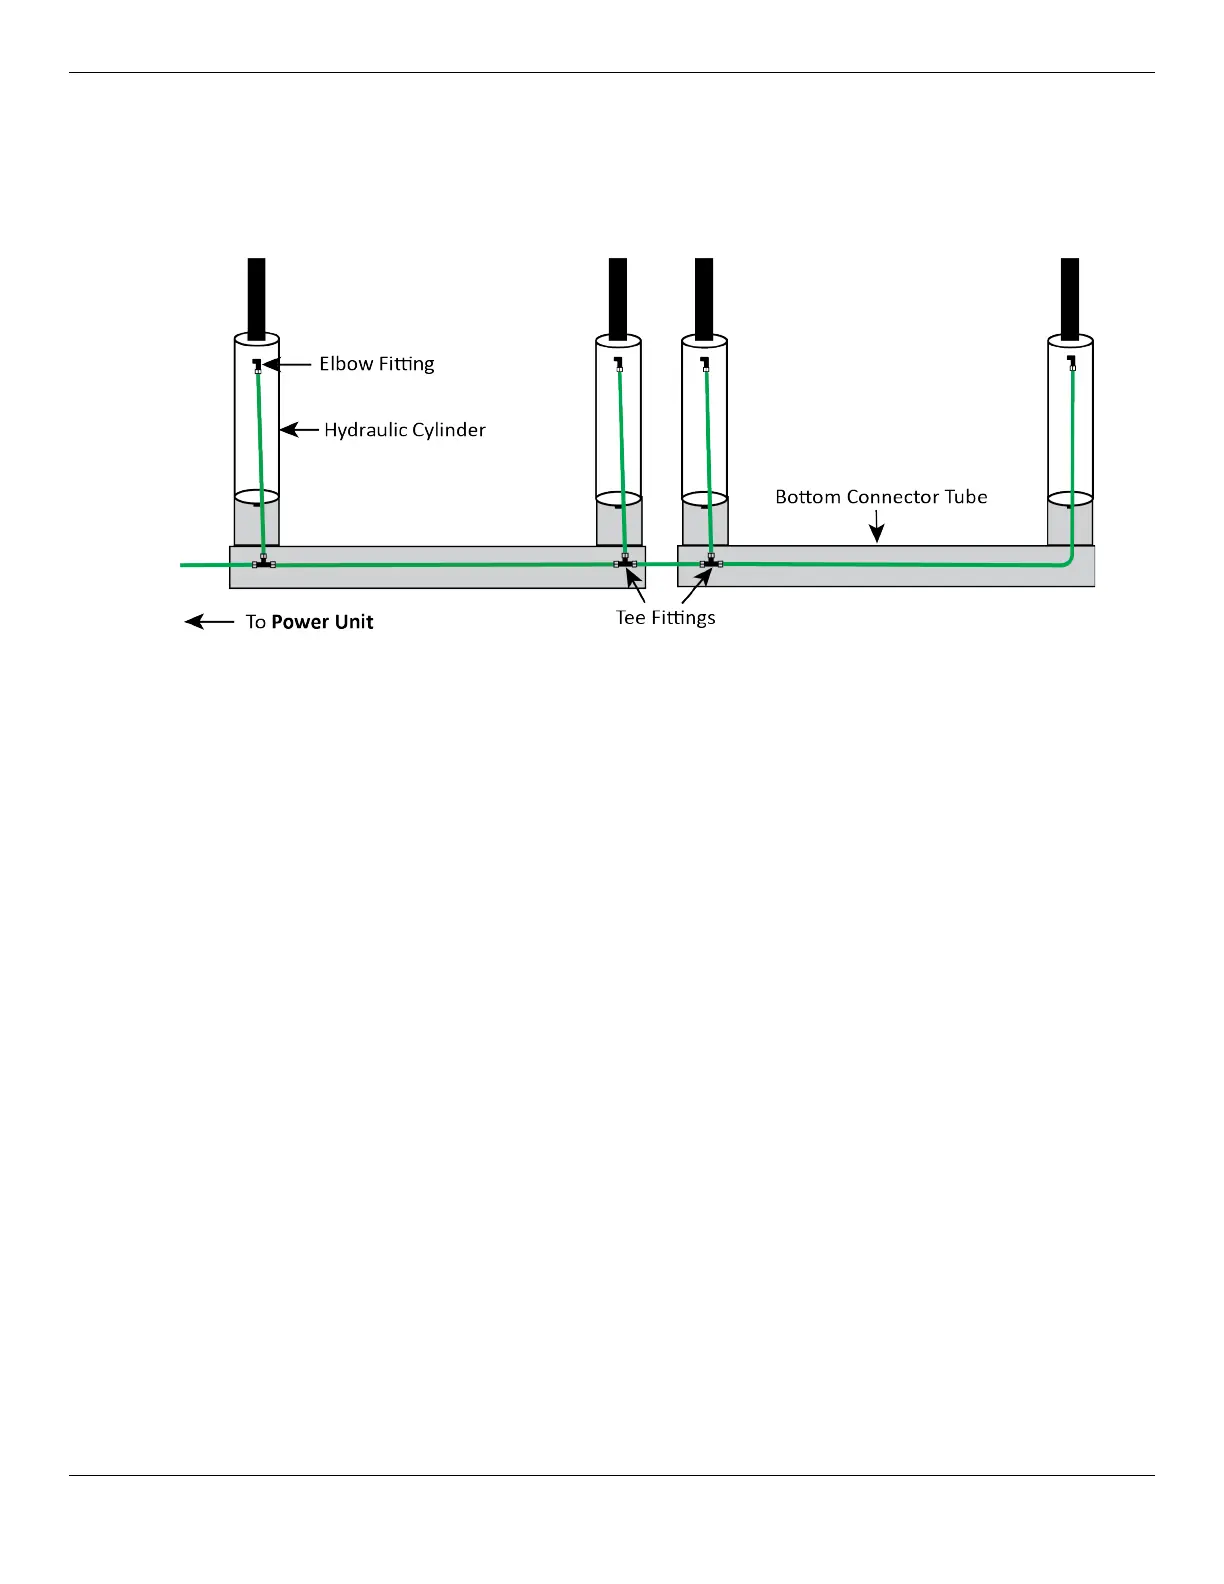
The following drawing shows how to connect the Return Lines between two Autostackers.
Not to scale. Not all components shown. Drawing shows Bottom Connector Tube open for clarity.
To install the Return Lines:
1. Attach an Elbow Fitting (-04 COMP x -06 NPT) to the Return Line Port on the Power Unit.
See Connecting the Master Power Unit for more about Connector locations.
2. Attach an Elbow Fitting (-04 COMP x -06 NPT) near the top of each Hydraulic Cylinder.
3. Place a Tee Fitting (-04 COMP x -04 COMP x -04 COMP) near the bottom of each Cylinder.
The Hydraulic Cylinder furthest from the Power Unit (on the last Lift) does not need a Tee Fitting, as
shown above.
4. Find the Return Line Tubing and measure the lengths of the segments you need, then cut the
appropriate lengths.
5. Connect the various pieces of Tubing to the Elbow Fittings and Tee Fittings on each Lift in your
setup, as shown in the drawing above.
See Working with Return Lines and Compression Fittings for more information.
6. If there are no further Lifts to connect to, connect a final Return Line to the top of the last Hydraulic
Cylinder, then connect the other end to the Tee Fitting on the first Hydraulic Cylinder (on the same
Lift).
Make sure the final segment is long enough to reach from the Tee Fitting, through the Bottom
Connector Tube, and to the top of the last Hydraulic Cylinder.