HDS-14LSX / HDS-14LSXE Lifts 39 P/N 5900162 — April 2018 — Rev. F3
To route Cable B to the Rear Offside Post:
1. Find Cable B, unscrew the Nut from the Threaded end, slip the Button end past the Retaining
Plate and into its slot on the Tie Plate (note that Cable B mounts on the other side of the Tie Plate),
then route the Threaded end of the Cable towards the Rear of the Lift.
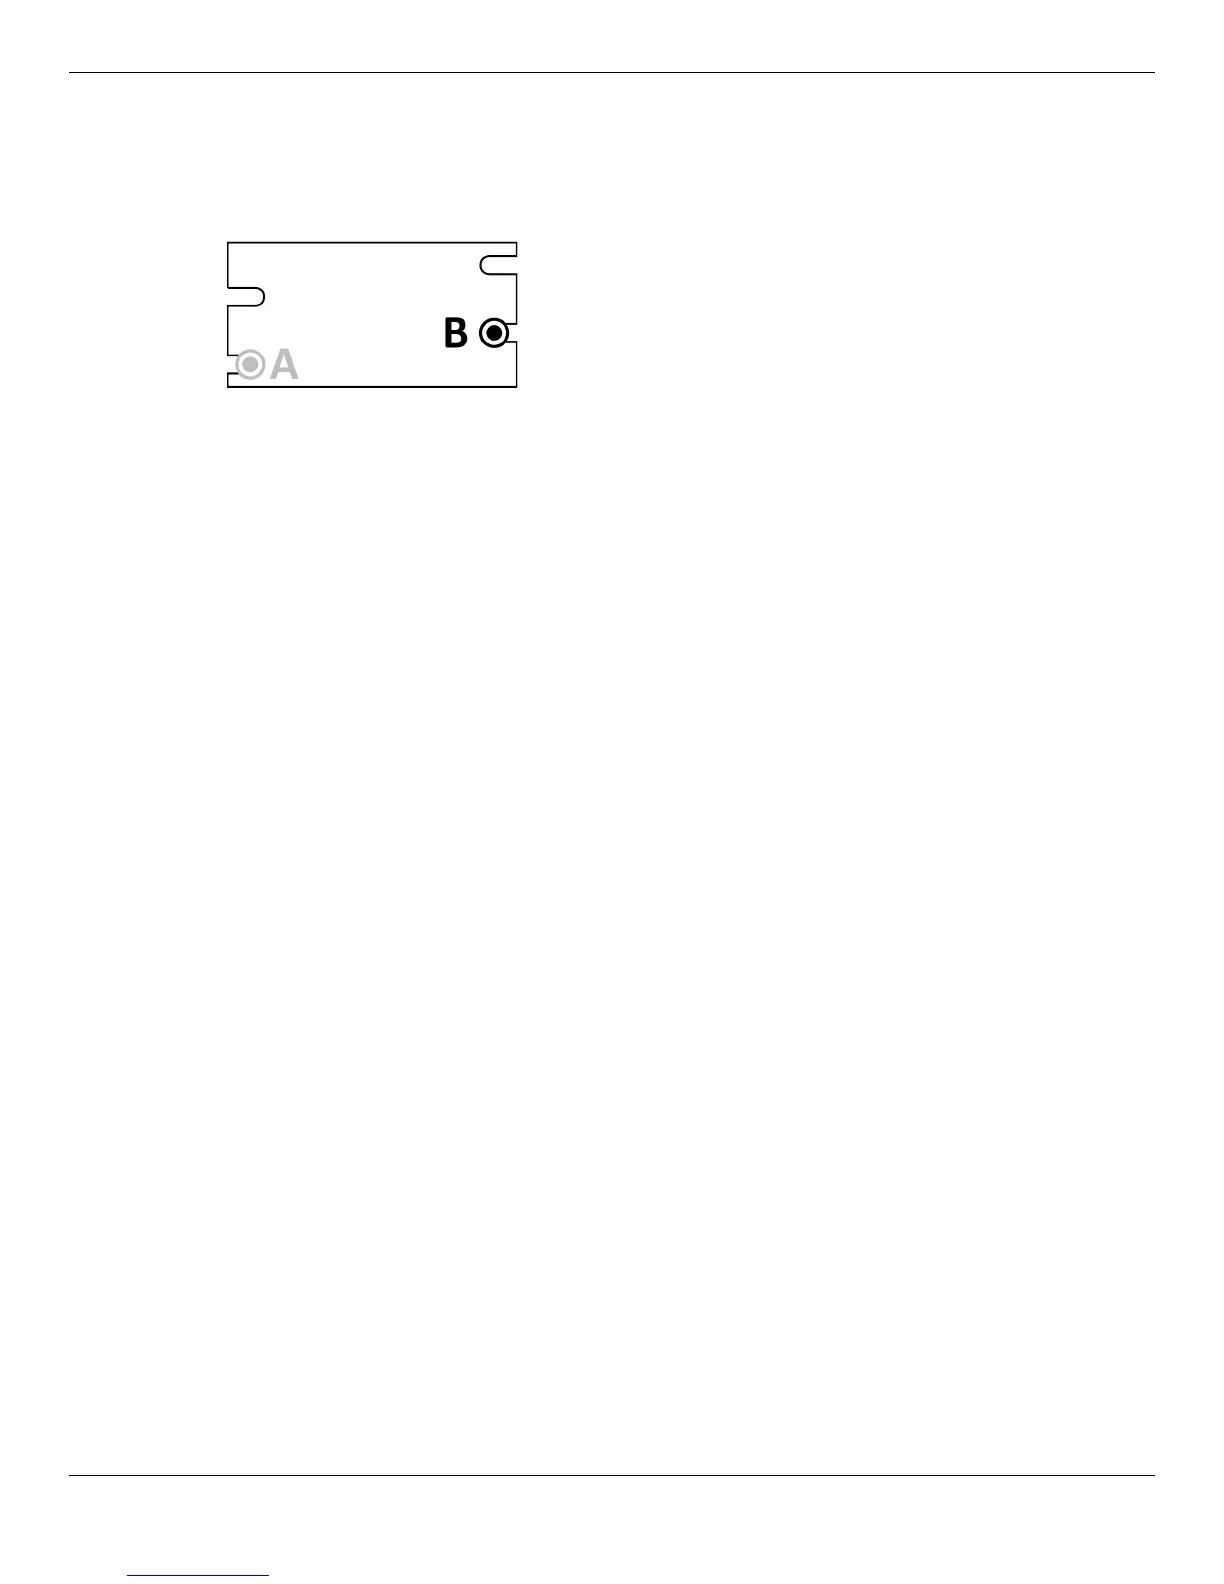
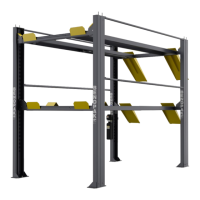
Drawing shows Button end of Cable B in its slot on the
Tie Plate.
View is from Front of Lift looking back towards the
Power Post. Not to scale. Not all components shown.
2. Route the Cable into the Window on the Crosstube, push it toward the Rear Offside Post, then pull
the Threaded end out of the Crosstube at the bottom of the Gusset. Let the Threaded end hang
out of the Crosstube for now.
3. Put Rear Sheave B in place, on top of Rear Sheave A, then make sure Cable B is seated in Rear
Sheave B.
4. Remove the Cable Lock Pin on the bottom of the Gusset on the Rear Offside Post.
Keep it handy; you will be putting it back in place soon.
5. Route the Threaded end of Cable B
under
the Gusset Sheave, then up towards the Top Cap at
the top of the Rear Offside Post.
When you start routing the Cable up, it
must
be between the Gusset Sheave and the Slack Safety
Sheave.
Important: When routing a Cable in its Post, the Cable must go
under
the Gusset Sheave and
then, when it heads up towards the top of the Post, it must be on the side of the
Slack Safety Sheave. If the Cable is
not in this exact location
, the Slack
Safeties will
not
work correctly.
6. Push the Threaded end of Cable B through the Top Cap and
hand tighten
it in place with the
Nut you removed just before routing the Cable.
You only want to hand tighten the Nut at this point so that there is a little play in the cabling. We
will securely tighten all four Nuts later in the installation procedure.
Note: The Threaded end of Cable B should go just a little bit through the Top Cap. If it is way
too long or way too short, you probably have the wrong Cable.
7. Reinstall the Cable Lock Pin near the bottom of the Crosstube Gusset.
Cable B is now correctly routed to the Rear Offside Post.
Important: The two Sheaves at the Front of the Lift are called Front Sheave C and Front Sheave
D. There is no Front Sheave A or Front Sheave B. The C and D in the names of Front
Sheave C and Front Sheave D refer to the Cables that go around them.