HDS-14LSX / HDS-14LSXE Lifts 56 P/N 5900162 — April 2018 — Rev. F3
Installing Accessories
The accessories available for your Lift include:
• Tire Stops. Installed at the Front of the Lift. Hold the front Tires of the vehicle in position.
BendPak recommends chocking the rear Tires, so that the vehicle stays in place.
• Ramps. Installed at the Rear of the Lift. Allow vehicles to be easily driven onto the Runways.
• Alignment Turn Plates. Installed at the Front of the Runways. Used for alignments.
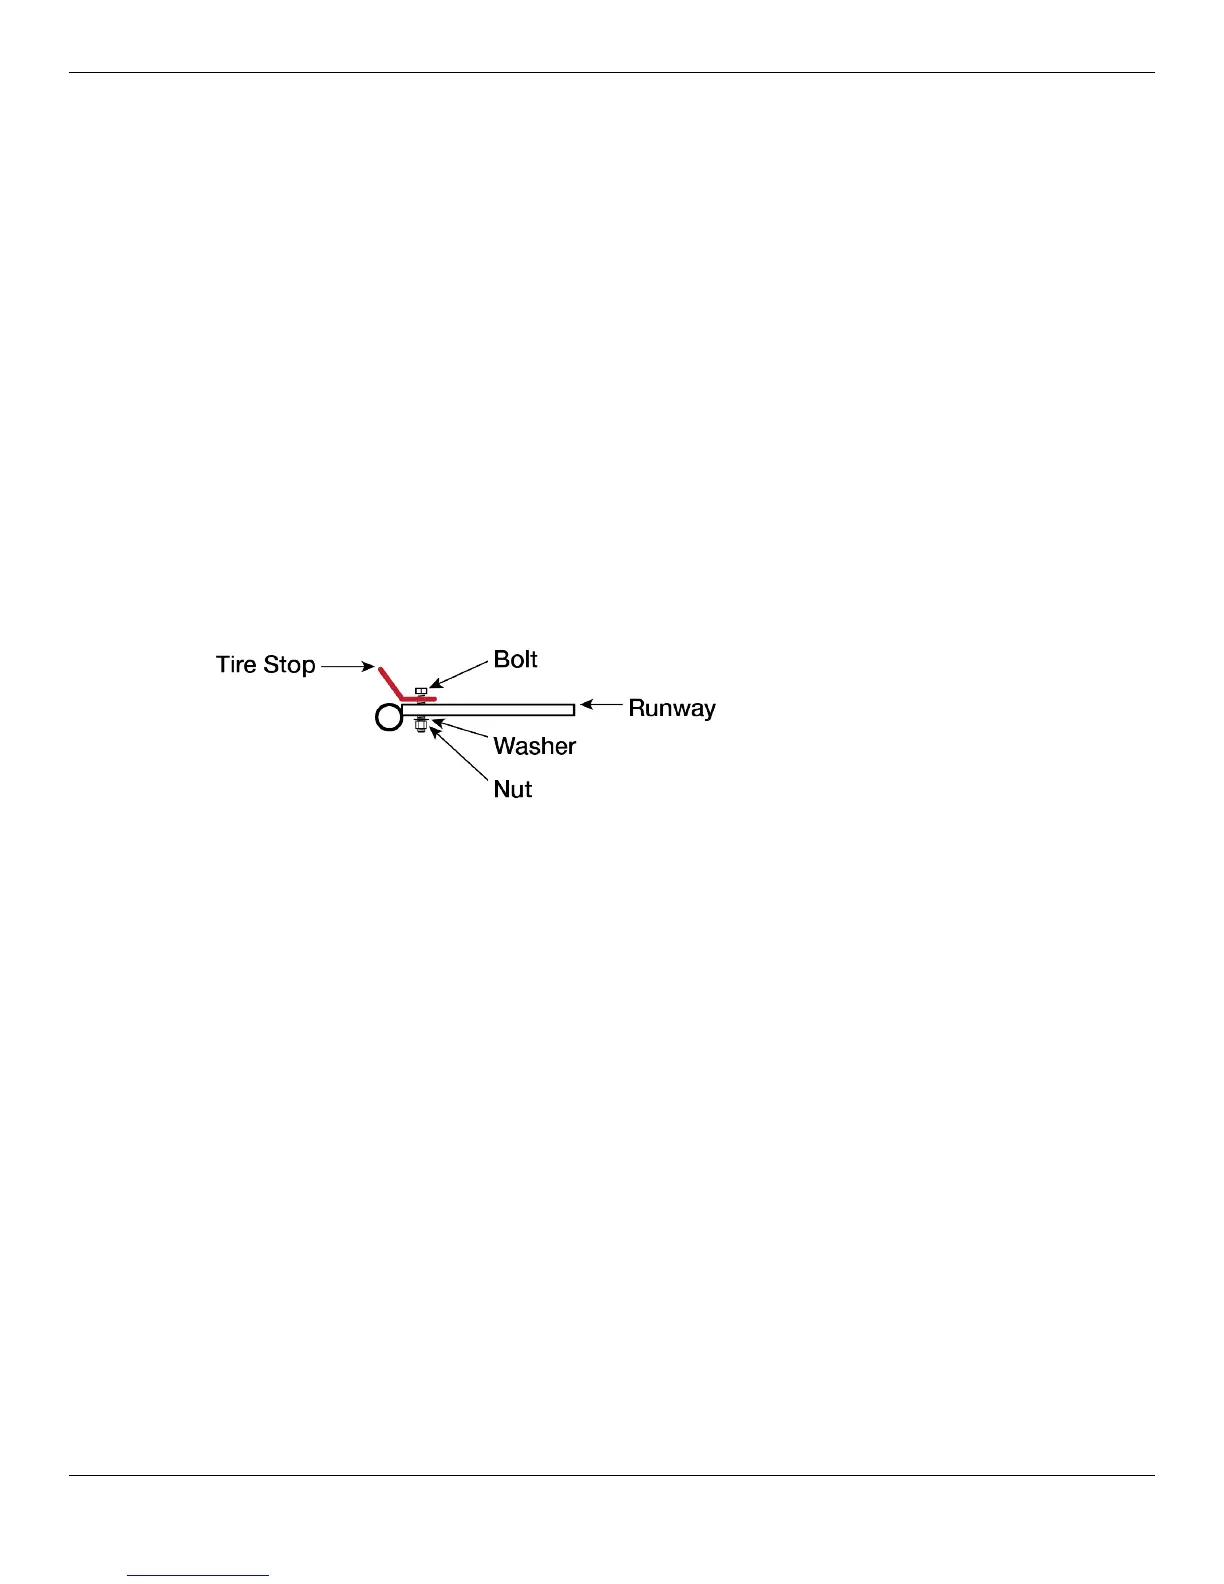
Tire Stops
Tire Stops are bolted onto the Front of the Lift. They prevent the tires of the vehicle on the Lift from
going too far forward.
To install the Tire Stops:
1. Locate the four M14 by 2 by 40L Hex Head Bolts, Washers, and Nuts that you will need (two sets
per Tire Stop).
2. Put one Tire Stop in position over the holes in the Runway, put the Bolt through the Tire Stop and
the holes in the Runway, then secure the Tire Stop with the Washer and Nut on the underside of
the Runway.
Note: Make sure to orient the Tire Stop so that it is sloping away from the Runways. This
creates an angle best suited to holding the Tire in place.
3. Repeat Steps 1 and 2 for the second Tire Stop.
Ramps
Your Lift comes with two Ramps, which are installed onto the Rear of the Lift so that vehicles can drive
onto the Runways.
To install the Ramps:
1. Find the required components: two Ramps, two Ramp Pins, and four 18 mm Rotor Clips.
2. Put a Ramp into position on the end of a Runway at the Rear of the Lift, with the tube on the
bottom of the Ramp between the two tubes on the end of the Runway.
3. Slide a Ramp Pin through the three tubes, then install Rotor Clips on both ends of the Ramp Pin.
Note: The Ramps are awkward, so you may want to consider having two people install them;
one to hold the Ramp, the other to put the components into place.
4. Repeat Steps 2 and 3 for the other Ramp.