June 2004 9507EM/5
2-33
2 to 9 Tonne Dumper Instruction Manual
Maintenance
Clutch Replacment - Models 2 and 3 Tonne
Straight and Swing Skips
Before carrying out the following procedure it is advisable to
thoroughly clean the machine.
z Remove the gearbox, see Gearbox Section.
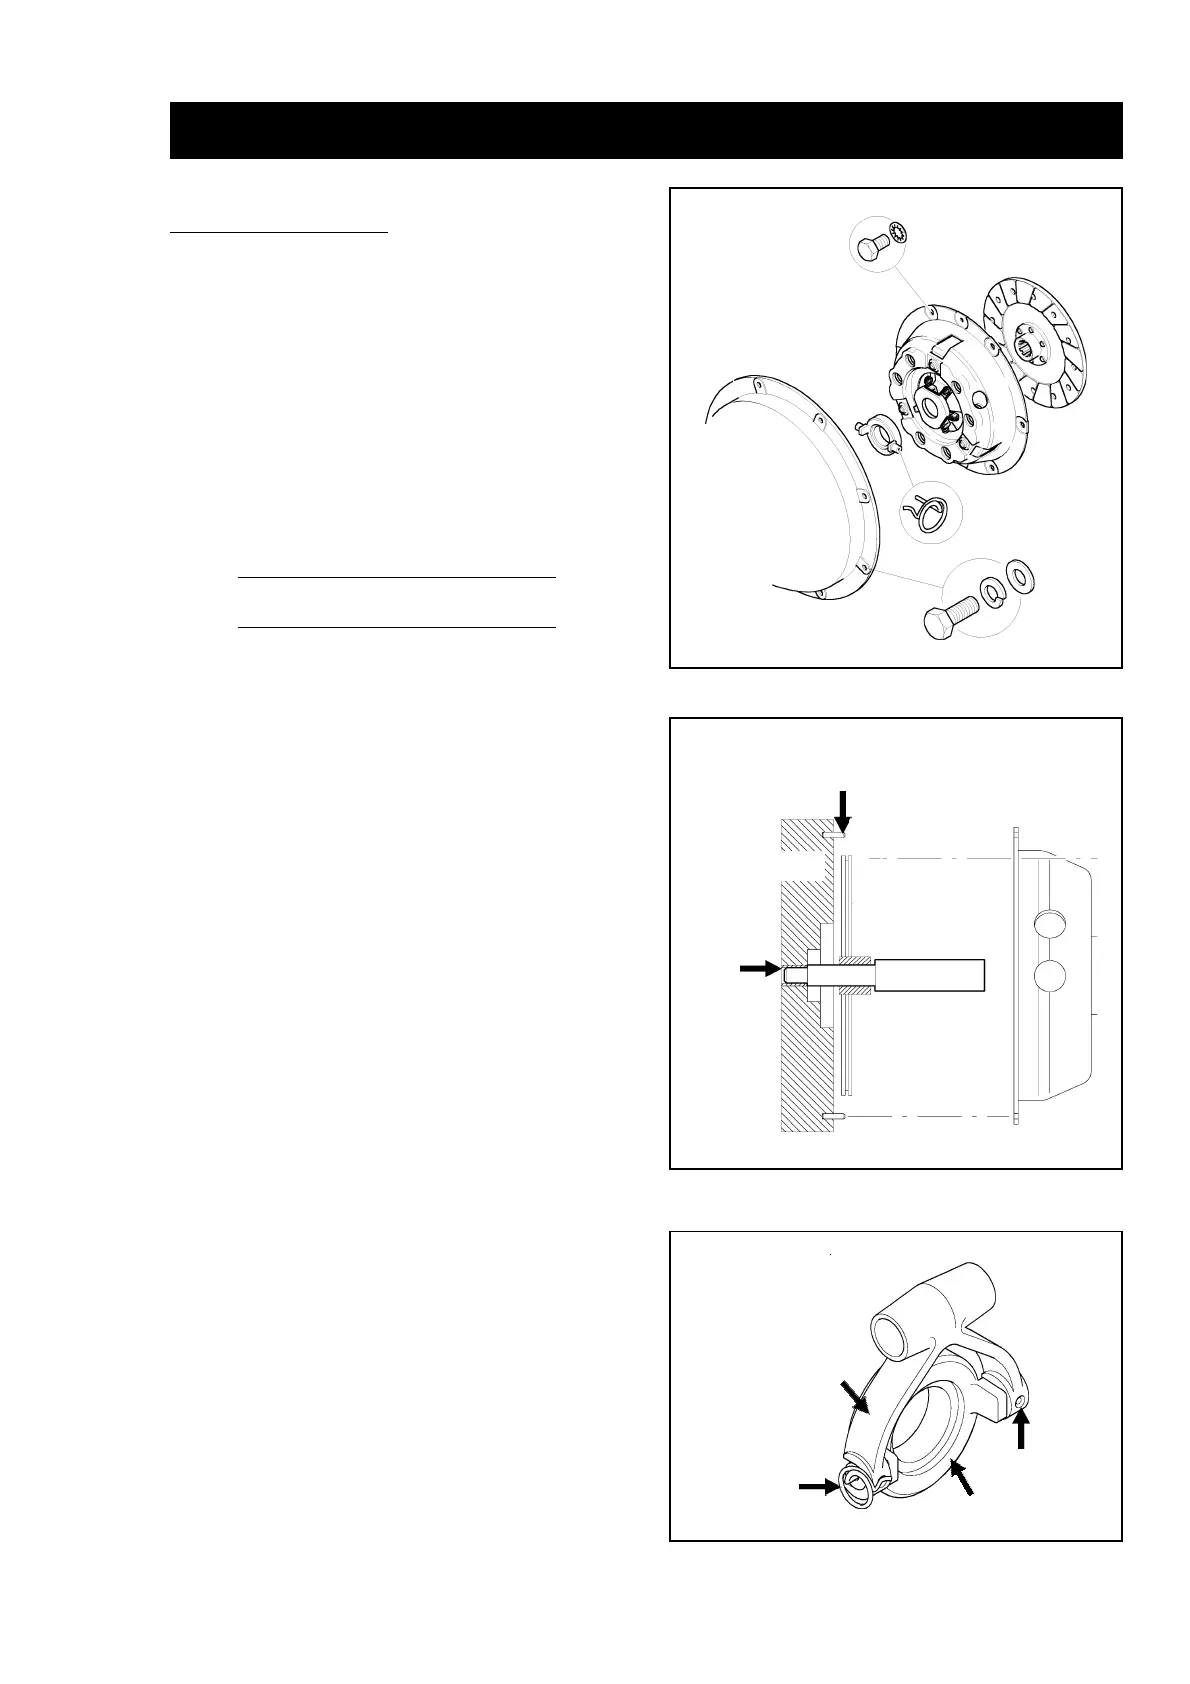
z Slacken the six setscrews around the clutch cover. Once the
setscrews have been loosened undo them in a diagonally
opposite sequence, two turns at a time until the clutch cover
is loose.
z Remove all the setscrews, the clutch cover and the clutch
plate.
z Check for oil leaks from the rear of the engine and from
inside the clutch bell housing. If there are leaks they must
be rectified before fitting a new clutch assembly.
ALL Worn Components MUST be Replaced
z It is advisable to renew the Clutch Plate, Cover and Release
Bearing when servicing clutch.
z Clean and check the engine flywheel fitted to the engine
crankshaft, and check the primary shaft spigot bearing for
wear - replace as necessary.
When replacing the spigot bearing, care must be taken to
use the correct size drift or damage to the bearing may occur
preventing the aligning tool from entering the bearing. The
outside bearing face must be level with the face of the mating
flywheel.
If problems, other than wear, have been experienced with
the clutch the engine flywheel should be checked for run out
using a dial gauge. The crankshaft endfloat should also be
checked using a dial gauge. These procedures are beyond
the scope of this manual and reference should be made to
the engine manufacturers workshop manual.
z Place a clutch alignment tool through the new clutch plate,
ensuring the plate is the correct way round - Flywheel Side
is stamped on the metal just below the clutch lining, and fit
the alignment tool into the spigot bearing.
z Clean the contact face of the new clutch cover with petrol to
remove all traces of grease.
z Place the clutch cover over the alignment tool and position
on the two dowels.
z Hold in position using six new setscrews and washers. Screw
in until resistance is felt.
z Tighten the setscrews in a diagonally opposite sequence, two
turns at a time until the setscrews are tight.
z Use a torque wrench to finally tighten the setscrews to 23.5
Nm. (17 lbs/ft.)
z Renew the release bearing, if necessary. Ensure the locking
spring is located correctly in the indent on the operating fork.
z Refit the gearbox, see Gearbox Section.
Gearbox
Release
Bearing
Clutch Cover
Clutch plate
Release
Bearing
Fixing Spring
Spigot
Bearing
Clutch Cover
Alignment Dowels
Clutch
Plate
Clutch Aligning
Tool
Engine Flywheel
Clutch
Cover
Fork
Release Bearing
Locking
Spring
Indent