22 Operation
Using the menus
The projector is equipped with 2 types of On-Screen Display (OSD) menus for making various
adjustments and settings.
• Basic OSD menu: provides primary menu functions. (See Basic menu on page 27)
• Advanced OSD menu: provides full menu functions. (See Advanced menu on page 29)
To access Basic OSD menu, press MENU on the projector or remote control.
• Use the arrow keys ( / / / ) on the projector or remote control to move through the menu items.
• Use OK on the projector or remote control to confirm the selected menu items.
• Use the arrow keys ( / ) on the projector or remote control to make adjustments.
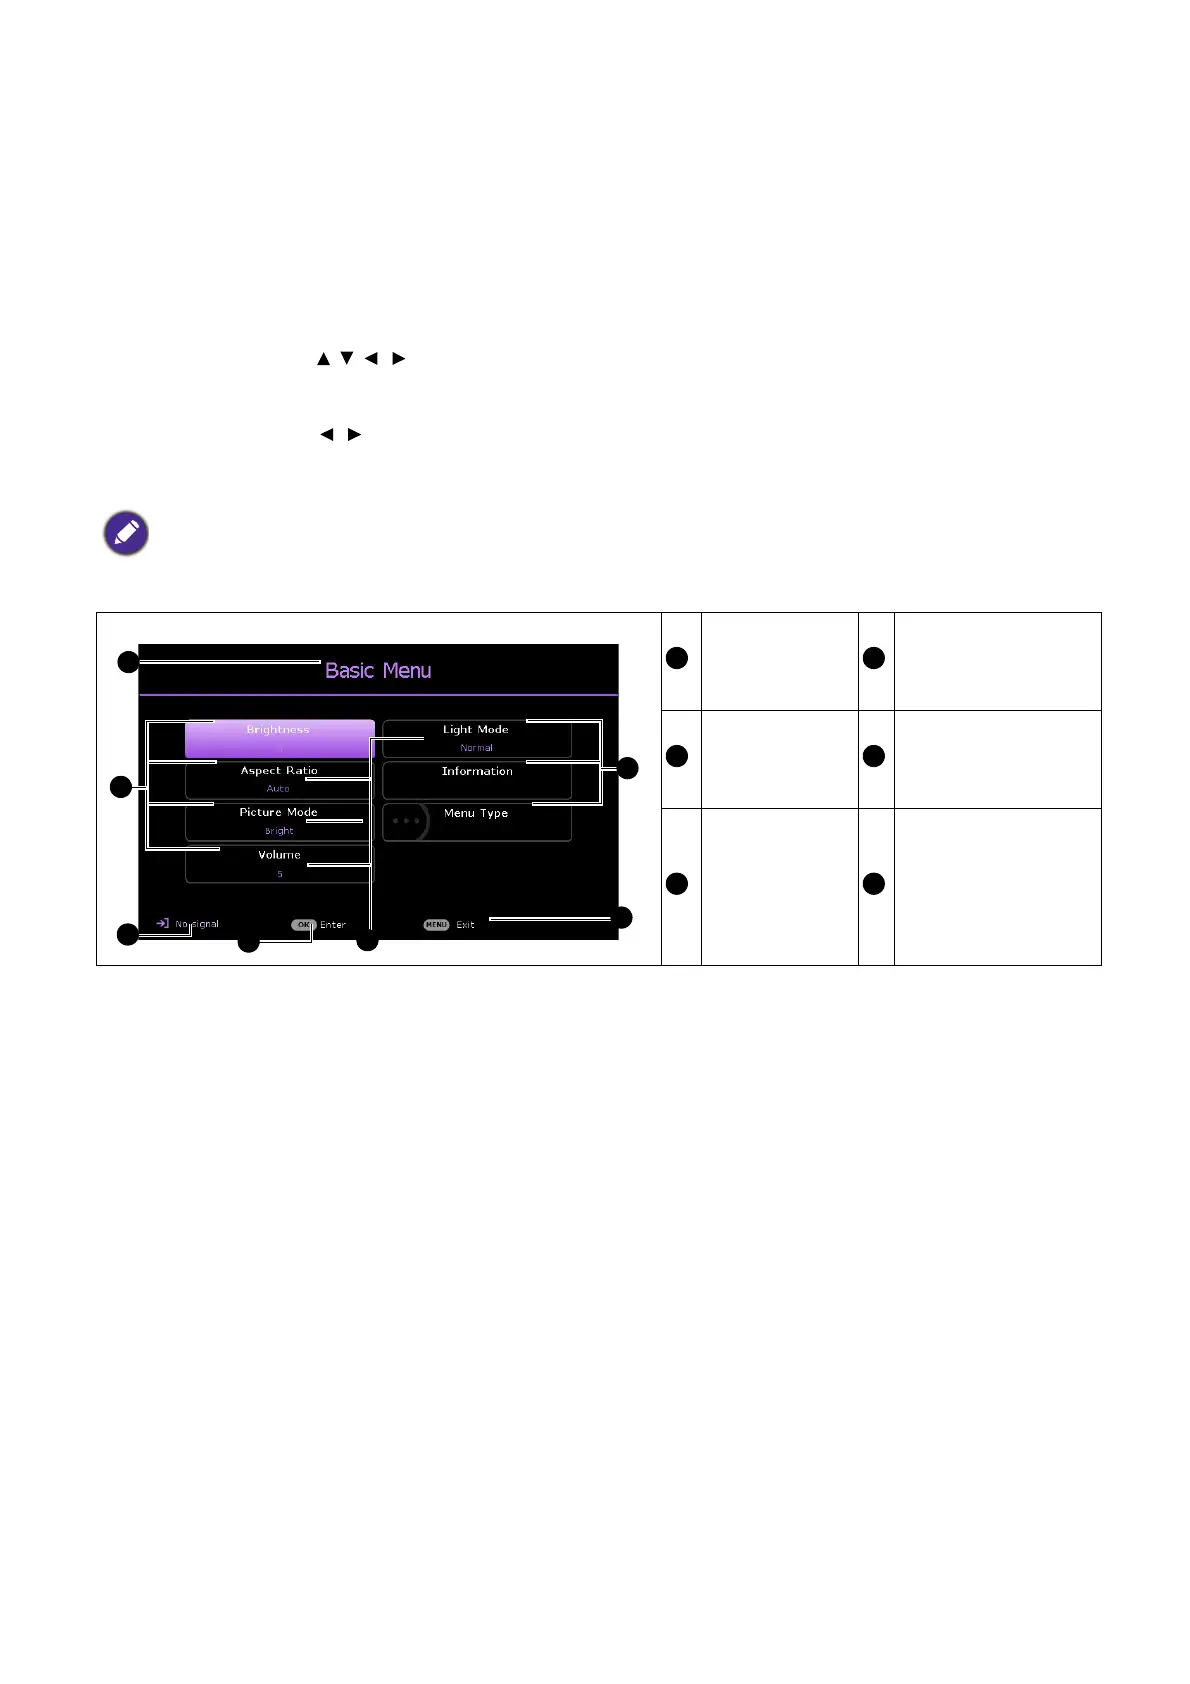
The first time you use the projector (after finishing the initial setup), Basic OSD menu displays.
Below is the overview of the Basic OSD menu.
The OSD screenshots below are for reference only, and may differ from the actual design.
Menu Type
Press OK to enter
the menu.
Menu item Status
Current input
signal
Press MENU to
exit.