30
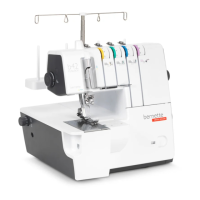
3–Thread Coverstitch
• Correct balance
– Set each tension dial to recommended setting
and test sew on a sample of your fabric.
• How to balance the thread tension
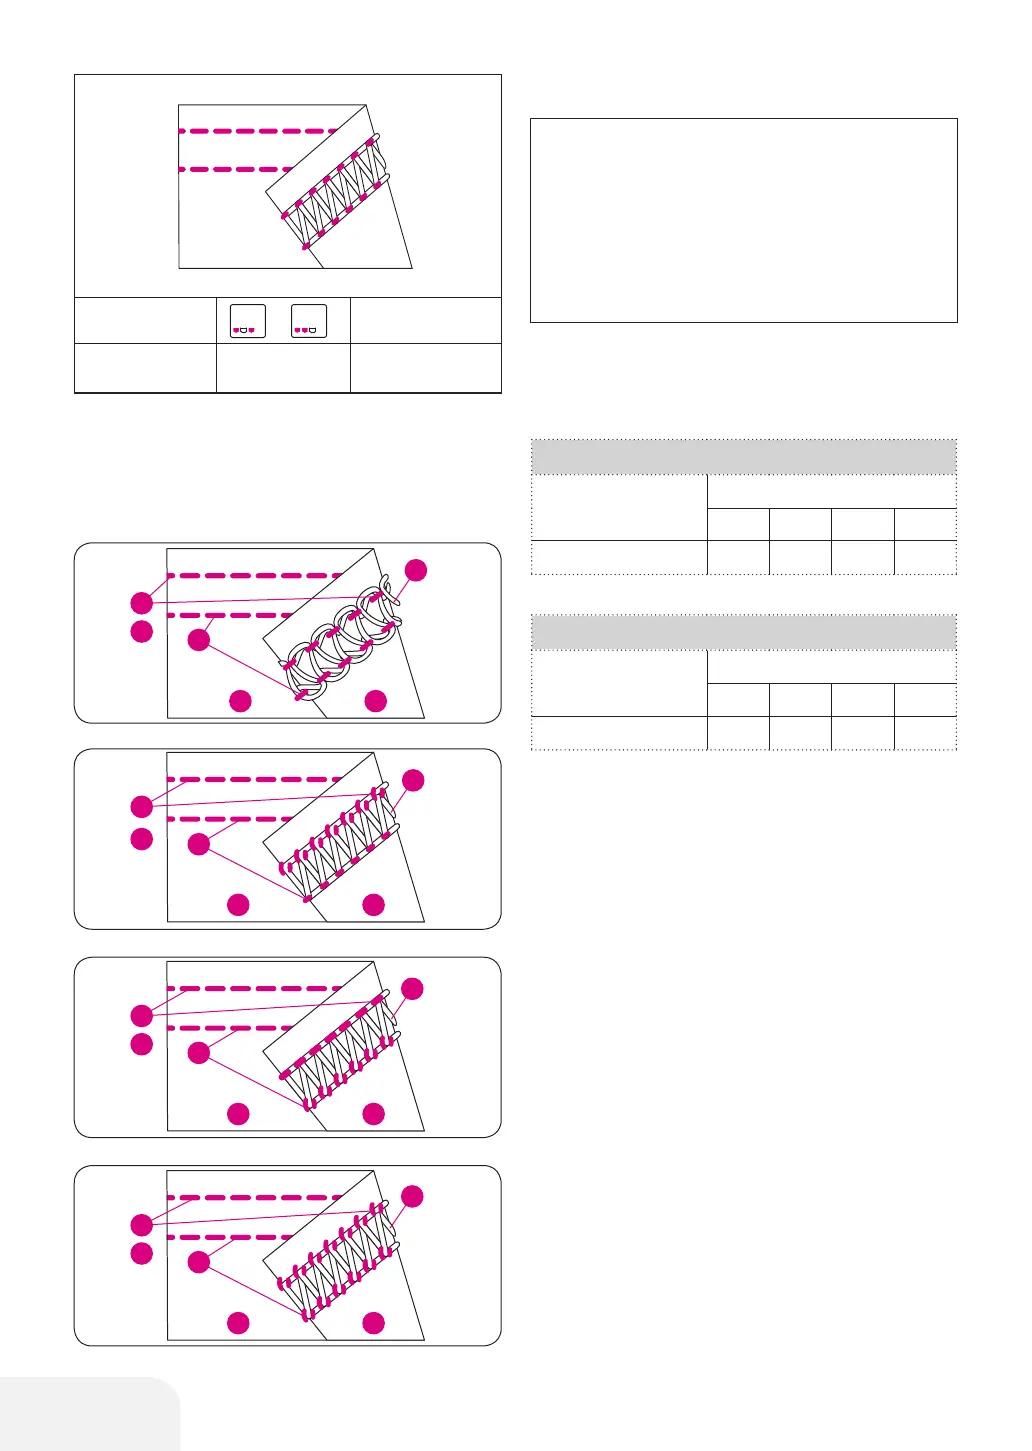
When the coverstitch looper thread is too loose;
– Turn the coverstitch looper thread tension dial
(violet) toward a higher number.
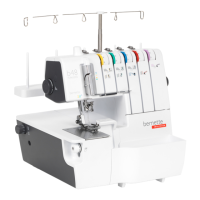
When the Coverstitch Needle thread tension is too
loose;
– Turn the Left Coverstitch Needle thread tension
dial (yellow) toward a higher number.
– Or, turn coverstitch looper thread tension dial
(violet) toward a lower number.
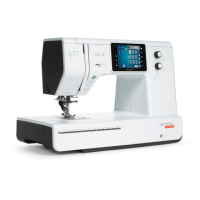
When the Right Coverstitch needle thread tension is
too loose;
– Turn the Right Coverstitch needle thread tension
dial (green) or (blue) toward a higher number.
– Or, turn the coverstitch looper thread tension
dial (violet) toward a lower number.
When the top surface of fabric bulges between needle
threads and the seams on the underside of the fabric
becomes tight;
– Turn the coverstitch looper thread tension dial
(violet) toward a lower number.
PLEASE NOTE:
– These are suggested tension settings only.
– Tension settings are effected by;
1. Type and thickness of fabric
2. Needle size
3. Size, type and fiber content of thread
– Stitch length for coverstitch should be set at
over "•" (2.5 mm).
3-Thread Coverstitch wide
Fabric
Thread tension dial
Yellow Green Blue Violet
Polyester
4.0 4.0 4.0
3-Thread Coverstitch narrow
Fabric
Thread tension dial
Yellow Green Blue Violet
Polyester
4.0 4.0 4.0
Thread Color Code refer page 15.
/
2
3
2
3
1
4
6
5
1
4
6
5
2
3
1
4
6
5
2
3
1
4
6
5
NP
/
Refer page 12
SL
3–4
Refer page 25
/
2
3
2
3
1
4
6
5
1
4
6
5
2
3
1
4
6
5
2
3
1
4
6
5
/
2
3
2
3
1
4
6
5
1
4
6
5
2
3
1
4
6
5
2
3
1
4
6
5
/
2
3
2
3
1
4
6
5
1
4
6
5
2
3
1
4
6
5
2
3
1
4
6
5
/
2
3
2
3
1
4
6
5
1
4
6
5
2
3
1
4
6
5
2
3
1
4
6
5