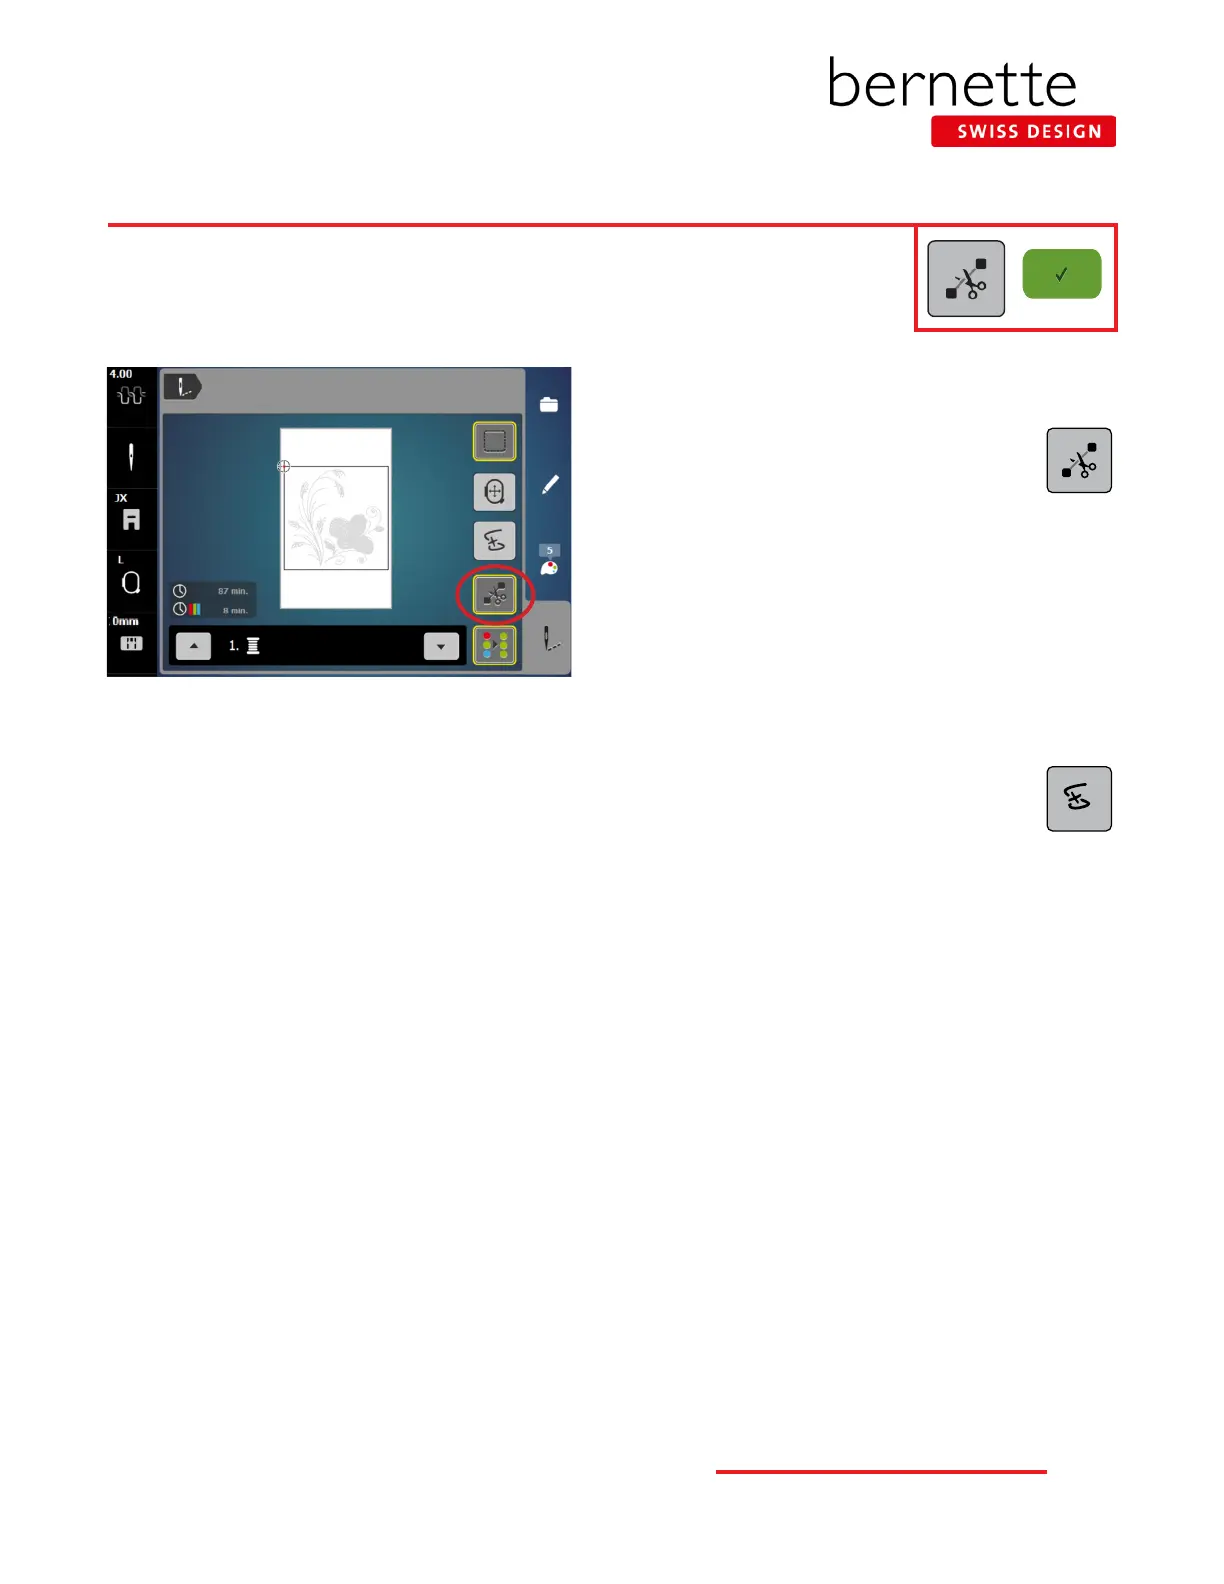
Stitching a Design
1. You should already be in the embroidery screen. If not,
touch the Embroidery (needle) icon.
2. Engage the Cut Connecting Stitches icon
(denoted by a yellow outline around the icon)
so that the connecting stitches between the
embroidery motifs will be cut.
3. While in the Embroidery screen, press the Start/Stop but-
ton to begin stitching.
Note: When stitching a design, the machine will stop
after about 7 stitches and wait for the user to trim the
thread tails. This feature can be turned off so that the
machine will not stop. Select Setup > Embroidery Settings
> Automatic Cut > Thread Cut After Starting Embroidery.
Turn this feature off.
4. Sometime during the stitching process, stop the
machine and cut the thread to simulate a thread
break. Follow the steps for using the Sequence
Control function on the following pages.
5. Change thread as prompted on the screen.
6. When the motif is complete, touch the Conrm (green
check) icon. The Edit screen will reappear.
IMPORTANT TIP:
A crucial factor in successful machine embroidery is regular cleaning and oiling. This will keep your machine running smoothly.
Refer to your machine’s manual and Page 30 of this workbook for more information. Follow your dealer’s guidelines for rou-
tine checkups and maintenance.
21
bernette
EMBROIDERY MACHINE WORK
BOOK