1. I
n the Selection menu, select the Embroidery Motif folder. Select
Folder 1, Design 13. Optional: Select the Color Information tab
(palette) and change the color to black (Isacord 0020).
2. Select the Add icon (+); Alphabets Folder; Alphabet #1.
3.
Enter “hand” in all lower case letters; touch the green check
box to Conrm. Move “hand” to the upper part of the frame
using the stylus or the Multi-function knobs.
4. Select the Add icon (+); Aphabets Folder; Alphabet #1.
5.
Enter “made” in all lower case letters; touch the green check
box to Conrm. Move “made” to the lower part of the circle
using the stylus or the Multi-function knobs.
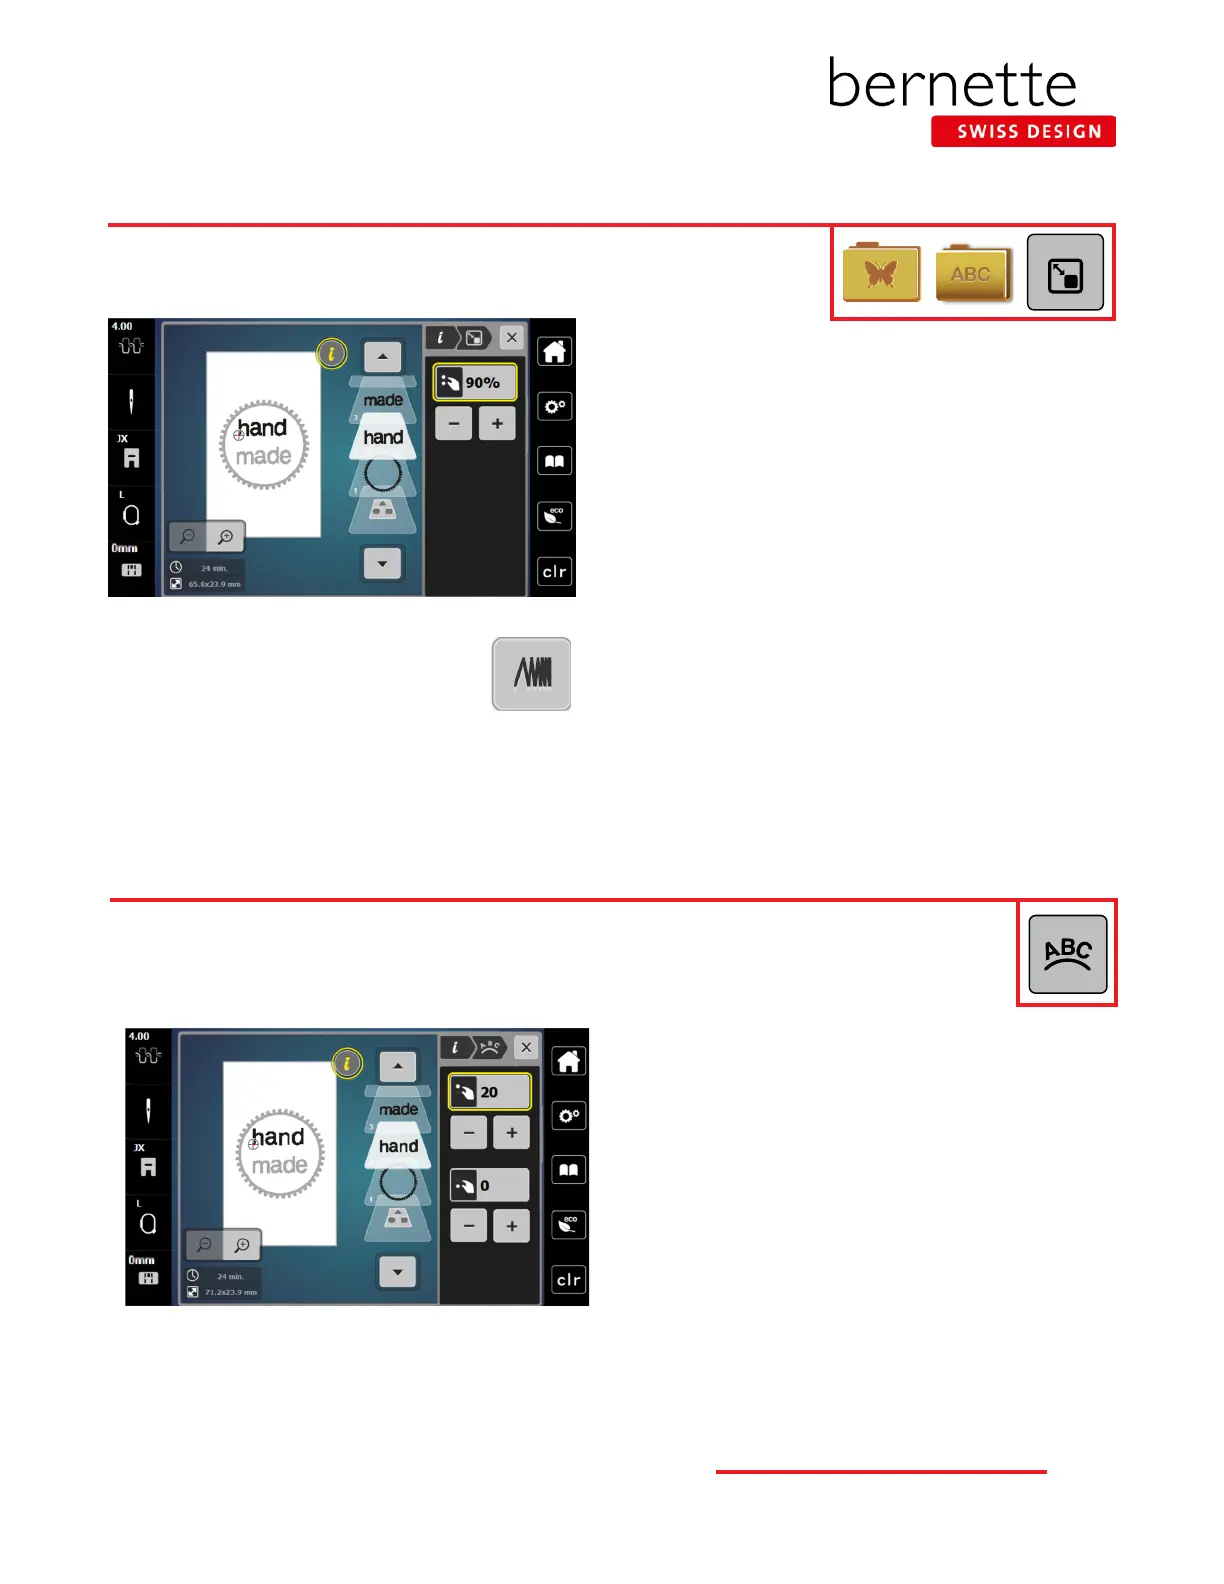
6. With “made” still selected, touch the “i” icon and select
the Change Motif Size icon. Use either the Upper or Lower
Multi-function knob (or the - / + icons) to reduce the size
proportionately to 90%.
7. Touch “hand” in the Layer Panel.
8. Use either the Upper or Lower Multi-function knob (or the
- / + icons) to reduce the size proportionately to 90%.
Changing Lettering Size
Enter single letters or words and use the Resize Motif icon to resize the motif proportion-
ally up to 20% larger or smaller.
Although letters added to the screen are mathematically spaced, sometimes certain combinations of letters
will appear to be too close together or too far apart. Using Word Art (Text Bending) will allow exibility in
the spacing of the lettering.
1. Notice that the “a” and the “n” appear too close together
on the screen.
2. Select the word “hand” in the Layer Panel.
3. Touch the “i” in the breadcrumb path and select the Word
Art icon.
4.
Use the Upper (Width) Multi-function knob (or the -/+ icons
in the upper area of the screen) to change the spacing.
• Turning the knob to the left (or touching the - icon)
decreases the spacing between the letters.
• Turning the knob to the right (or touching the + icon)
increases the spacing between the letters.
5. Increase the spacing to approximately 20, or until the
spacing is visually pleasing.
6. Proceed to the next page.
Word Art - Changing Lettering Spacing
NOTE: Use the Stitch Properties icon to
increase/decrease stitch density. Increasing
density may be helpful on towels to prevent
terry loops from coming through the embroi-
dery. Refer to Page 26 and your machine’s manual for
more details.
23
bernette
EMBROIDERY MACHINE WORK
BOOK