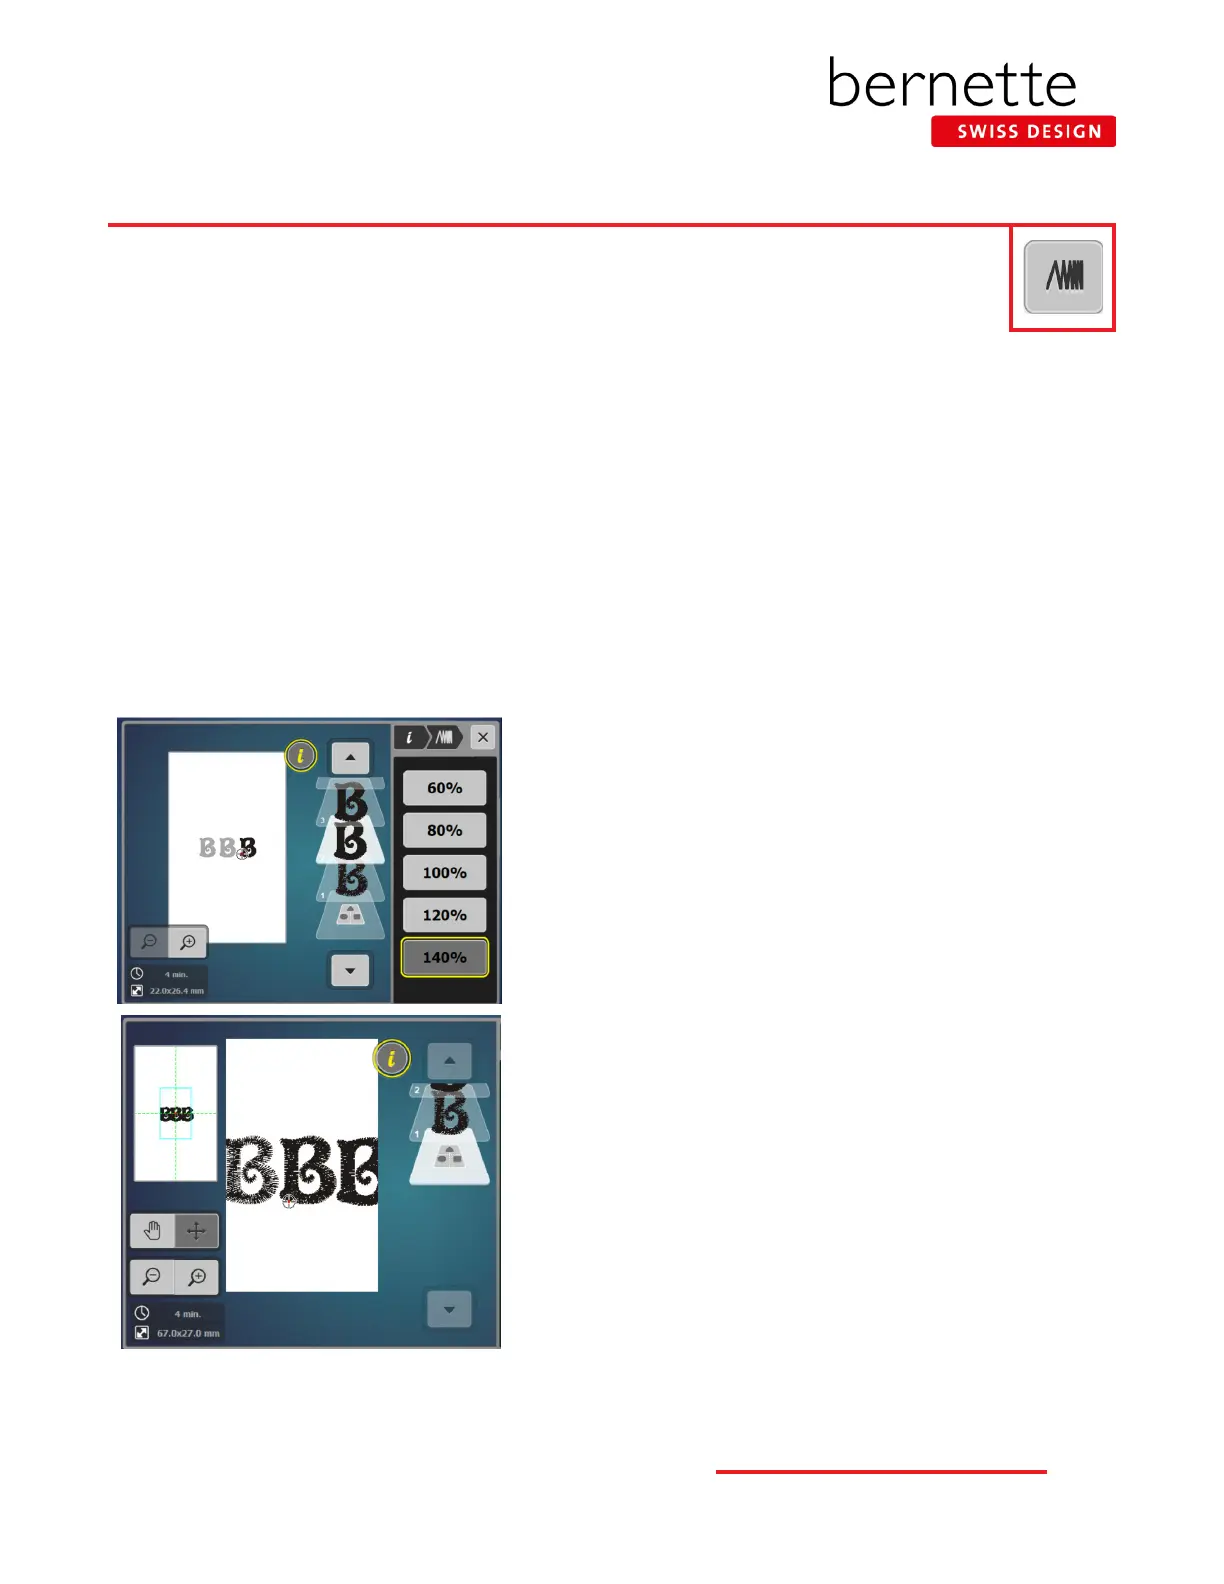
Alter Stitch Density-Lettering
Change the stitch density of lettering to complement different fabric types. This is helpful when enlarging
lettering. .
Stitch Density
1. Select the Alphabets Folder; select Alphabet #5.
2. Enter the letter B; touch Conrm (the green check box).
3. Touch the Hoop Selection icon and select the Large Hoop. Close the Hoop Selection menu.
4. Move the B to the left.
5. Select the Add Motif icon at the top of the Layer Panel.
6. Select the Alphabets Folder; select Alphabet #5. Type the letter “B” and Conrm.
7. Again select the Add Motif icon at the top of the Layer Panel.
8. Select the Alphabets Folder; select Alphabet #5. Type the letter “B”; Conrm.
9. Move this “B” to the right.
10. Visually align the three B’s.
11. Touch the left B on the screen. Select “i”; select Embroidery Stitch
Density; alter satin density to 60%.
12. Select the center B on the screen; leave density at 100%.
13.
Touch the right B on the screen; alter satin density to 140 %
.
14. Select the Zoom icon and zoom in to notice the difference in the den-
sity of the letters.
26
bernette
EMBROIDERY MACHINE WORK
BOOK