j. Purge the extruder
Before purging the extruders, position the axes using the move command:
position the head in the middle of the machine, and
move the bed half way down the machine, This prevents damage to the bed, and allowsaway from the nozzles.
purging to be inspected easily.
Ensure filaments are loaded into the extruders, as defined in the .h. Load the extruders
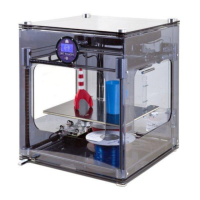
Make sure the springs on the extruder pressure bearings are compressed (as detailed in ) enoughc. Setting the extruder pressure bearings
to push the filament into the teeth of the drive shaft.
Proceed by purging one extruder at a time.
Heat the extruder (as shown in ) to the maximum temperature defined below, depending on the material in the extruder:i. Extruder control
Material Extrusion temperature (°C)
ABS
260
PLA
195
Once the target temperature has been achieved, turn the RPM up to 30.
Examine the movement of the filament at the pressure bearing. It should slowly be driven towards the nozzle. If not, ensure that the spring
pressure bearing is compressed sufficiently ( ).c. Setting the extruder pressure bearings
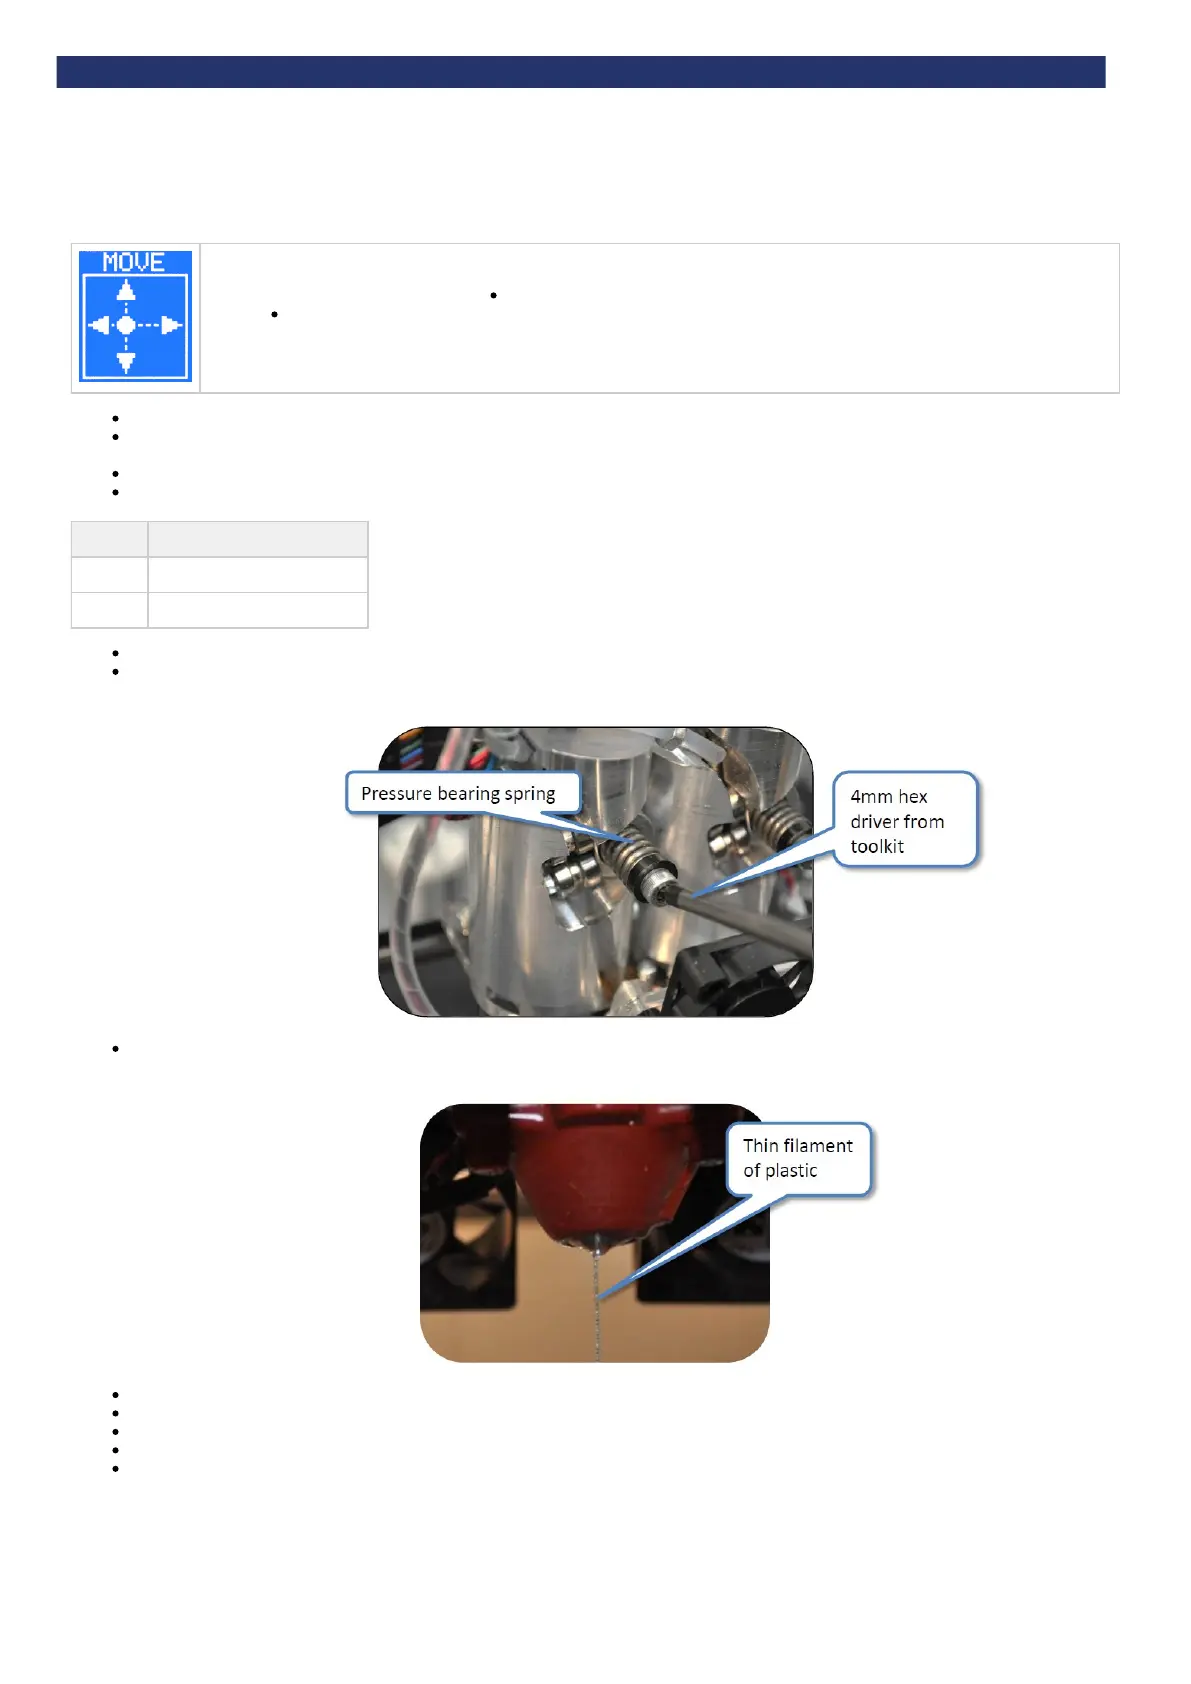
Observe the end of the nozzle. A thin bead of molten plastic should come out of the nozzle. Depending on how far the filament was loaded
into the extruder, this could take several minutes.
Allow material to purge for a few seconds before reducing the RPM to 0.
Repeat the purge process for each extruder.
Turn the machine off to allow the nozzles to cool.
As the extruders cool, clean the nozzles (see "Check the hot-end nozzles are clean").
Dispose of all waste filament from the nozzle.