7
M8 20
M10 40
M12 70
M16 160
2.4.2 Assembly procedure
IMPORTANT
Failure to comply with the following procedures
may impair product warranty.
WARNING
Installation, commissioning and maintenance and
repair works should be carried out by qualified
staff. A non-conforming assembly could be the
source of serious accidents.
For actuator assembly on the valve:
IMPORTANT
Check that the assembly position, as shown
on the documentation, complies with system’s
geometry. Check the consistency of the parts of
actuator-valve coupling.
• Operate the actuator so that it reaches the
position matching valve position (section 3.3).
• Lubricate valve stem with oil or grease.
• Properly clean and remove grease from
coupling flange surfaces.
• Connect, if supplied separately, the
adjustment insert to valve stem and fasten it
with the special fastening pins.
• Lift the actuator using the special lifting
points (section 2.2).
• Install the actuator so that valve stem inserts
in the coupling area. This coupling should be
made without forcing.
• Fasten the two parts with the threaded
connections (screws, tie rods, nuts). If
holes of coupling flanges are not aligned,
adequately operate the actuator if necessary
move the mechanical stops backwards
(section 3.4).
• Fasten threaded connections. Please refer to
table 1.
The screwing values in table 1 were calculated
considering the materials ASTM A320 grade L7
for screws or tie rods and ASTM A194 grade 2H
for the nuts.
TABLE 1 - NUTS TIGHTENING TORQUE
Threading Tightening torque (Nm)
2.5 Pneumatic connections
Connect the actuator to the pneumatic feed
line with fittings and pipes in accordance to
the plant specifications. They must be sized
correctly in order to guarantee the necessary
air flow for the operation of the actuator, with
pressure drops not exceeding the maximum
allowable value.
The shape of the connecting piping must
2.6 Electrical connections (if any)
WARNING
The connections should be made by qualified staff.
Before carrying out any operation, cut line
power off.
Safety provisions as per CEI 64-8 regulation
should be complied with (same as IEC 60364).
Connect the electrical feed, control and
signal lines to the actuator, by linking them
up with the terminal blocks of the electrical
components. In order to do this, the housing
covers must be removed without damaging the
coupling surfaces, the O-rings or the gaskets.
Remove the plugs from the cable entries. For
electrical connections use components (cable
glands, cables, hoses, conduits) which meet the
requirements and codes applicable to the plant
specifications (mechanical protection and/or
explosion-proof protection). Screw the cable
glands tightly into the threaded inlets, so as
to guarantee the weatherproof and explosion-
proof protection (when applicable). Insert the
connection cables into the electrical enclosures
through the cable glands, and connect the
cable wires to the terminals according to the
applicable wiring diagram. If conduits are used,
it is advisable to carry out the connection to the
electrical enclosures by inserting hoses so as
not to cause anomalous stress on the housing
cable entries. Replace the plastic plugs of the
unused enclosure entries by metal ones, to
guarantee perfect weatherproof tightness and
to comply with the explosion-proof protection
codes (where applicable).Once the connections
are completed, check that the controls and
signals work properly.
2.7 Commissioning
WARNING
Installation, commissioning and maintenance and
repair works should be made by qualified staff.
Any calibration relative to functional aspects of
the actuator are preset at the factory, except the
angular stroke setting because for this setting
operation, the actuator must be placed on to the
valve (see section 3.4).
Before any modifications please contact Biffi.
Upon actuator commissioning please carry out
the following checks:
• Check that the pressure and quality of the
air supply (filtering degree, dehydration) are
as prescribed. Check that the feed voltage
values of the electrical components (solenoid
valve coils, microswitches, pressure switches,
etc.) are as prescribed.
• Check that the actuator controls work
properly (remote control, local control,
emergency controls, etc.).
• Check that the required remote signals (valve
position, air pressure, etc.) are correct.
• Check that the setting of the components of
the actuator control unit (pressure regulator,
pressure switches, flow control valves, etc.)
meet the plant requirements.
• Check there are no leakages in the pneumatic
connections. If necessary tighten the nuts of
the pipe fittings.
• Remove all rust and, in accordance with the
applicable painting specifications, repair
paint-coat that has been damaged during
transport, storage or assembly.
not cause excessive stress to the inlets of
the actuator. The piping must be suitably
fastened so as not to cause excessive stress
or loosening of threaded connections, if the
system undergoes strong vibrations.
Every precaution must be taken to ensure
that any solid or liquid contaminants which
may be present in the pneumatic pipe-work
to the actuator are removed to avoid possible
damages to the unit or loss of performance.
The inside of the pipes used for the connections
must be well cleaned before use: wash them
with suitable substances and blow through
them with air or nitrogen.
The ends of the tubes must be well deburred
and cleaned. Once the connections are
completed, operate the actuator and check that
it functions correctly, that the operation times
meet the plant requirements and that there are
no leakages in the pneumatic connections.
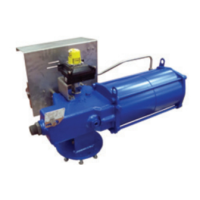
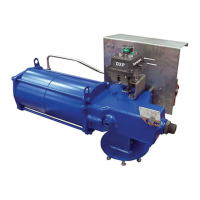
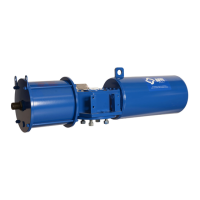
RPS SPRING RETURN PNEUMATIC ACTUATOR
INSTALLATION, OPERATION AND MAINTENANCE MANUAL
 Loading...