S45
S45
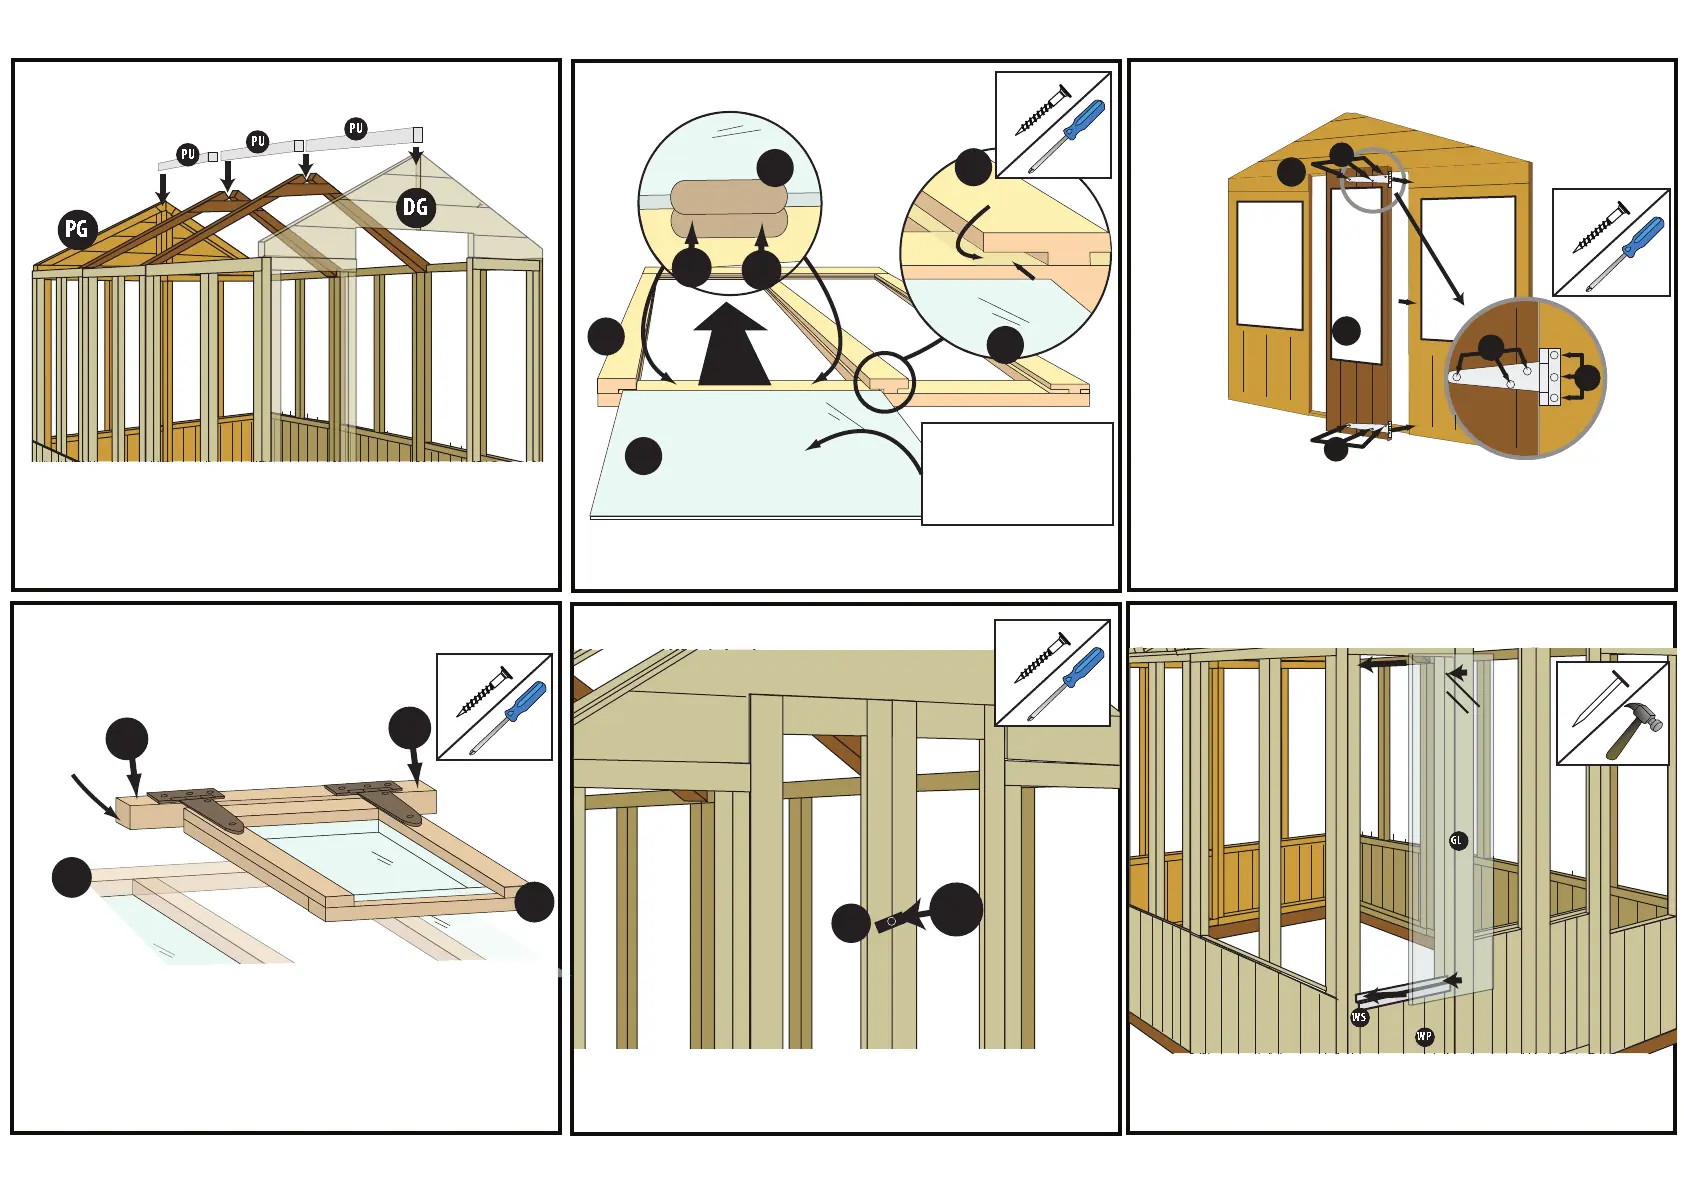
13) FIXING THE CENTRE PURLIN:
1) Place the PURLINS (PU) on top of the TRUSS (TRU) and slot them into the notches on
the GABLES (PG and DG).
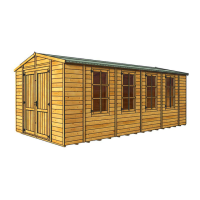
Use 30mm screws (S30) to x the HINGES (HG) to the DOORS (D) and through the
baton on the back of the DOOR (D).
Fix the DOORS (D) through the HINGES (HG) to the DOOR GABLE (DG) with 30mm
screws (S30).
30mm
Screws
Philips
Screwdriver
DG
D
S30
S30
S30
S30
15) FIXING THE DOORS:
WO
RFR
HINGE
BLOCK
S50
S50
The Opening Window, framing comes pre-assembled. All that is required is to x this unit,
to the opening window frame using 50mm Screws (S50).
Tip: Carefully pre-drill all holes before fixing.
16) FIXING THE OPENING WINDOW: (not on Fixed roof model)
50mm
Screws
Philips
Screwdriver
Place a TURNBUTTON (TB) on the slave door on the DOOR GABLE (DG) and screw in
with a 25mm Black screw (S25). Make sure that the TURNBUTTON (TB) does not impede
the door opening when adjusted.
S25
TB
17) FIXING THE OUTER TURNBUTTON:
25mm
Screws
Philips
Screwdriver
50mm
Screws
30mm
Nails
Hammer
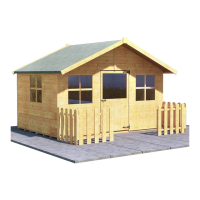
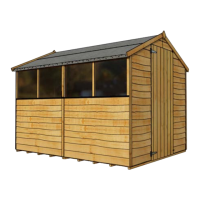
18) GLAZING (1): (Styrene or Polycarb)
1) Place the WINDOWSILL (WS) on the outside of the WINDOW PANEL (WP).
2) Place the GLAZING (GL) on to the WINDOWSILL (WS) and against the WINDOW
PANEL (WP) Note: The WINDOWSILL (WS) (439.5mm or 879mm) spans the entire WINDOW PANEL (WP).
GLAZING SLOTS IN
GROOVE IN FRAME
Slot all of the various GLAZING (GL) in to the grooves of the roof panel frames. Hold the
glazing in place with two GLAZING CLIPS (GC) per pane with 12mm screws (S12)
GL
GL
RFR
RFR
S12
S12
GC
The printed film is the
UV coated surface and
should be fitted as the
out side face.
14) INSERTING ROOF GLAZING: (Polycarb used)
12mm
Screws
Philips
Screwdriver