Project Type
Instructions
Date: February 12 2021
Customer: Thermor Ltd
Job Number: TH6151
Item Number: BD353
Designer: Alex Vranjesevic
Revision: C
Artwork is not to be amended or scaled. If any changes
are required please send through Thermor oce with
instructions, and we will amend here and resend artwork
through. PLEASE RETURN WITH SIGNATURE
Contact: Graphic’s Department
graphics@thermor-ins.com
Colour Breakdown
Reason For Project:
New Item:
New Branding:
Design Update:
N/A: X
UPC (For Reference Only)
j) If this device was stored in low temperature, it is necessary to leave it in room temperature
for at least 1 hour, otherwise the measurement can be inaccurate.
Comment:
Continue to use the same arm for comparisons. It is not unusual for there to be a difference in
blood pressure between arms.
Comparable blood pressure measurements always require the same conditions (Relax for
several minutes before taking a measurement).
ATTENTION: Do not use a cuff other than the original cuff contained in this kit!
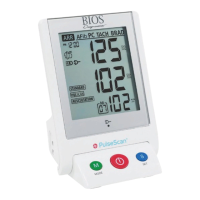
3.4 Protocol Software (7D Mode)
7D Mode is used in consultation with your physician for assessing white coat hypertension or
sustained hypertension, based on a protocol of measurements taken at home. The protocol calls
for 2 measurements to be taken in the morning (AM) and 2 measurements in the evening (PM) for
7-days consecutively. The blood pressure monitor will automatically average the measurements
according to the protocol and will indicate whether all data was fulfilled, at the proper times.
7D Mode simplifies the process for users and provides physicians with clear data from home
measurement.
1. When the monitor is OFF, press the SET button, 7D Mode will appear on
the monitor. Press the SET button to confirm.
NOTE: Press the MEM button to switch between 7D Mode and
General Mode.
2. Next, select the user. When taking measurements in 7D Mode it is
very important to select the correct user. Press the SET button to confirm, then press the
START/STOP button to power the monitor OFF.