42
1. 8 7 7. 8 7 7. 2 269 BLACKBOX.COM
NEED HELP?
LEAVE THE TECH TO US
LIVE 24/7
TECHNICAL
SUPPORT
1.877.877.2269
5.1.3 SELECTING A COMPUTER USING HOTKEYS
Using hotkey combinations, you can quickly switch the keyboard, mouse, speakers and USB peripherals to any computer channel.
5.1.3.1 USING STANDARD HOTKEY PRESS COMBINATIONS
The standard hotkey press combinations allow you to change channels with the minimum of keypresses:
1. Simultaneously press and hold CTRL and ALT (or other hotkeys, if altered).
2. While still holding CTRL and ALT, press the number key of the required channel address (or the TAB key), then release all of the
keys.
Note: The numbers on your keyboard’s numeric keypad are not valid, use only the numeral keys above the QWERTY section.
The ports (K/M, audio and/or USB) that are switched using this method depend upon the switching mode that is currently set
using the front panel buttons.
The range of standard hotkey combinations are as follows:
Note: If your hotkeys have been changed, substitute them for CTRL and ALT in the examples given here.
CTRL ALT 1 Selects channel 1
CTRL ALT 2 Selects channel 2
CTRL ALT 3 Selects channel 3
CTRL ALT 4 Selects channel 4
CTRL ALT 5 Selects channel 5
CTRL ALT 6 Selects channel 6
CTRL ALT 7 Selects channel 7
CTRL ALT 8 Selects channel 8
CTRL ALT 0 Isolates the user console from all channels
CTRL ALT TAB Selects the next channel (see note below)
Choosing which computers are accessed when using hot keys + tab
The computer channels that are visited when you use the hot keys + tab (or mouse buttons) are determined by a setting within the
Configuration menu:
1. Enter the Configuration menu (see Section 4.1 for details).
2. Choose the required Port cycling option, either:
• Cycle all ports (visits even inactive ports), or
• Cycle only active ports.
3. Click the Save button.
5.1.3.2 TO DISABLE/ENABLE GLIDE AND SWITCH
Once Glide and Switch is in operation, you can temporarily disable (and re-enable) it. You can tell when Glide and Switch is in opera-
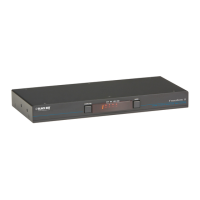
tion when the four lower indicators on the Freedom II front panel scroll across every few seconds.
• Simultaneously press and hold and , then press
KV0008A-R2 models only
 Loading...


