10. Safety checks
25
4. Turn off equipment.
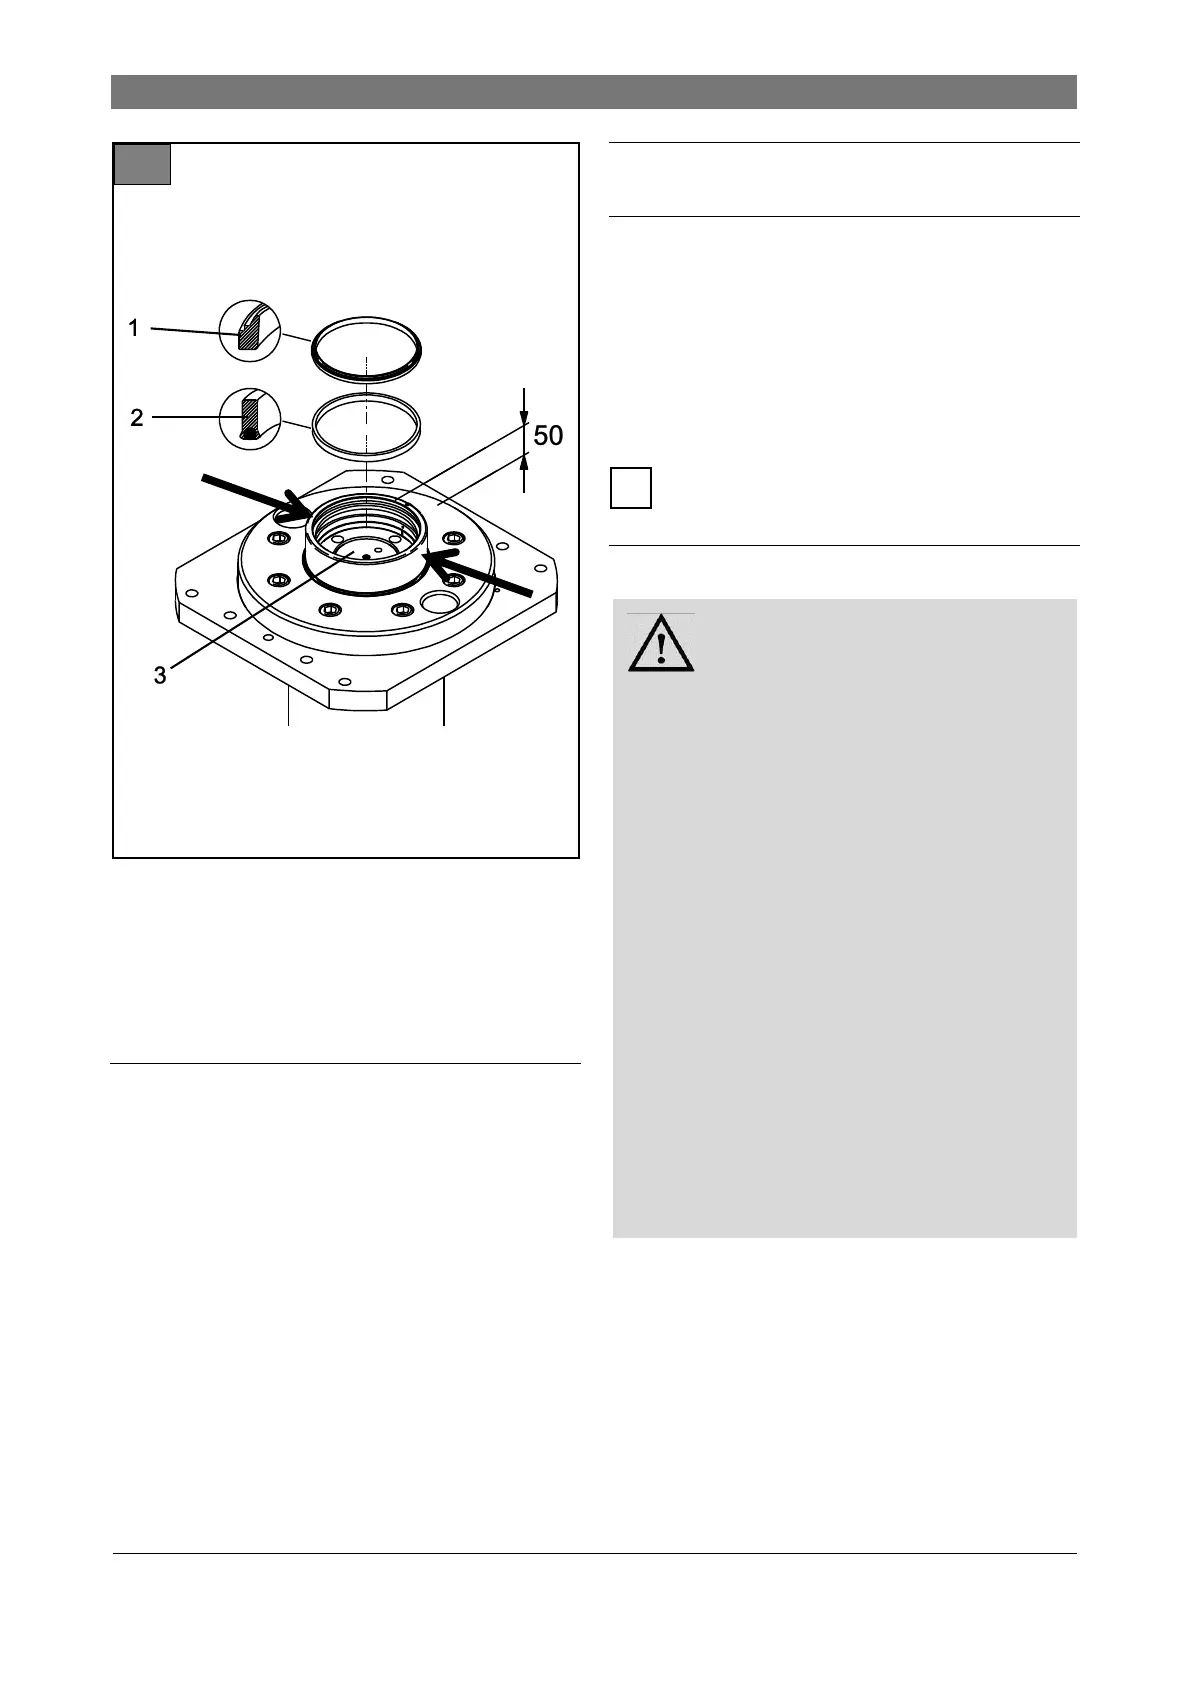
5. Change seal ring (2) and scraper ring (1).
6. Replace cross member, tighten plunger rod Ø
150mm with mounting screws on cross member
(tightening torque bolts: Ma = 560Nm).
10. Safety checks
Safety checks are necessary to ensure the safety of
the lift during operation.
Carry out safety checks in following cases:
Initial start-up: Use form “First safety check be-
fore start-up”.
Annually: Use form “Annual safety check”.
Special safety check:
After every design modification of lift components.
Use form “Special safety check”.
Safety checks are only to be carried out by au-
thorized experts or competent persons.
11. Transport, storage
11.1 Storage
Lift components are only to be stored dry (no corro-
sion protection).
Permitted storage conditions
Ambient temperature: -5 ... +50°C
Relative humidity, 30% ... 95%
not condensing, at 20°C
The manufacturer is not responsible for cor-
rosion damage due to incorrect storage.
11.2 Transport
Danger of crushing and shearing
off of limbs during offloading due
to falling or shifting of the load.
Do not linger in the vicinity or under suspend-
ed loads.
Offload and transport packaging units to instal-
lation location only with forklift or pallet lift with
sufficient load capacity.
Only use load-bearing equipment (slings,
chains, etc.) permitted for the total weight.
Attach load-bearing equipment in such way
that slipping is impossible (observe load cen-
ter of gravity).
Attach individual components only at load-
bearing parts. Lift only vertically, even and
with smooth movements.
Carry out visual check before offloading.
Secure loose components.
Always be aware of the danger zones during
lifting and lowering.
Transport hydraulic components always with-
out oil filling.