Detailed assembly instructions Detailed assembly instructions
26
27
Speedmachine Owners Manual
Seatpost preparation
Seatpost length
The two seatposts compatible with the Speedmachine have a minimum and a maximum
insertion depth in the frame.
S M L
Seatpost length 300 330 360
Mini insertion 70 70 70
Max insertion 180 200 200
WARNING: Always make sure you are respecting the Mini insertion length of 70mm.
INFORMATION: If the max insertion is too restricting and does not allow a low enough saddle height
adjustment, you can cut your seatposts to a shorter length to allow you to reach your ideal saddle height.
INFORMATION: Use a saw guide like the Park Tool SG-7.2 Oversized Adjustable Saw Guide and an
appropriate carbon specific saw blade such as the Park Tool CSB-1.
WARNING: If cutting the seatpost, make sure to respect the maximum cutting instruction.
70mm
mini
Maximum cutting length
Decals
Electronic wires installation
SHIMANO DI2
WARNING: Please always refer to the latest SHIMANO product information for your
groupset. The following information is a guide with basic principles.
Battery:
BT-DN300
Front Derailleur:
EW-SD300, 700mm
Rear Derailleur:
EW-SD300, 1400mm
Battery to Adaptor:
EW-SD300, 700mm
Conversion Adaptor:
EW-AD305
Dual control levers cable:
EW-JC130
550/50/550
Junction B 4-Port:
SM-JC41
EW-SD50, 1 000mm
Adaptor to Junction B cable:
EW-SD50, 700mm
Recommended wire lengths:
Location Part code Length
Front Derailleur EW-SD300 700mm
Rear Derailleur EW-SD300 1 400mm
Battery to Adapter EW-SD300 700mm
Adapter to Junction B EW-SD50 1 000mm
Extensions EW-SD50 1 000mm
• Install the different electronic wires into the frame and the cockpit.
INFORMATION: It helps a lot to use a cable routing guiding tool like the Park Tool IR-1.2
Internal Cable Routing Kit
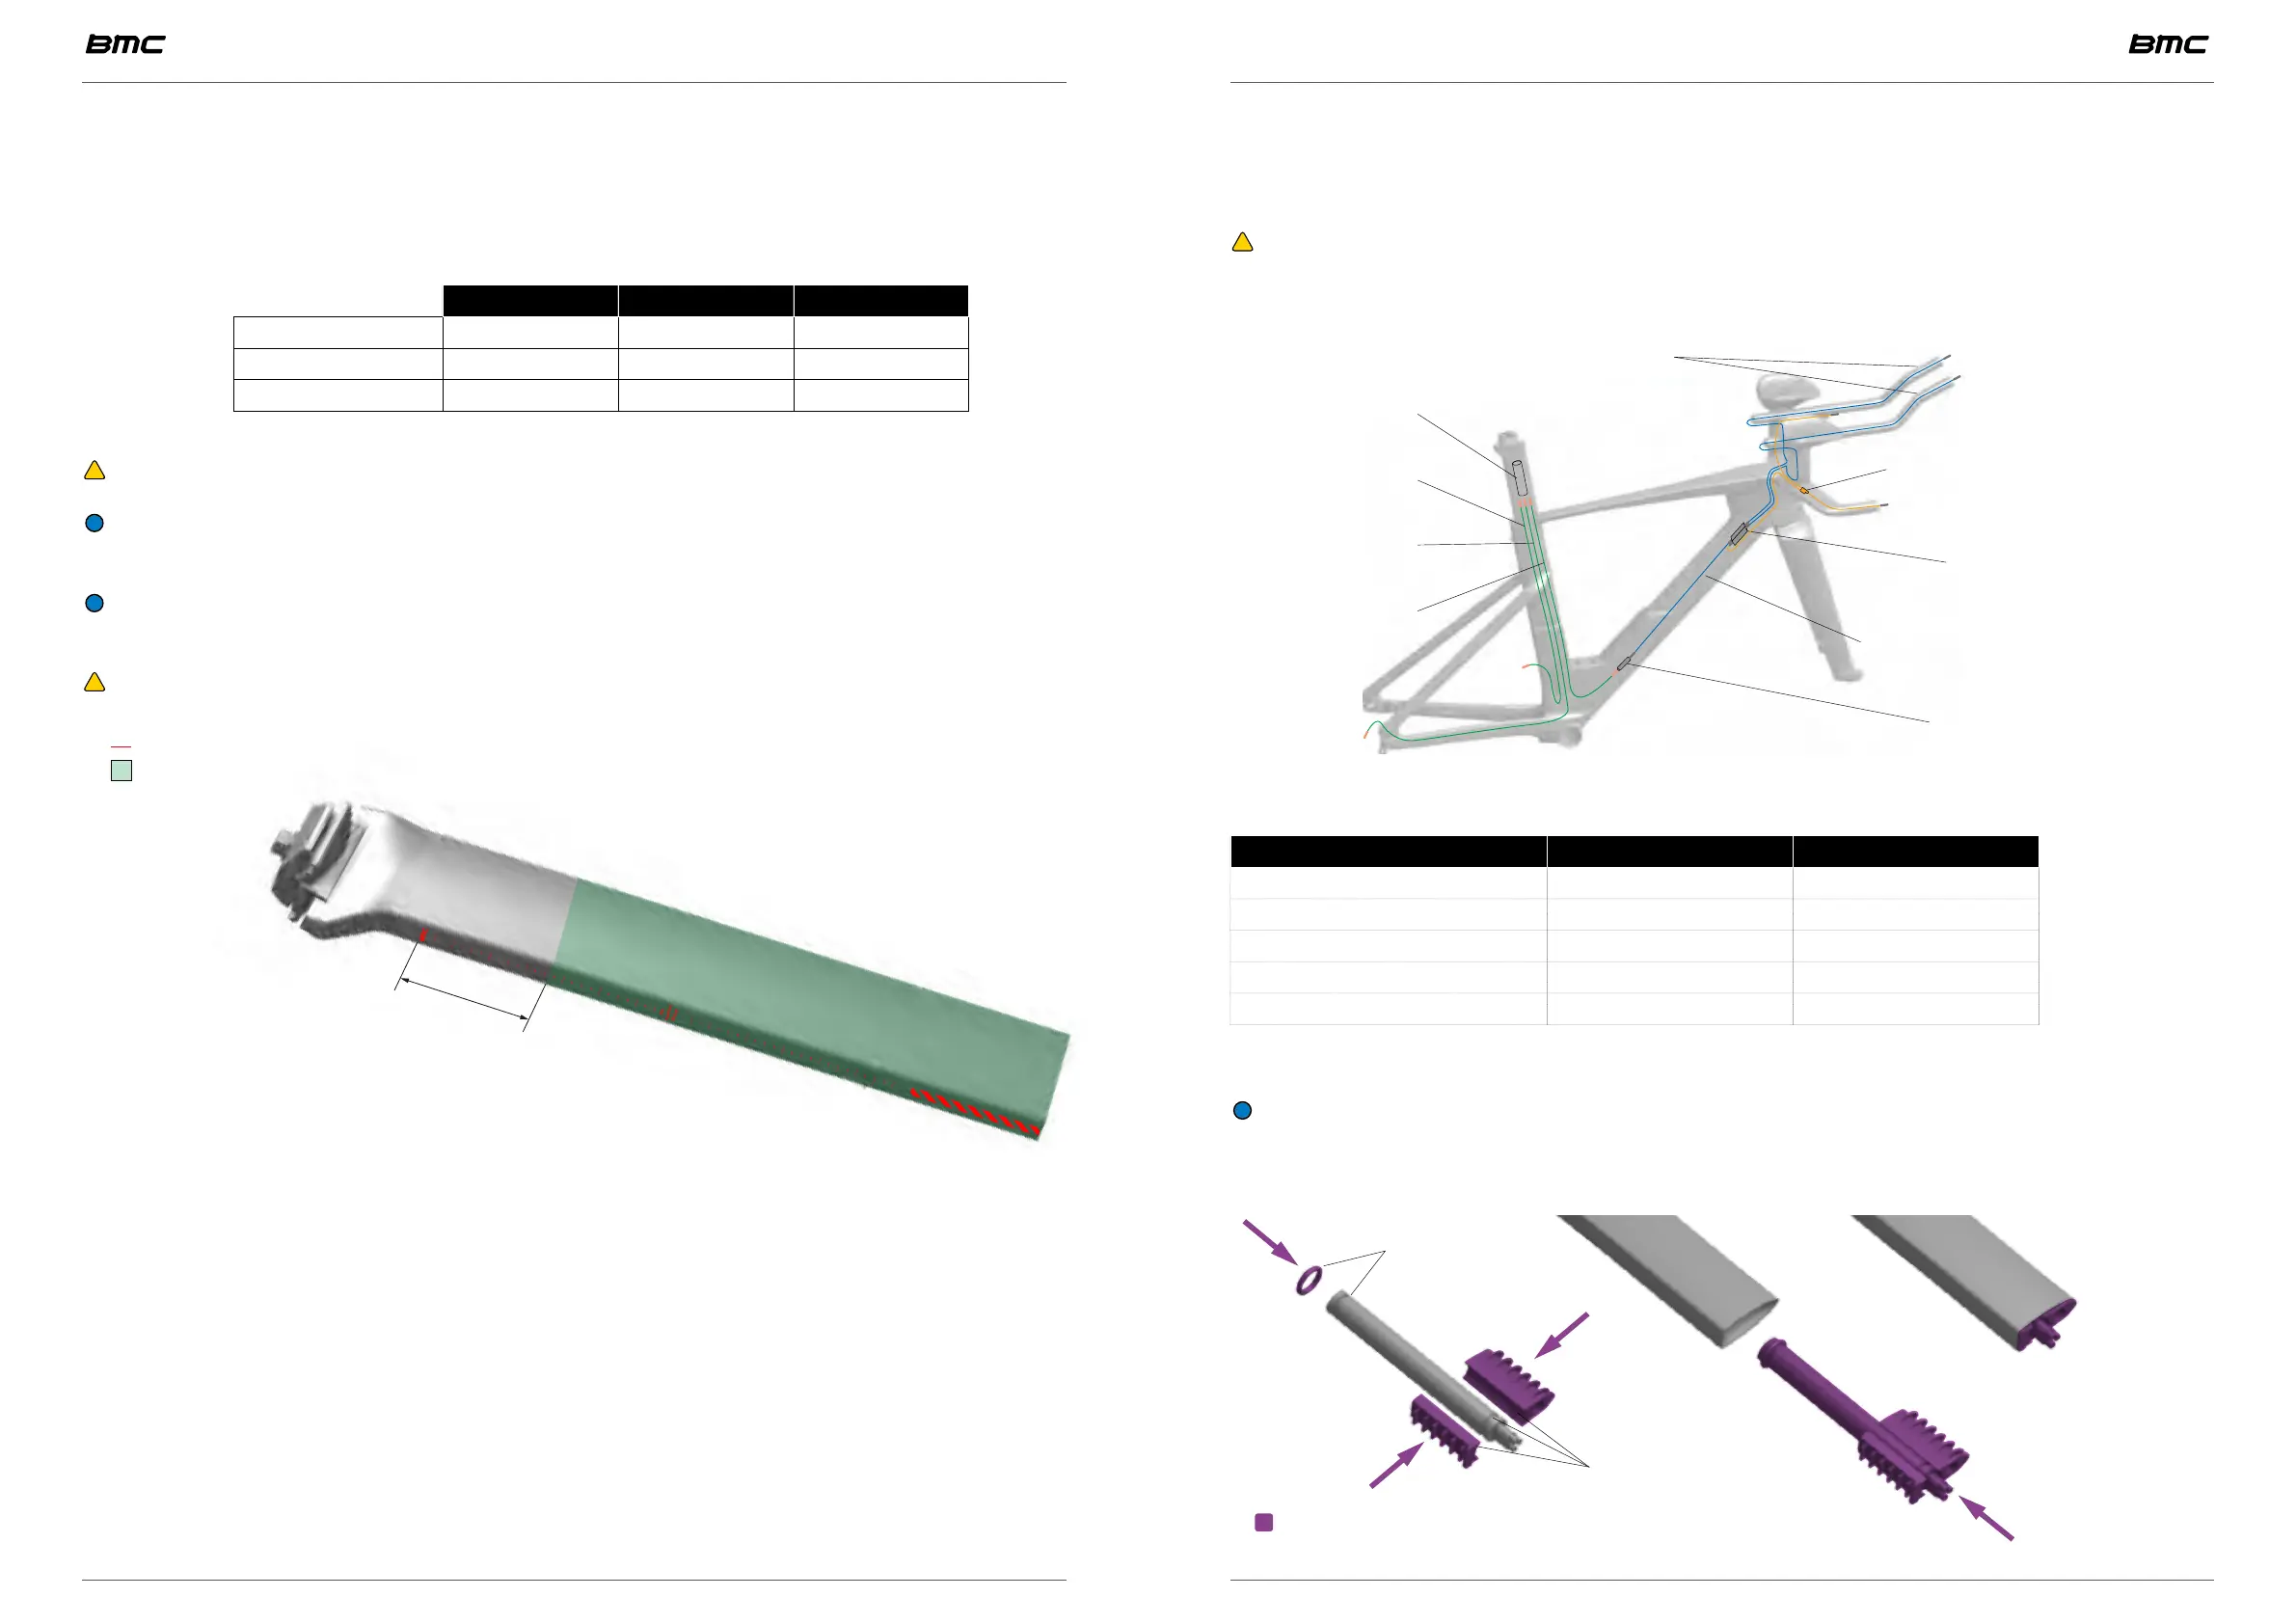
• Install the battery in the seatpost using the supplied battery holder and the o-ring.
Align hadaptor and battery
and press into the seatpost
Align to lock
Align to lock
Push