Detailed assembly instructions Detailed assembly instructions
36
37
Speedmachine Owners Manual
25
4 Nm4 4 Nm
• Tighten to 4 Nm using a 4 hex wrench.
WARNING: No friction paste should be applied on the steerer tube or on the bearings.
Bottom bracket and crankset assembly
Now that all the cables and brakes hoses are
installed, you can install the bottom bracket
and the crankset.
The Speedmachine uses a T47x68mm bottom
bracket.
We usually recommend to apply grease on
bottom bracket mounting threads and cotact
surfaces but some manufacturers of bottom
bracket sets may recoment thread locker.
WARNING: Please follow the bottom bracket
and crankset instruction for installation.
68mm
T47 thread
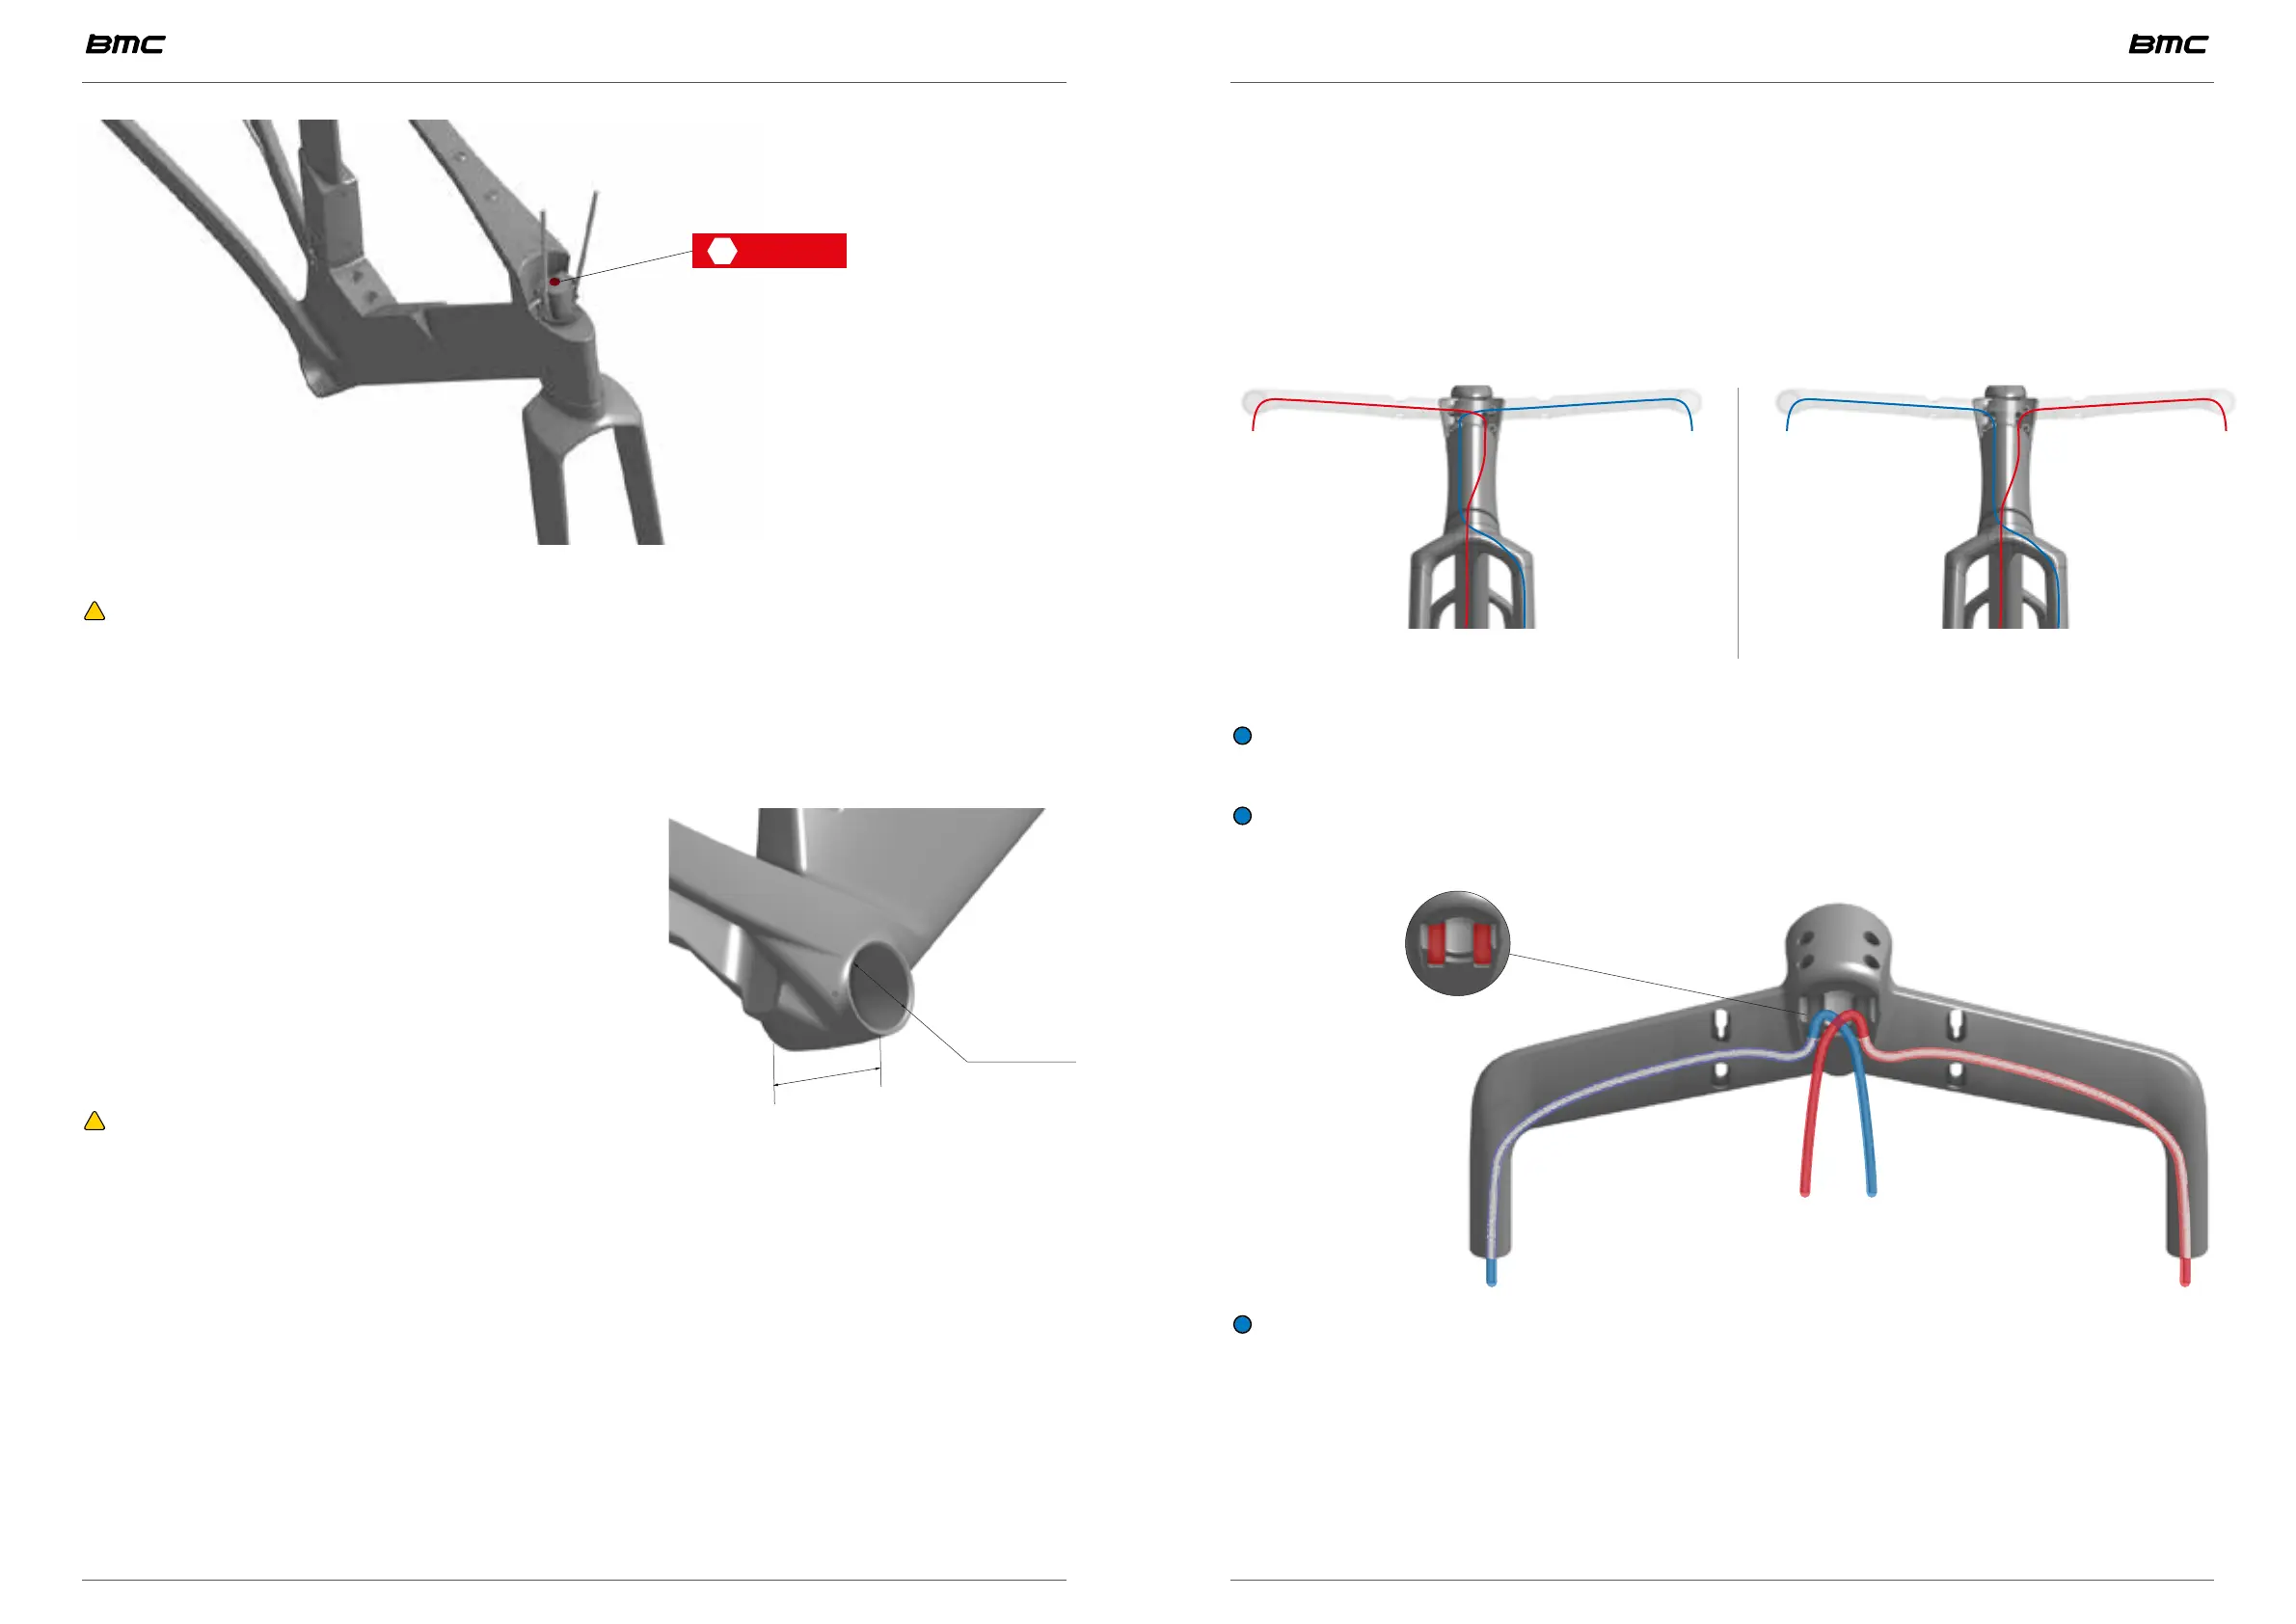
Base bar assembly
Prior to proceed to the base bar installation, you should define how your brakes should
be installed.
• Standard Style Brake-Assembly:
[Front brake] from [Left lever] & [Rear brake] from [Right lever]
• UK Style Brake-Assembly:
[Front brake] from [Right lever] & [Rear brake] from [Left lever]
Standard Style: cross brake hose UK Style: no hose crossing
• Route the brake hoses according to your preferred style.
INFORMATION: It’s easier to route the brakes hoses before installing the Armrest
and riser kit.
INFORMATION: The brakes hoses should be routed between the riser kit bolts. This
is where you will find the easiest path.
Hose ingress
INFORMATION: It shouldn’t be necessary but sometimes it helps to use a cable
routing guiding tool like the Park Tool IR-1.3 Internal Cable Routing Kit