8. To install the on-board monitor radio
EN/18
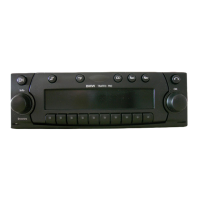
Remove the blue securing clip (40) from
branch A12, black 17-pin socket casing on
the on-board monitor wiring harness A, and
connect branch A13, 10-pin socket casing,
to the relevant point in branch A12.
If the car has a CD changer without a DSP
amplifier, the on-board monitor radio/CD changer
control cable must also be fitted.
Secure branch A13 with the blue securing
clip (40).
Connect branch A12, black 17-pin socket casing,
to the on-board monitor radio (14).
Connect branch A14, black angled coaxial
socket casing (aerial connection), to the on-
board monitor radio (14).
Connect branch A15, angled coaxial socket
casing, to the on-board monitor radio (14).
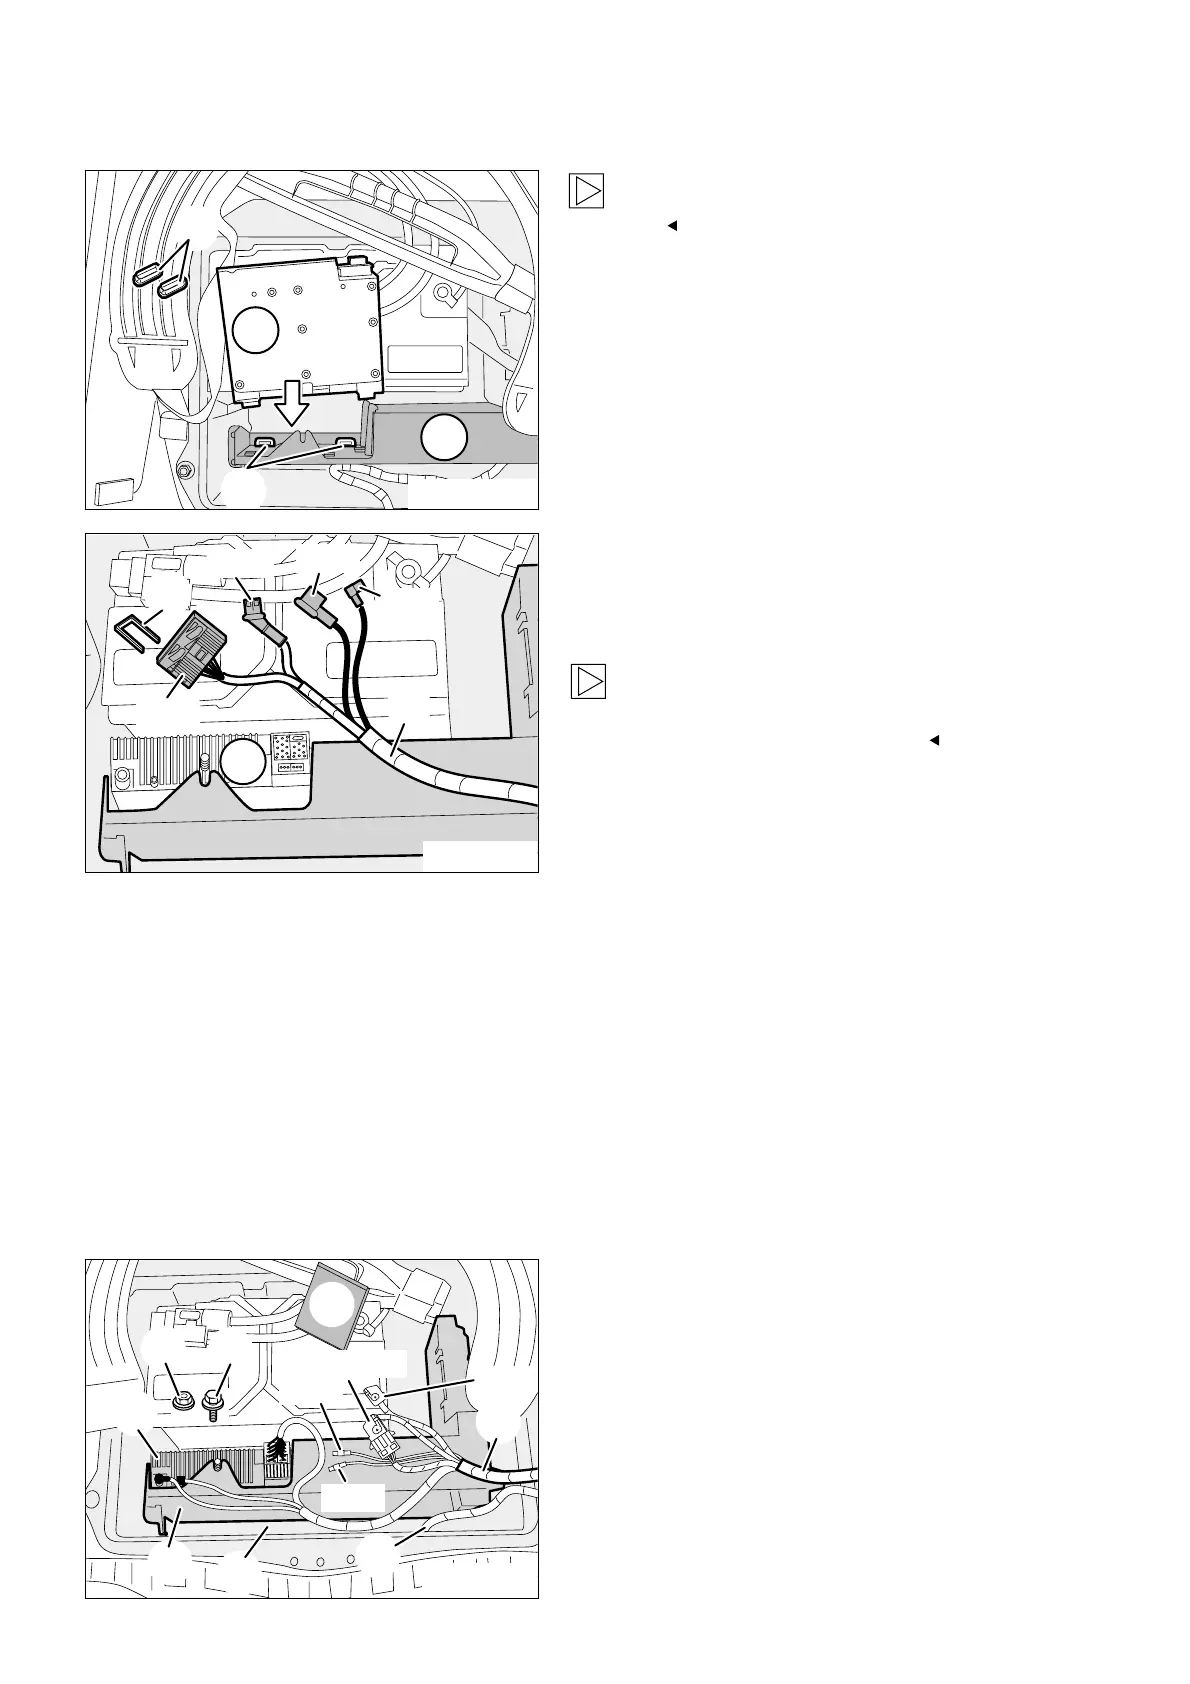
The figure shows the multi-functional tray in
the boot.
If the two rubber grommets (40) are not
fitted in the unit holder (41), the two rubber
grommets (24) supplied in the retrofit/
installation kit must be fitted.
Then insert the on-board monitor radio (14) into
the rubber grommets (40/24) as shown in the
figure.
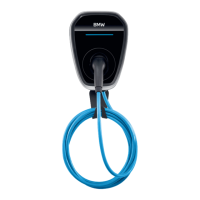
Secure the on-board monitor radio (14) to the unit
holder (40) using the hexagonal nut with washer
M5 (20) or hexagonal screw with washer M5x14
mm (21), depending on the design of the on-
board monitor radio (14).
Affix the rattle guard (17) to the on-board monitor
wiring harness A so that branches A19 and A20,
plug connection A17+A18 and the branch A16
are enclosed by it.
Tie back the enclosed connections and the plug
connection on the standard wiring harness (41) in
the multi-functional tray (42) (only to be
connected if you are also installing a video
module and the TV amplifier).
Retrofit/Installation kit No. 65 90 0 025 169 Issue date: 10.2001
Installation instructions No. 01 29 0 030 090