20
V - Electrical connections BT6002
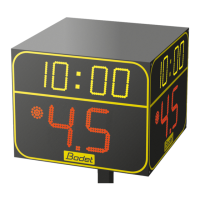
1/ Open the access door of each BT6002.
2/ Connect 240V power + Earth to the power supply terminal (A) by passing the cable through the hole
provided for this purpose and attach the cable to the housing to avoid any traction on the terminal
(this 240V power cable is not supllied by BODET).
3/ DIP switches have been set in factory. Check the position of the DIP switches for the 2 BT6002 (see
page 7).
A
A
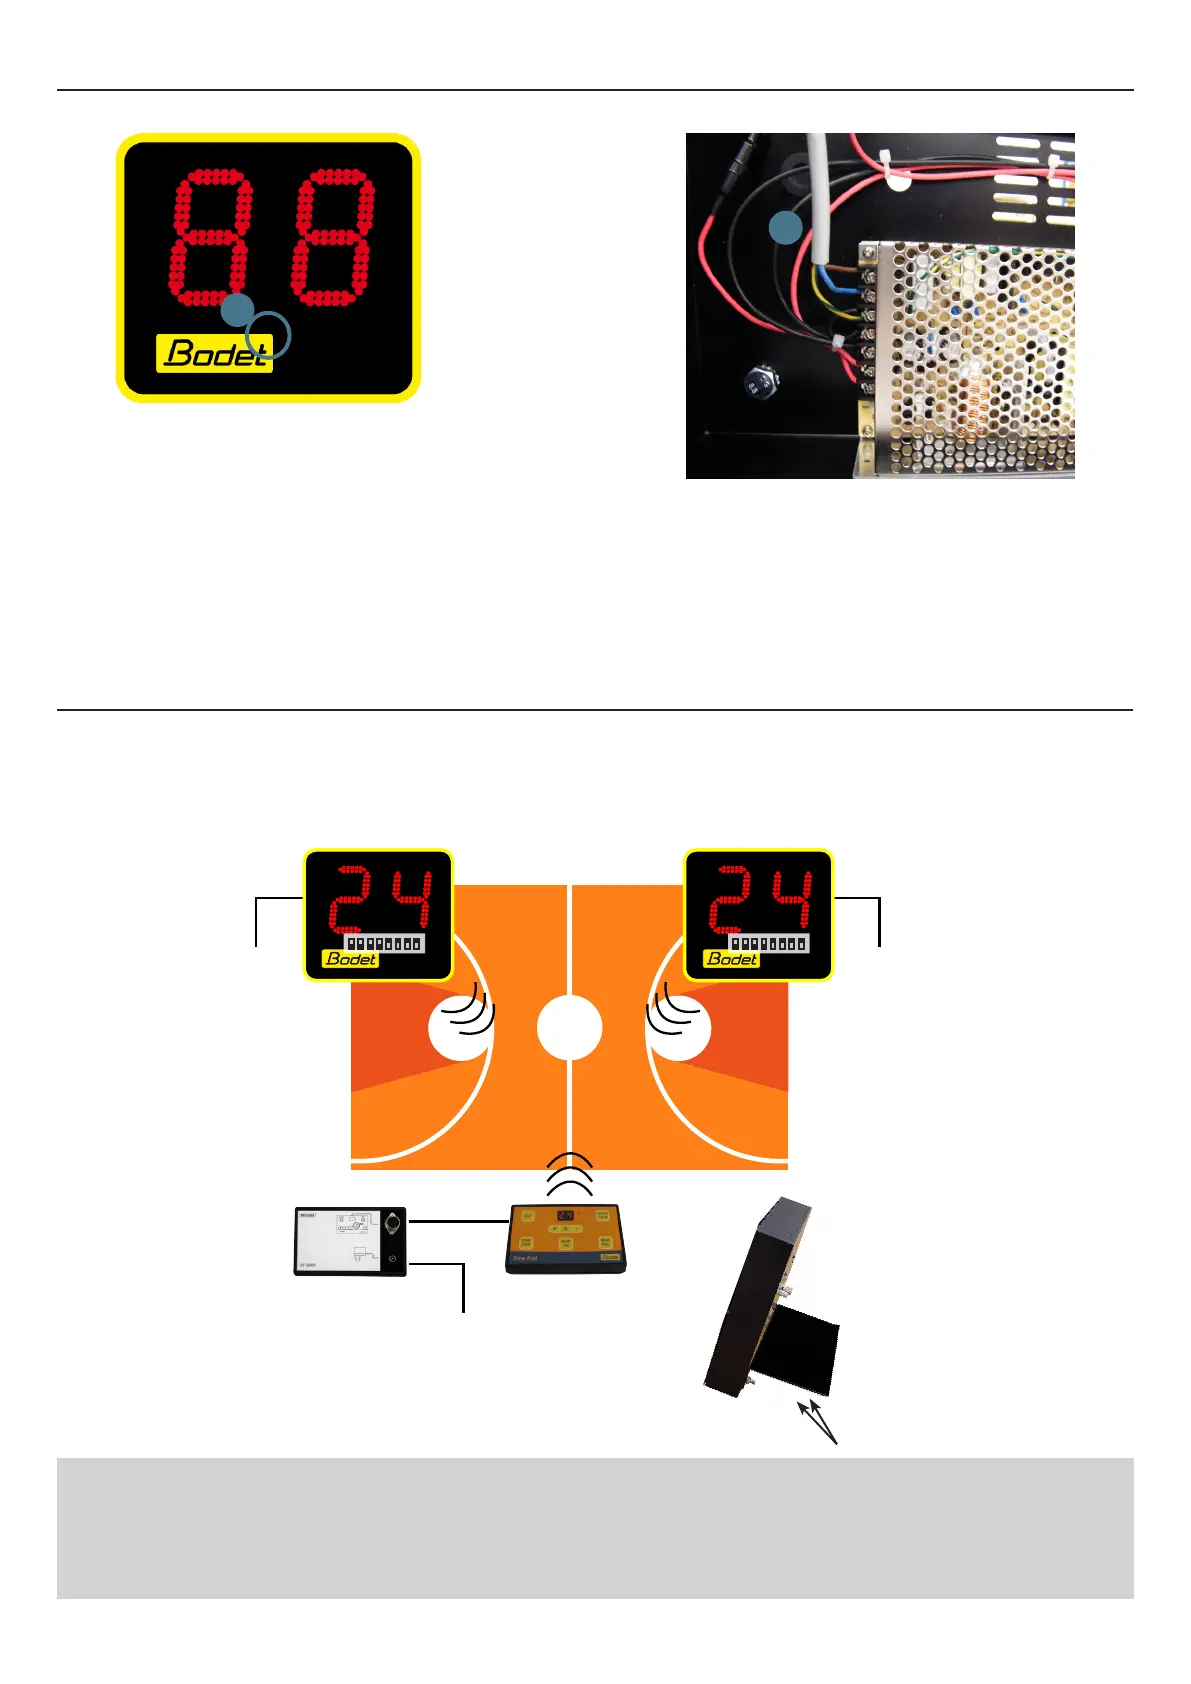
VI - Installation BT6002 HF (Autonomous wireless)
IMPORTANT: solution available only with the BT6000 version of the shot clock keyboard.
1/ Connect the shot clock keyboard to the DIN plug of the autonomous box.
2/ Connect the power to each BT6002 and to the autonome box.
The dip switches are set at the factory, check that they are set as follow.
1/ Open the access door of each panel.
2/ Dip switches 1 to 4 always OFF.
3/ Dip switches 5 to 8 always ON ↑.
240V
BT6002 HF autonomous
BT6002 HF autonomous
240V
240V
autonomous
box
Shot clock
keyboard
To use the panels standing on
the ground,mount the bracket
on the back of the panel