11
To avoid injury from accidental
starting, remove plug from
power source outlet before making any adjustments.
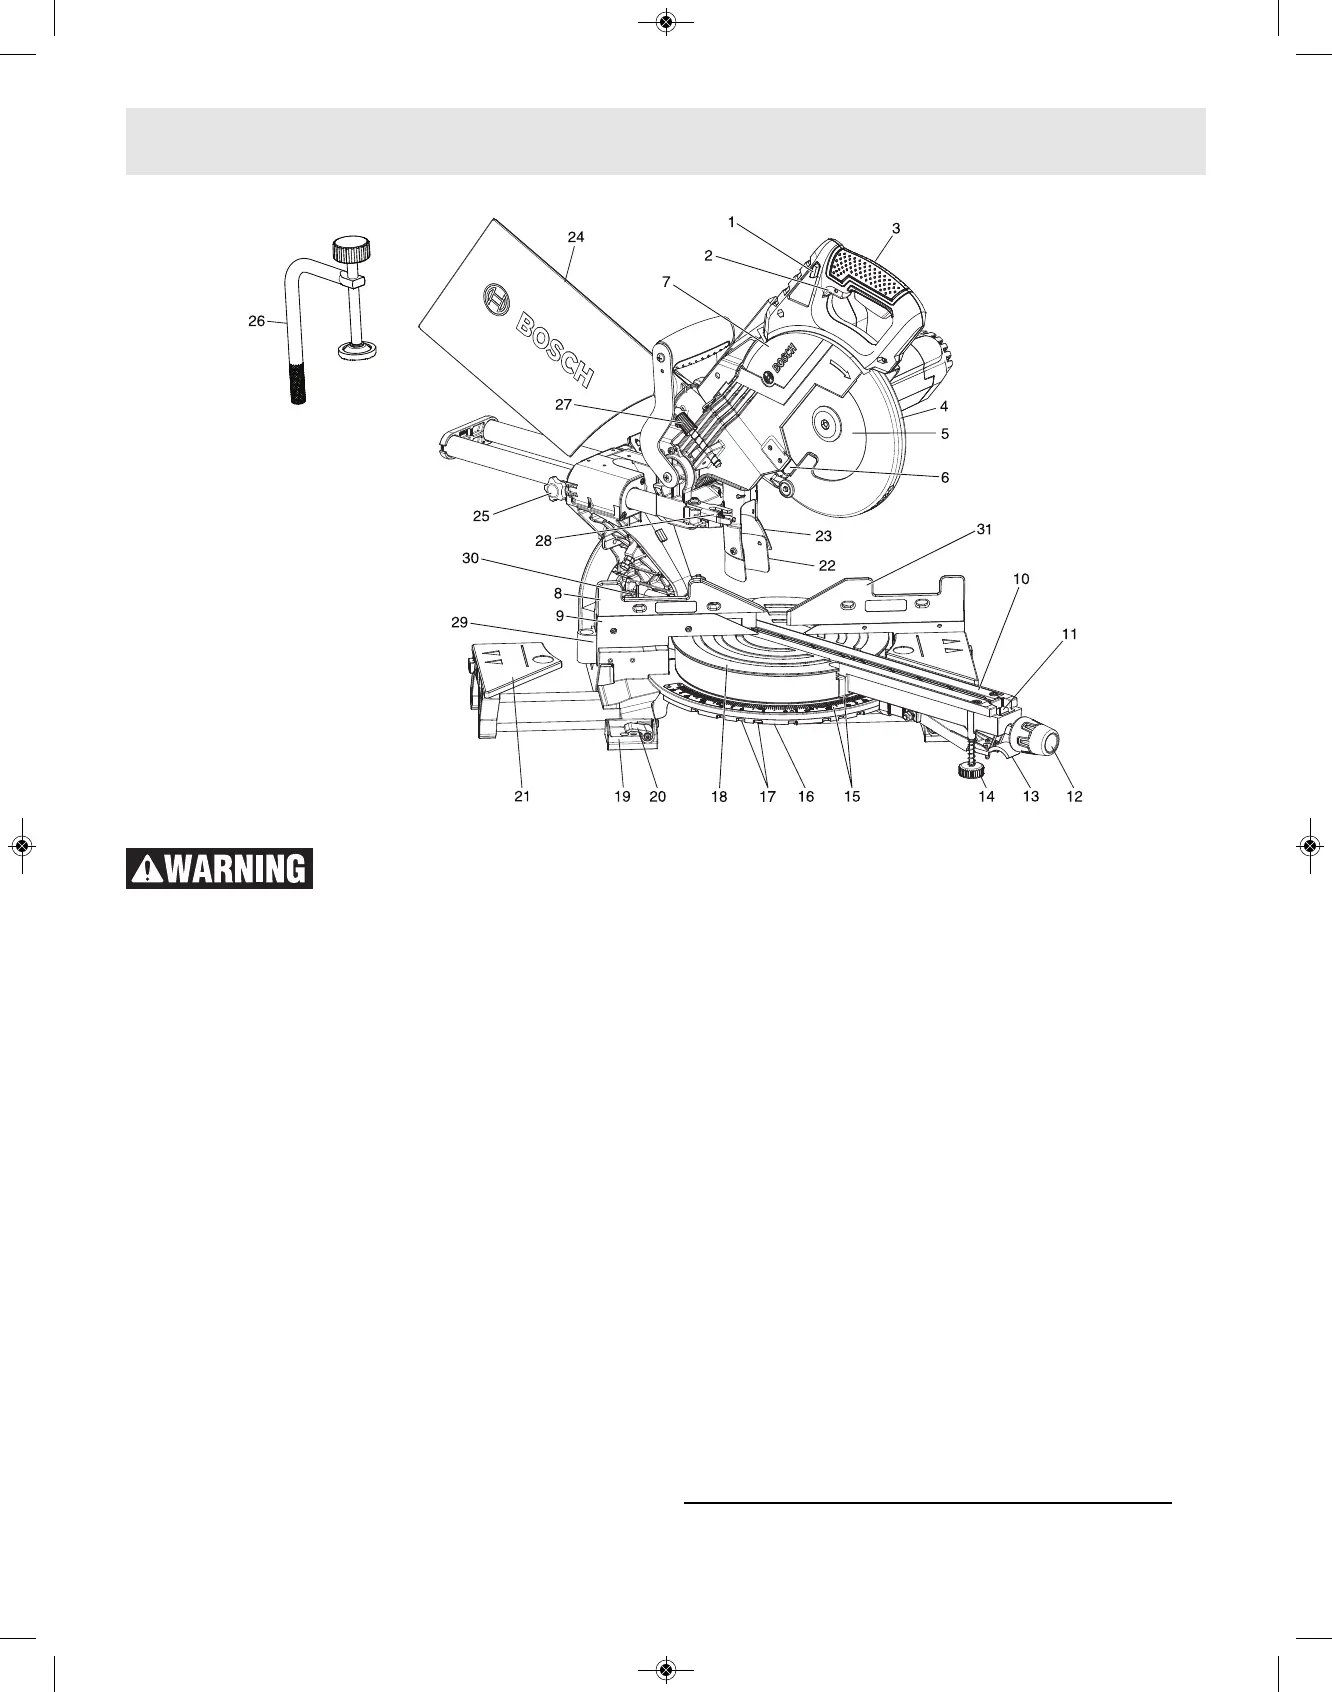
1. Switch Lock-OFF Release Buttons – One of these
two buttons must be pressed before the power
switch can be pressed.
2. Power Switch – The power switch used with the
switch “Lock-OFF” release button energizes the
unit.
3. Main Handle – This handle contains the power
switch. Pulling this handle down lowers the blade
into the workpiece.
4. Lower Blade Guard – The lower blade guard helps
protect your hands from the spinning blade. It
retracts as the blade is lowered.
5. Blade – Use only 8
1
⁄2" (216 mm) diameter blades
with
5
⁄8" (15.88 mm) diameter arbor holes.
6. Chip Deflector – Deflects cut-off workpieces from
entering the upper guard.
7. Upper Guard – Covers upper portion of the blade.
8. Left Sliding Fence – Supports the workpiece. The
fence also has holes to secure an auxiliary fence if
desired.
9. Stationary Fence – Stationary fence is bolted to
the base and will support the workpiece when the
sliding fence is removed.
10. Kerf Inserts – Kerf inserts can be adjusted to
different blade widths to minimize workpiece tear-
out.
11. Miter Detent Override – Allows detent action to
be locked out, allowing for micro-adjustments to
any miter angle.
12. Miter Lock Knob – The miter lock knob locks the
miter saw table at any desired miter angle.
13. Miter Detent Lever – The lever releases the table
from the detent.
14. Front Stabilizing Foot – Provides additional
support and stability when making slide cuts.
15. Miter Scale/Miter Pointer – The pointer rotates
with the table and blade. It points to the miter
scale to indicate the angle setting before a cut is
made.
16. Miter Detent Plate – The position of the plate can
be adjusted to set the accuracy of its detent
locations.
17. Miter Detents – There are ten (10) miter detent
slots for fast and accurate miter cuts of common
miter angles.
18. Table – Sits in base, provides workpiece support,
rotates for desired miter cuts and rotates the head
assembly. The front extended part of the table is
called the miter arm.
19. Tool Mounting Pads – The four corners of the saw
provide areas to clamp, bolt or nail the saw to a
flat work surface.
NOTE: To view items 20 through 30, see page 12.
Getting To Know Your Miter Saw