Product Information
5
Compress Hybrid 7000i AW – 6721833054 (2020/09)
2.5.1 Generic overview of the refrigerant circuit
Fig. 1 Functional principle of the refrigerant circuit in the heat pump
[1] Evaporator
[2] Compressor
[3] Condenser
[4] Expansion valve
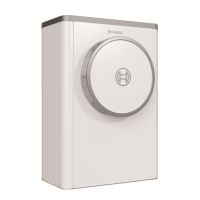
2.6 Indoor unit
The purpose of the indoor unit is to distribute the heat from the heat
pump outdoor unit to the heating system. The speed of the pump in the
indoor unit is controlled so that it automatically reduces when demand is
low. The energy consumption falls as a result.
If the heat energy demand is higher at low outside temperatures, an
external heat source may be required. External heat generators can be
connected or disconnected via the control unit in the indoor unit.
2.7 Hints on energy saving
• Use the normal heating mode, thus the heating system will use the
least energy. Set the desired room temperature according to your
personal comfort needs.
• Open the thermostatic vents fully in all rooms. Increase the
temperature setting on the control only when the desired room
temperature has not been reached for some time. Close the
thermostatic valve in a specific room, only if that room is warmer
then the others.
• If there is a room controller installed, this can be used to set the
optimal room temperature. Avoid influence of external heating
(i.e sunlight or wood stove). Otherwise unwanted fluctuations in
the room temperature may occur.
• Avoid placing big objects i.e a sofa in front of the radiators
(minimum 50 cm distance). This will block the circulation of the
heated air in the room.
• Do not set a too low temperature for cooling. Cooling will also
consume energy.
Vent the room correctly
Open the windows fully for a short period instead of leaving them ajar.
Leaving the windows ajar will let the heated air out of the room
constalntly without increasing the air quality. Close the thermostatic
valves or lower the heating setting on the room controller while the
room is vented.
2.8 Warranty conditions
▶ For the warranty conditions, please refer to the accompanying
certificate of guarantee.
▶ Fill out the certificate of guarantee together with the installer directly
after installation.
▶ Send this to the address specified on the certificate of guarantee.
This makes the process easier when making any claims under the
manufacturer's warranty and/or calling on our customer service.
+27 °C
75 %
+35 °C+2 °C –2 °C
0 °C 88 °C
–4,5 °C 50 °C
25 %
100 %
1
2
4
3

 Loading...