1 689 989 091 2014-05-14| Robert Bosch GmbH
30 | DCU 130 | Maintenanceen
7. Maintenance
7.1 Cleaning
7.1.1 DCU 130
Only use a soft cloth and neutral detergents to clean
the housing and display of the DCU 130. Do not use
abrasive cleaning agents and coarse workshop cloths.
7.1.2 Data disks
Clean the CD-ROM or DVD-ROM with a disk cleaning
kit or carefully wipe over the silver side of the disk with
asoft, lint-free cotton cloth. Never use paper towels,
asthese could cause scratches.
7.1.3 DVD drive
Clean the DVD drive at regular intervals with a cleaning
disk for the CD-ROM or DVD drive. The appropriate
cleaning disks are available from most computer or en-
tertainment electronics shops.
7.2 Battery replacement
WARNING - Risk of explosion when char-
ging batteries!
Improper charging of the batteries leads to a
risk of explosion which may cause burns and
injuries.
¶ Use only the batteries specified for the
DCU 130.
¶ Use only the battery charging station spe-
cified for the DCU 130.
¶ Use only the power supply unit specified
for the DCU 130.
¶ Heed the notes on disposal.
¶ Batteries are not to be heated, burnt,
short-circuited, mechanically damaged or
charged with excessively high currents or
reverse polarity.
¶ Suitable extinguishing agents: Water, CO
2
,
sand.
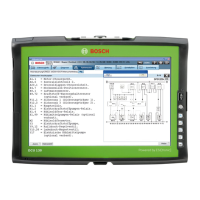
1. Press the button on the back of the DCU 130.
2. Take out the battery.
3. Insert a new battery and press home until heard to
engage.
i It is possible to change one battery during operation.
The power supply unit must be connected if both
batteries are to be replaced.
i The battery charge indicator can be called up using
the
Test Power
button on the battery.
"The battery charge indicator lights for a few seconds
and shows the current battery charge on a scale of
0to 100.
i A red indicator means the battery charge is low.
A green indicator shows that the battery is fully
charged. When the device is in operation, the battery
charge can be established by way of the "Battery
Information and Diagnosis Tool" provided.
7.3 Recovery-Process
! All data and applications Software on your hard disk
will be deleted during the Recovery process!
1. Plug power supply to DCU 130!
2. Switch on DCU 130.
3. Connect the external DVD Disk Drive to the DCU 130
using USB cable (0,7 m).
4. Insert recovery DVD.
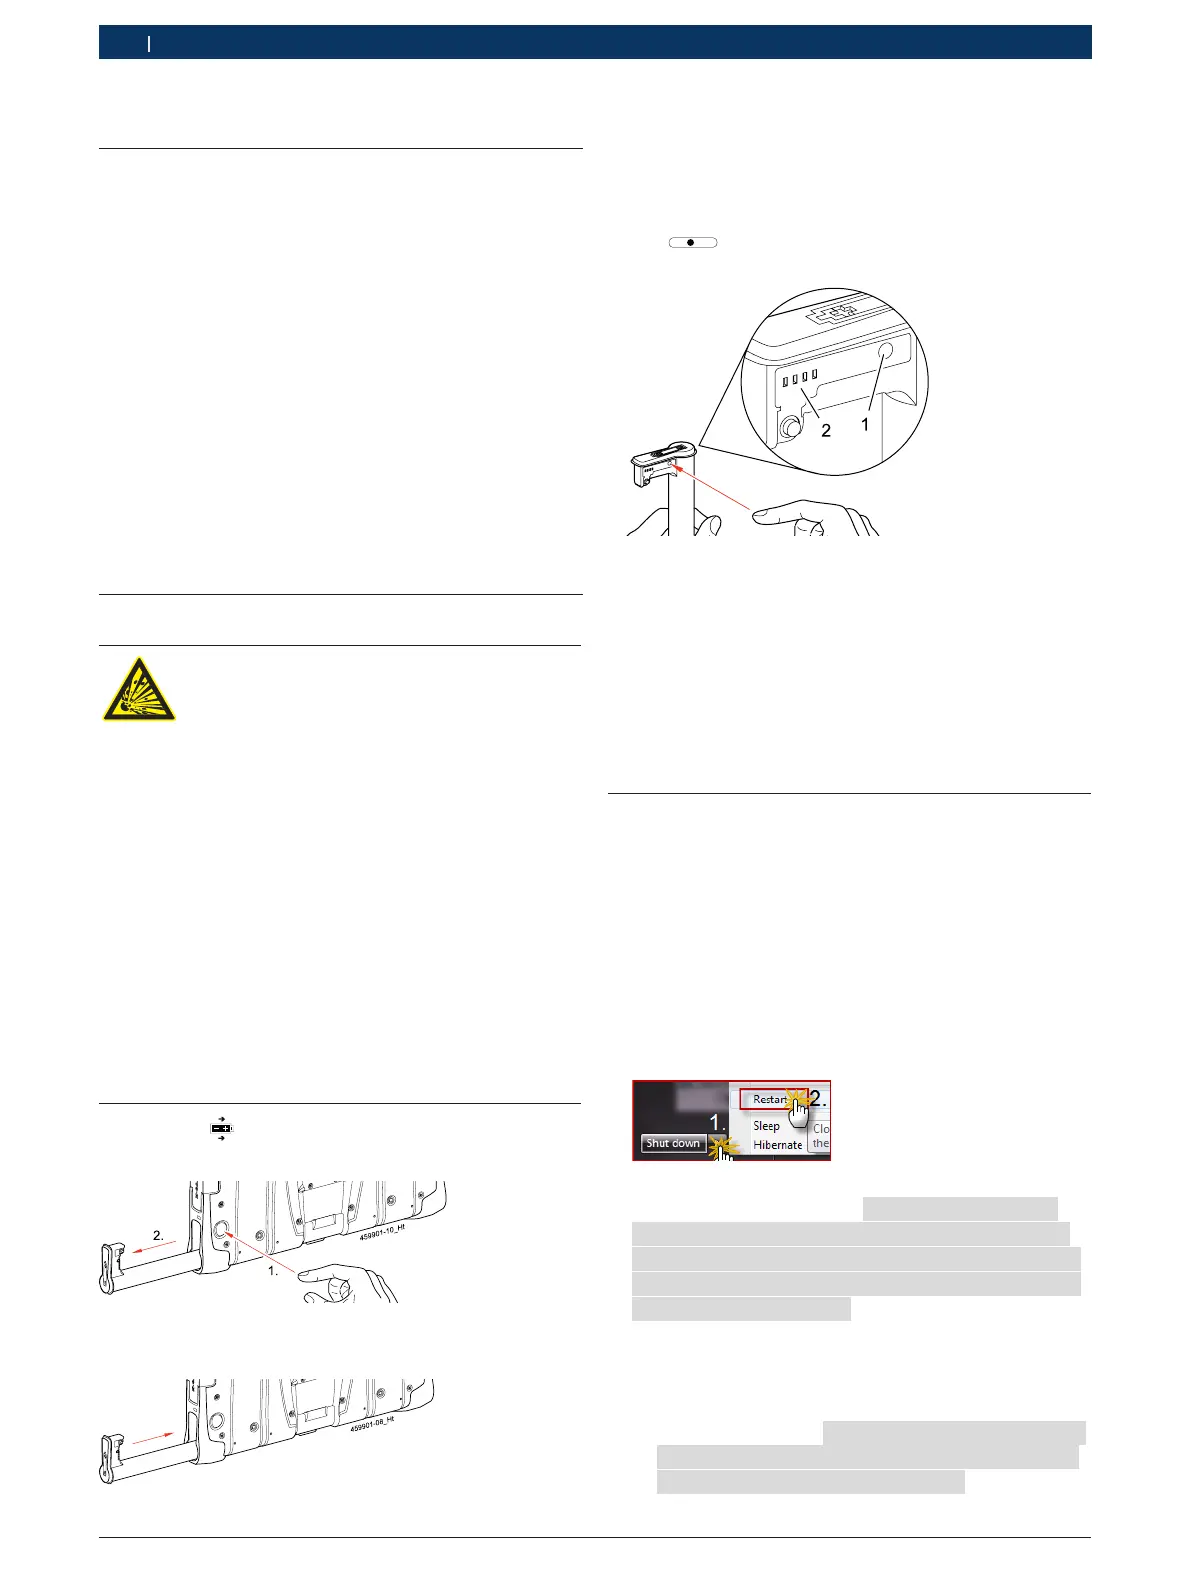
5. Restart Windows “START >> Restart“.
Windows is restarting .
6. Confirm dialogue window”Would you really
want to recover your System? WARNING!
ALL DATA ON HARD DISK DRIVE C: WILL BE
LOST. Please be patient while recovery
process is running.“ with <Yes>.
DCU 130 Recovery process is running - duration
ca. 25 Minutes.
After the recovery has finished the system re-
boots.
The dialog window ”Please remove the reco-
very media from the device and click
"OK" to reboot the computer" appears.
7. Remove recovery DVD from DVD drive.
 Loading...