DSA E-Series (E2700) Installing the drive trays for the E2700 controller-drive tray configurations | en 35
Bosch Sicherheitssysteme GmbH Installation manual 2015.10 | V2 | DOC
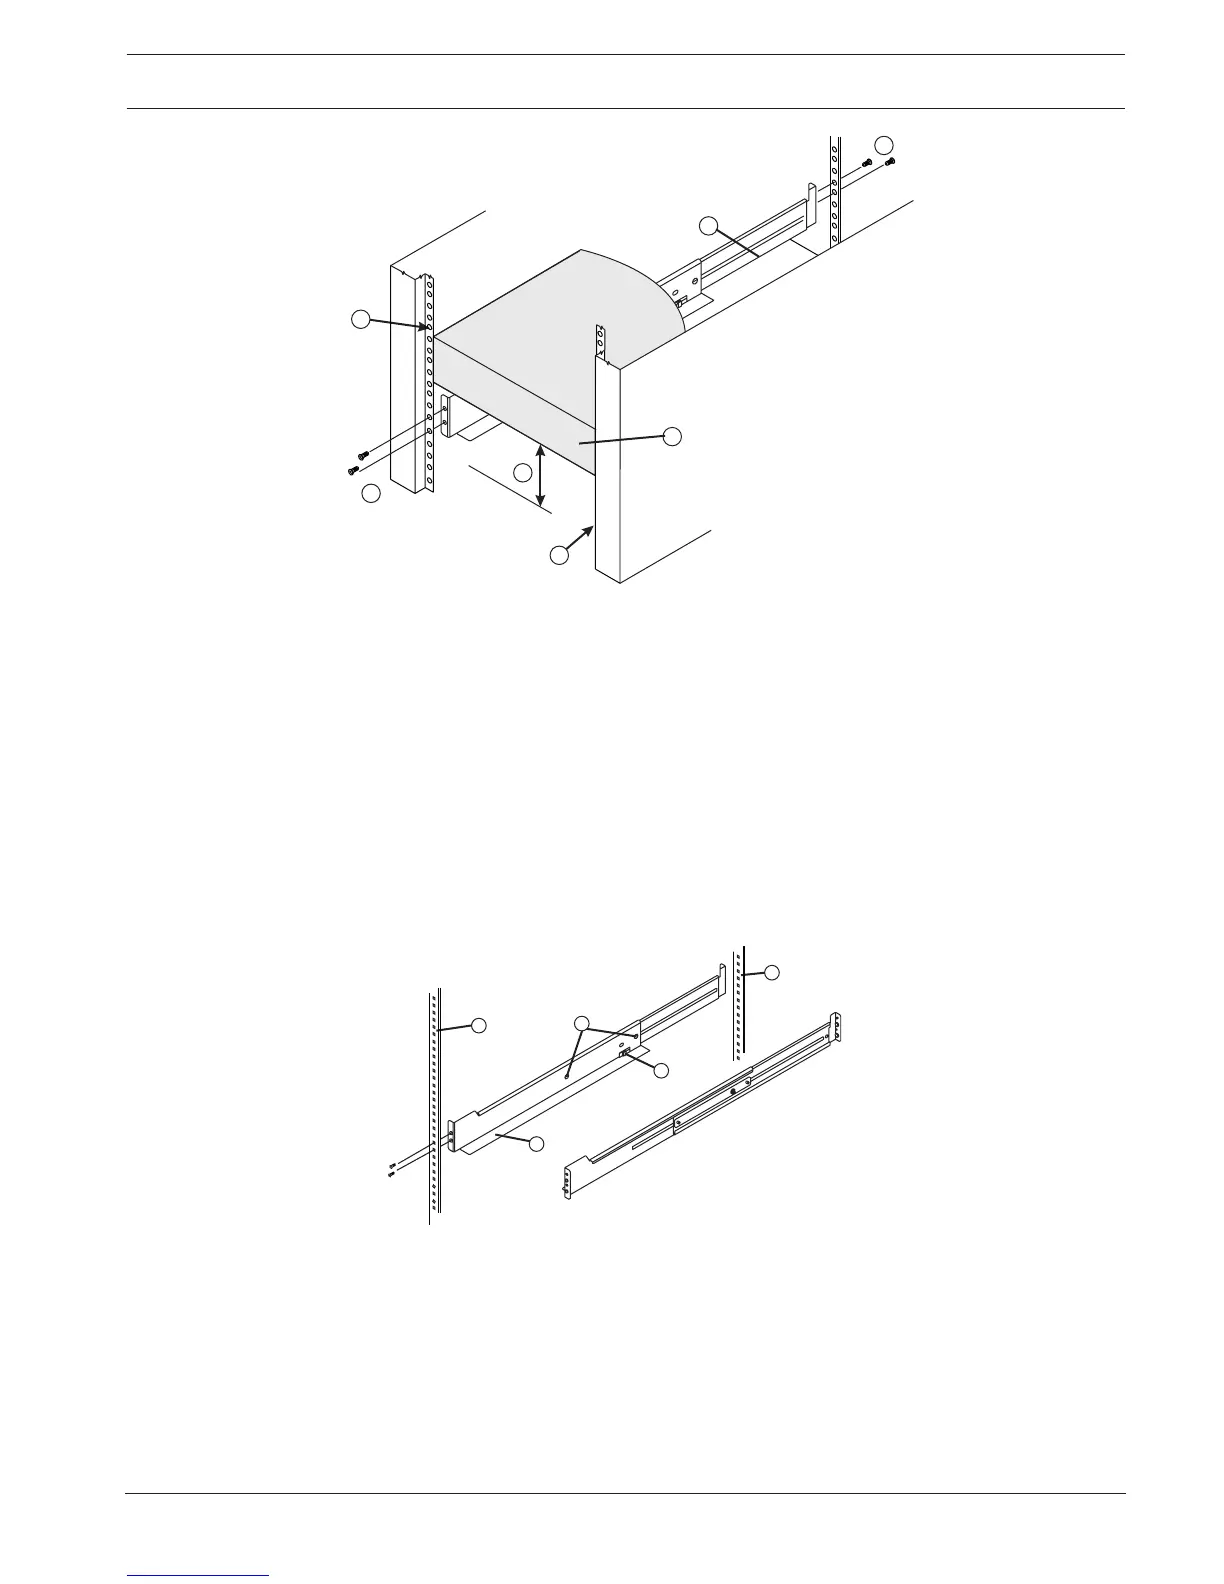
1 - Mounting rail
2 - Existing tray
3 - Clearance above and below the existing tray
4 - Screws for securing the mounting rail to the cabinet (front and rear)
5 - Industry standard cabinet
Note: Risk of equipment malfunction - To avoid exceeding the functional and
environmental limits, install only drives that have been provided or approved by the
original manufacturer. Not all controller-drive trays or drive trays are shipped with pre-
populated drives. System integrators, resellers, system administrators, or users of the
controller-drive tray or drive tray can install the drives.
5. Attach the mounting rails to the cabinet.
– Make sure that the adjustment screws on the mounting rail are loose so that the
mounting rail can extend or contract as needed.
1 - Cabinet mounting holes
2 - Adjustment screws for locking the mounting rail length
3 - Mounting rails
4 - Clip for securing the rear of the controller-drive tray
– Place the mounting rail inside the cabinet, and extend the mounting rail until the
flanges on the mounting rail touch the inside of the cabinet.
– Make sure that the alignment spacers on the front flange of the mounting rail fit into
the mounting holes in the cabinet.