14 | Mounting
MC 4006 720 819 669 (2016/05)
2.4 Setting the coding card
Fig. 3 Coding card with module status display, and a status display of
the connected heat sources or modules
2.5 Scope of delivery
Fig. 5, page 86:
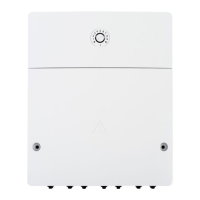
[1] Module
[2] Bag with strain relief
[3] Installation instructions
2.6 Specifications
The design and operation of this product comply with
European Directives and the supplementary national
requirements. Its conformity is demonstrated by the CE
marking. You can ask for a copy of the declaration of conformity for this
product. For this purpose see the contact address on the back cover of
these instructions.
2.7 Additional accessories
For precise information regarding suitable accessories, contact the local
manufacturer's representative.
• User interface: weather-compensated controller with outdoor
temperature sensor or room temperature-dependent controller;
connect to BUS (do not connect to BUS1, BUS2, BUS3 or BUS4);
connect outdoor temperature sensor to T1
• Flow temperature sensor; connect to T0
• Outdoor temperature sensor; connect to T1
• Return temperature sensor; connect to T2
• Cascade pump; connect to PC0
• Heating pump; connect to PC1
• Switch for maximum performance; connect to I2
• Stop switch; connect to I3
• IGM for heat source without EMS, EMS 2 or EMS plus; connect in
accordance with the technical documentation for the IGM
(the MC 400 cascade module replaces the ICM). Not used in all
countries.
Installation of additional accessories
▶ Install the additional accessories in accordance with legal
requirements and the instructions supplied.
2.8 Cleaning
▶ If required, wipe the enclosure with a damp cloth. Never use
aggressive or acidic cleaning agents for this.
3 Mounting
3.1 Installation
▶ Install the module on a wall, (Æ fig. 7 to fig. 9, starting at page 86),
on a mounting rail (Æ fig. 10, page 86) or in an assembly.
▶ When removing the module from the mounting rail, refer to fig. 11 on
page 87.
Coding Module function
0 Off (delivered condition)
1 Serial standard cascade
2 Serial optimised cascade (Æ fig. 24, page 89)
3 Serial cascade with peak load coverage
4 Parallel cascade
5 No function
6 External 0-10 V performance control with serial standard cascade
(no internal temperature control)
7 External 0-10 V performance control with serial optimised cascade
(Æ fig. 25, page 90, no internal temperature control)
8 External 0-10 V flow temperature control with serial standard
cascade
9 External 0-10 V flow temperature control with serial optimised
cascade
10 The module is one of a maximum of 4 subordinate cascade
modules. The higher level cascade modules control the connected
heat source corresponding to the code noted on them (Æ fig. 26,
page 90).
Table 2 Coding and function
Specifications
Dimensions (W × H × D) 246 × 184 × 61 mm (further
dimensions Æ fig. 6, page 86)
Maximum conductor cross-section
• 230 V terminal
• Extra-low voltage terminal
• 2.5 mm
2
• 1.5 mm
2
Rated voltages
• BUS
• Module mains voltage
• User interface
• Pumps and mixers
•
15 V DC (reverse-polarity-protected)
• 230 V AC, 50 Hz
•
15 V DC (reverse-polarity-protected)
• 230 V AC, 50 Hz
Fuse 230 V, 5 AT
BUS interface EMS 2 /EMS plus
Power consumption on – standby < 1,0 W
Maximum power output 1100 W
Table 3
6 720 810 538-23.1O
Maximum power output per
connection
• PC0, PC1
• A0, IA1
• 400 W (high-efficiency pumps
permitted; max. 40 A/Ps)
• 10 W
Capturing range for the flow and
return temperature sensor
• Lower fault limit
• Display range
• Upper fault limit
• < – 10 °C
• 0 ... 100 °C
• > 125 °C
Capturing range, outdoor
temperature sensor
• Lower fault limit
• Display range
• Upper fault limit
• < – 35 °C
• – 30 ... 50 °C
• > 125 °C
Permitted ambient temp. 0 ... 60 °C
IP rating IP44
Protection class I
ID no. Data plate (Æ Fig. 23, page 89)
DANGER: Risk of electric shock!
▶ Before installing this product: completely disconnect
heat appliances and all other BUS nodes from the
mains voltage.
▶ Before commissioning: fit the cover (Æ fig. 22,
page 89).
Specifications
Table 3
 Loading...