15
Creating user rhythm patterns based on
preset rhythm patterns
With Ver. 2, you can now select preset rhythm patterns
included with the BR-1180/BR-1180CD and edit them to
create USER/SONG rhythm patterns.
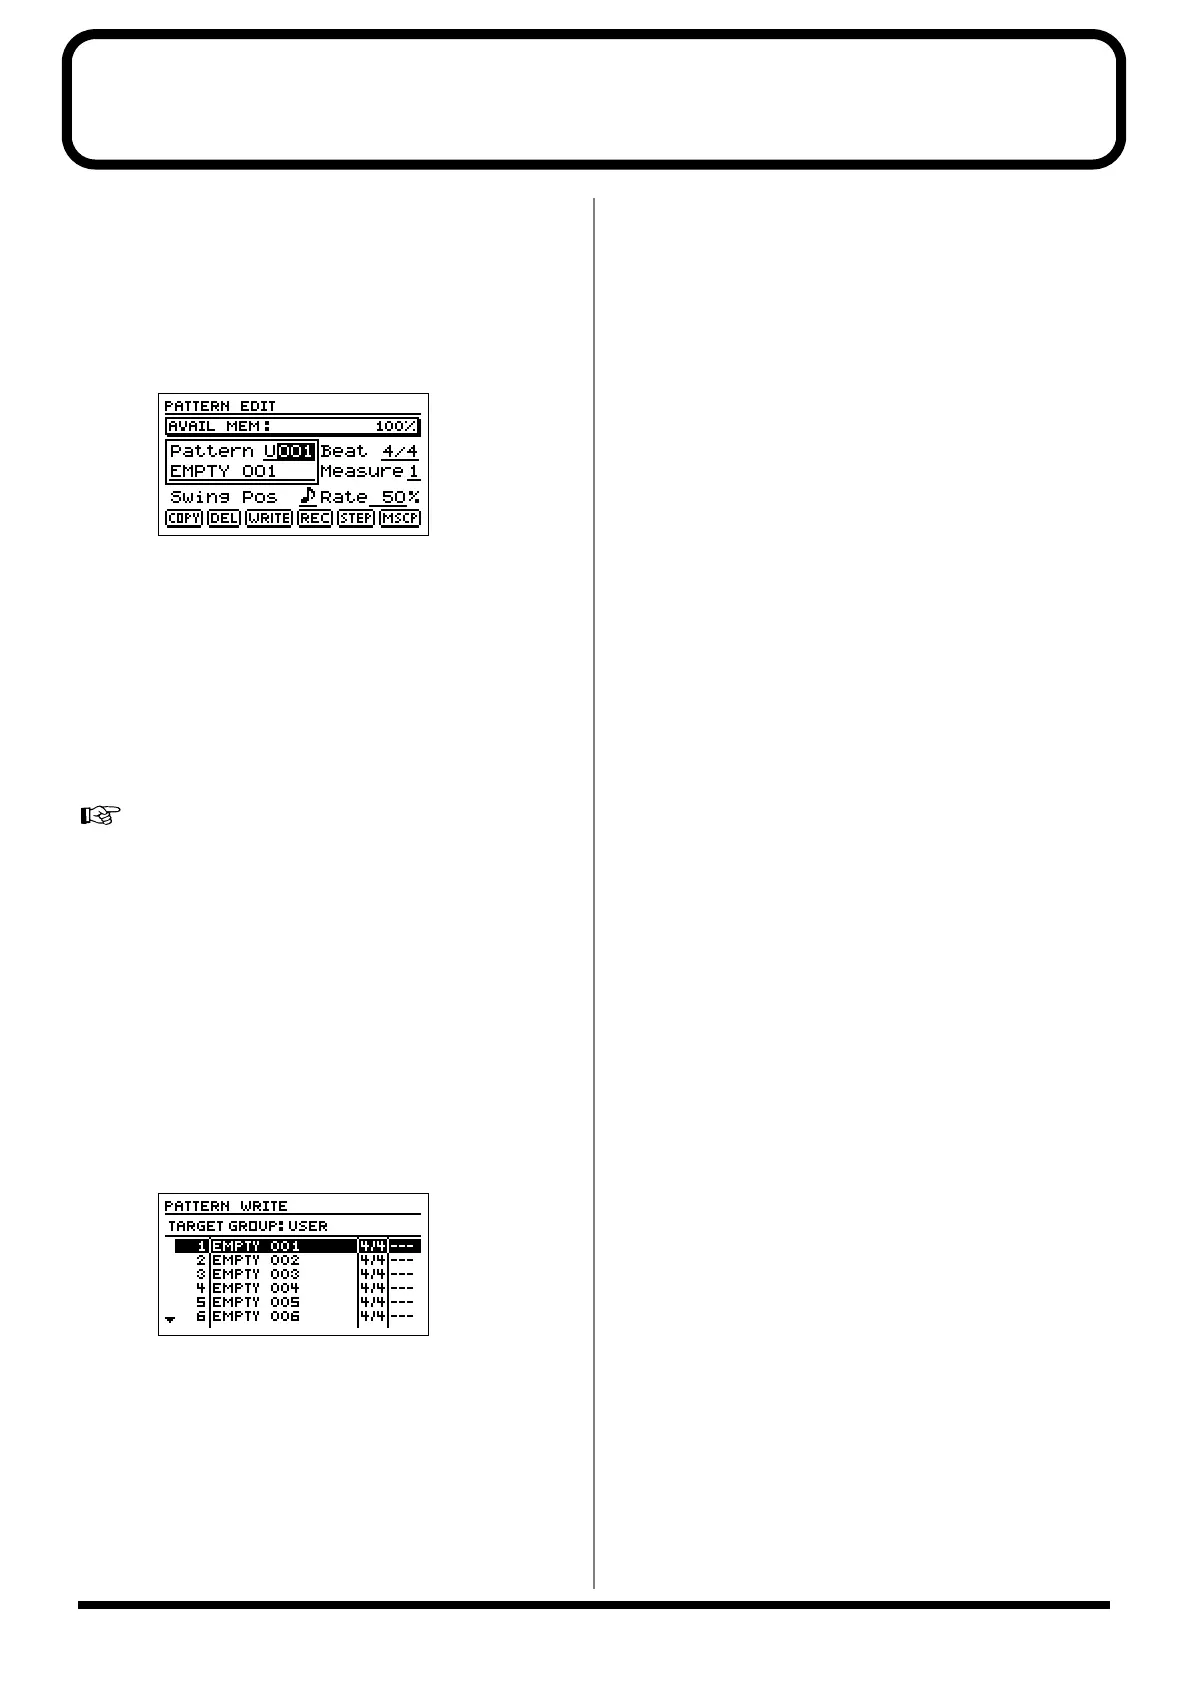
1. Press the RHYTHM [EDIT] button, press [CURSOR] to
move the cursor to “PTN,” then press [ENTER].
This brings up the Rhythm Pattern screen.
fig.20
2. Use [CURSOR] to move the cursor to Pattern, then
select “P001”–”P296” with the TIME/VALUE dial.
You can press [PLAY] at this time to hear the selected
preset rhythm pattern. Press [STOP] to stop the
performance.
3. You can record the selected preset rhythm pattern using
Realtime Recording, and use Step Recording and the
Microscope function to add changes.
For instructions on how to use Realtime Recording, Step
Recording, and Microscope, refer to “Creating rhythm
patterns” on p. 86 in the Owner’s Manual.
* In this case, the process does not directly change the preset
rhythm pattern data. The preset rhythm pattern data is copied
to temporary memory, and then any changes are made in that
copied data. Therefore, no matter how much you record and
edit with this data, no changes are made to the original preset
rhythm pattern data.
4. Press [EXIT] to return to the Rhythm Pattern screen,
press [CURSOR] to move the cursor to “WRITE,” then
press [ENTER].
fig.21
5. Use [CURSOR] to move the cursor to the USER or
SONG pattern to which you want to write the edited
pattern.
6. Press [ENTER].
“Complete!” appears, indicating that the edited results
have been written to the USER or SONG pattern.
* “TMP” appears for the rhythm pattern immediately after its
data is recorded or edited. If you try to select a different
rhythm pattern with the TIME/VALUE dial while the cursor
is positioned above this, the cursor turns white. If you press
[ENTER] at this point, the cursor reverts to black, and the
rhythm pattern number is confirmed. If you do not want to
confirm it, press [EXIT]; “TMP” is indicated again, and the
rhythm pattern reverts to the state it was in immediately after
editing. This allows you to avoid inadvertently erasing data
you have edited.