7
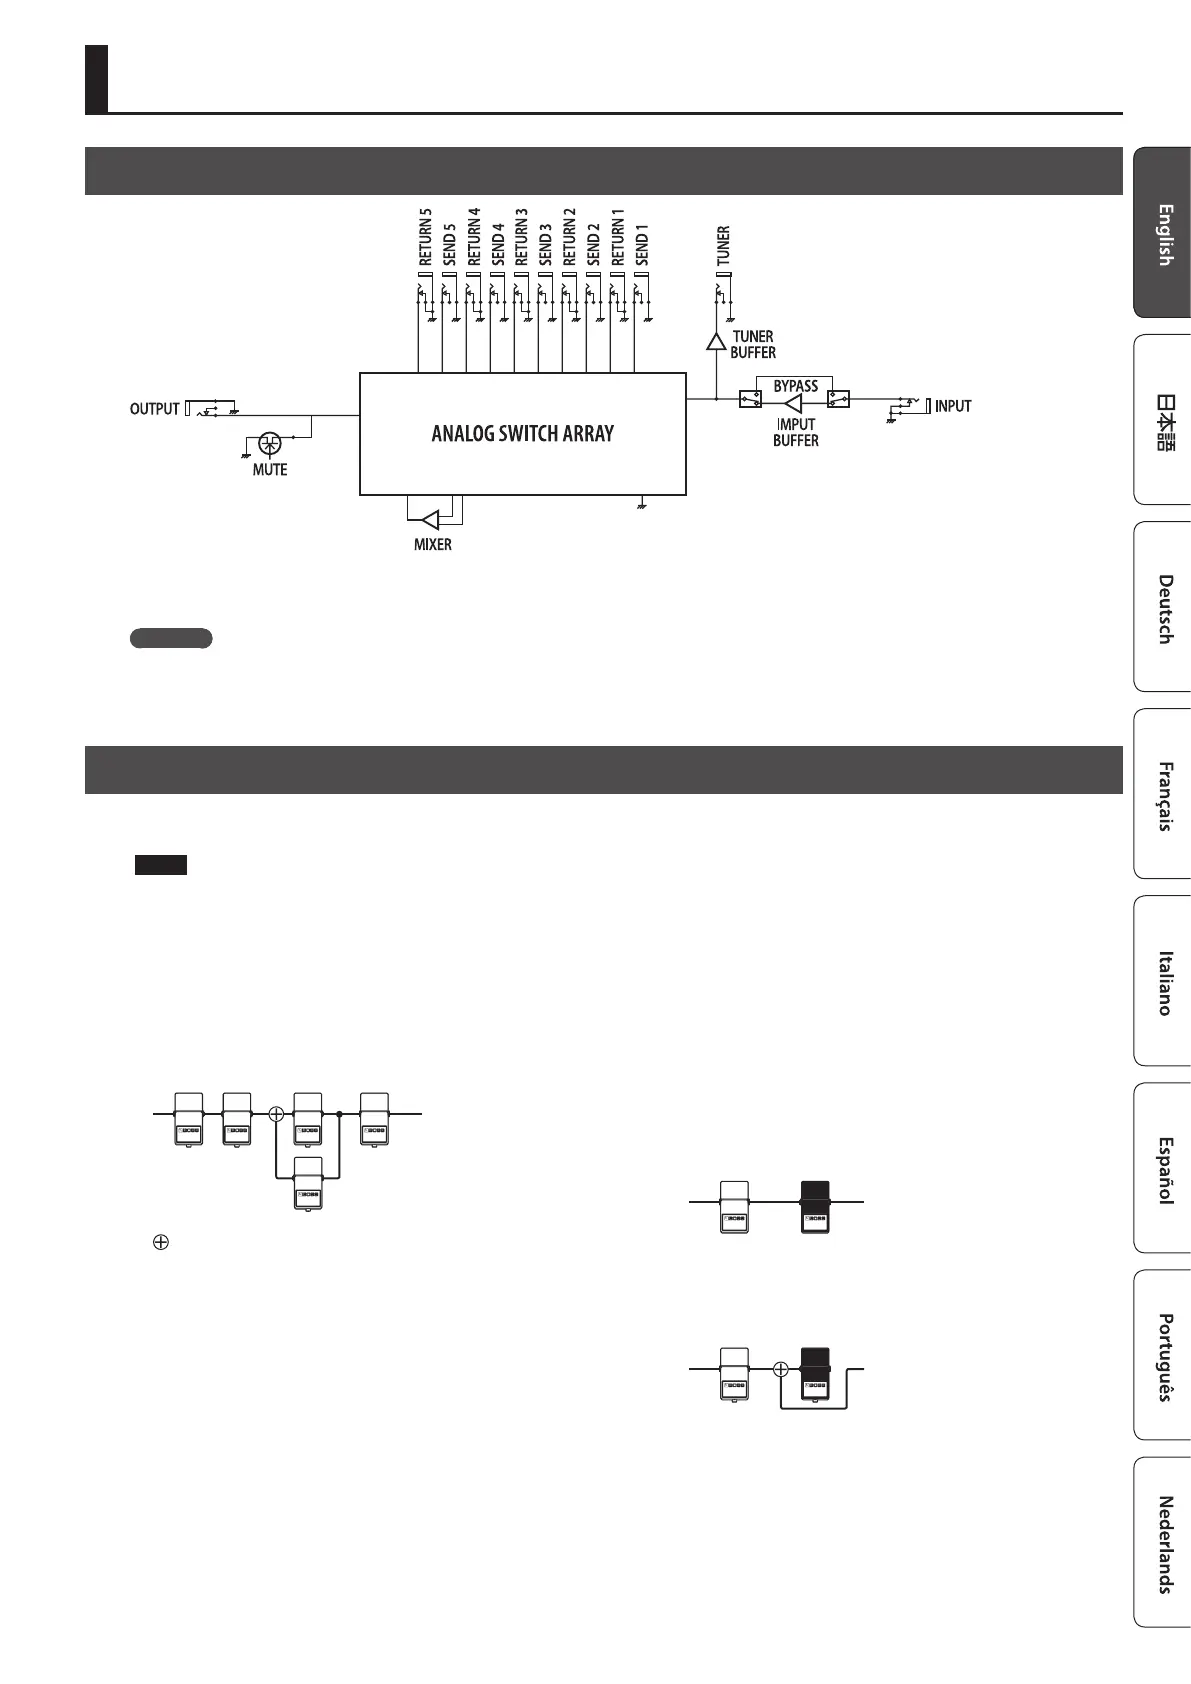
Block Diagram
The ES-5 uses an “analog switch array” that lets you freely change the connection order of your eect units.
It also contains an internal mixer, and lets you create a wide range of sounds by connecting eect units in parallel or using the “Carryover” function.
Carryover
This function cuts only the input while leaving the output connected when you change patches. For example, you can use this to allow just the
delay sound to remain when switching patches.
Tips for Creating Patches (Sounds)
Using the internal mixer is important in order to take advantage of the ES-5’s unique features, such as the ability to connect loops in parallel and use
the Carryover function. Understanding how to use the mixer will make it even more enjoyable to create patches (sounds).
NOTE
5 The same mixer is used for parallel connections and for Carryover. This means that depending on the settings, you might not be able to use a
parallel connection, or that Carryover might not work.
5 If you connect a loop in parallel or if you use the Carryover function, the mixer is congured appropriately for the parallel connections or Carryover
settings.
If you turn on the mixer without specifying parallel connections or Carryover, the mixer is congured immediately before the output.
Parallel connection
: Mixer
Using the Carryover function
This lets you preserve the sound (e.g., delay sound) when you switch
patches.
5 Before the patch change
Delay
5 After the patch change
The send to the delay loop is cut, and only the return is mixed
with the direct sound.
’
Direct sound
Delay
’
Delay sound
* To use the Carryover function, enable Carryover for the patch that
follows the patch change.
* Carryover might not work if the Loop Structure (p. 9) settings
dier before and after the patch change.
Creating a Patch